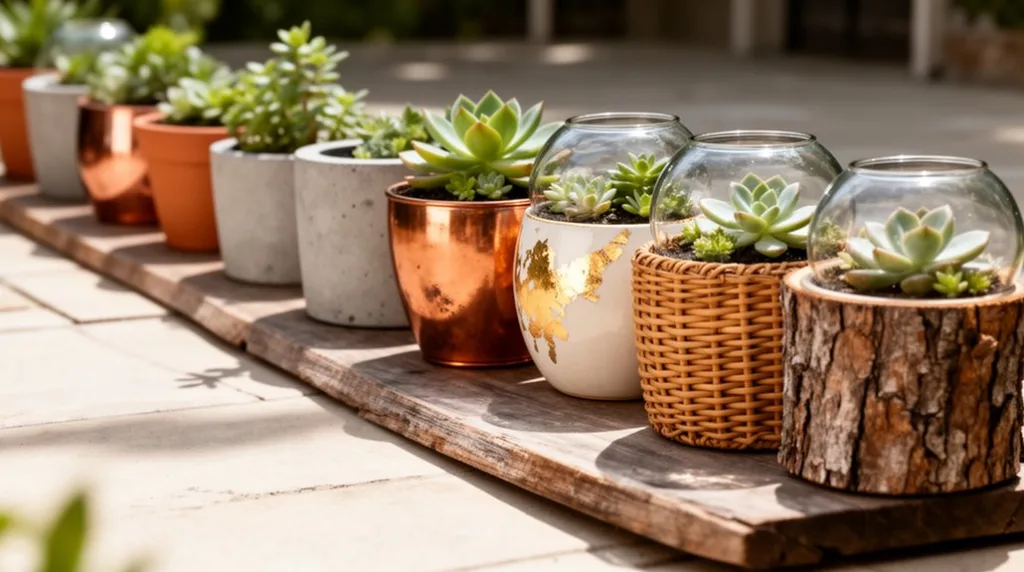
You can transform budget containers into luxury-looking features using strategic design tricks. Layer contrasting paints for authentic weathered finishes, incorporate bold architectural plants for instant impact, and add textured wraps—plaster, moss, rope, or burlap—for dimensional sophistication. Upcycle barrels, wine crates, and recycled tires into elevated planters with proper drainage and ergonomic heights. Mix materials strategically, use metallic spray finishes, and master chalk-paint techniques to achieve high-end aesthetics affordably. The most genius approaches combine multiple strategies to create garden features that rival expensive alternatives.
Key Takeaways
- Transform upcycled barrels, wine crates, and recycled tires into designer planters using paint, stain, and strategic styling techniques.
- Layer contrasting paints and apply faux-concrete textures with joint compound and dry-brushing for authentic, upscale weathered finishes.
- Create budget-friendly potting mix using equal parts perlite, coconut coir, and compost instead of expensive commercial soil.
- Use metallic spray finishes, chalk paint with wax, and acrylic stencil designs to achieve high-end aesthetic appeal affordably.
- Pair textured wraps like burlap, moss, and rope with bold architectural plants for instant visual sophistication and impact.
The Three Design Tricks That Make Cheap Pots Look Luxury
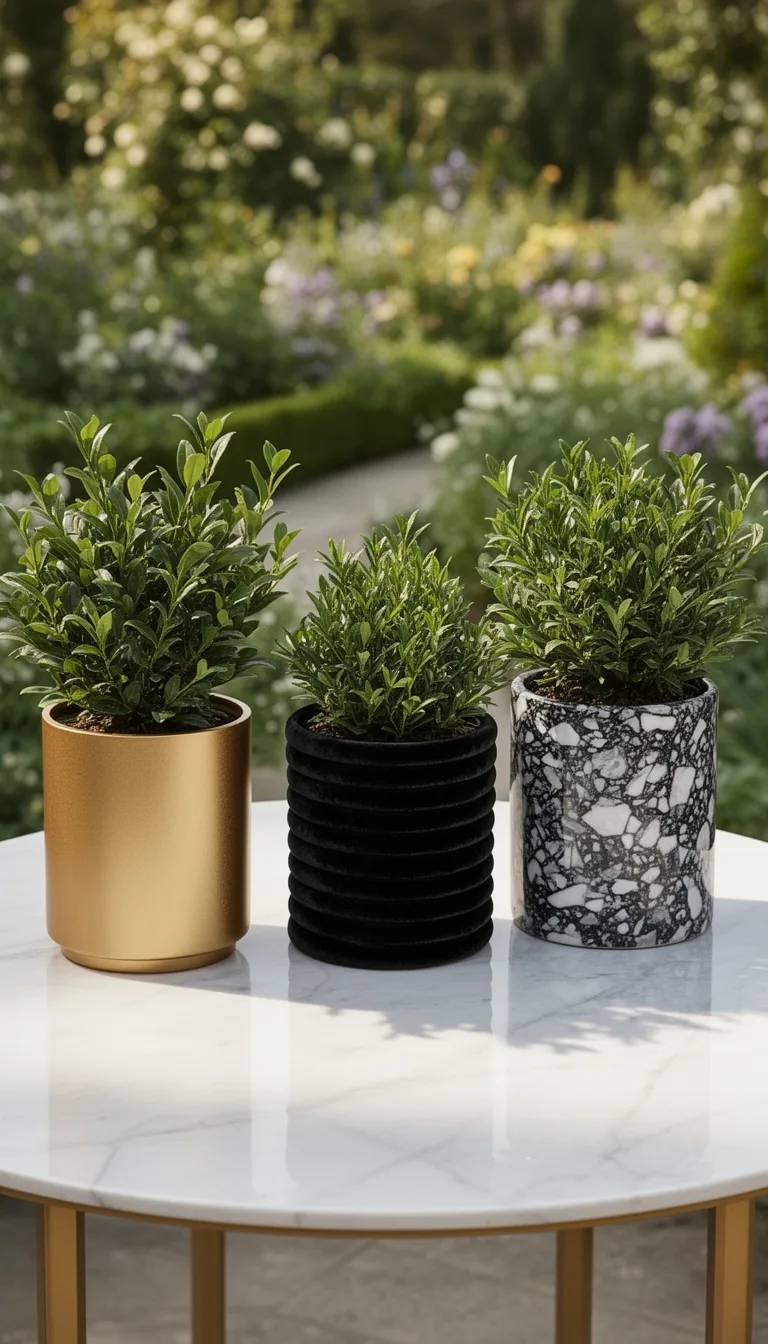
How can you transform a dollar-store planter into a designer showpiece? You’ll master three essential tricks.
First, strategically layer contrasting paint colors—white dry brushing over black creates authentic weathering that mimics high-end aging.
Second, select bold architectural plants like bamboo or New Zealand flax that command visual attention and elevate simple containers instantly. Self-watering planters can reduce maintenance while keeping your statement plants thriving in hot weather.
Third, wrap textured materials around your pots: plaster of Paris over jute, faux leather, or woven basket integration creates dimensional sophistication.
These techniques work together, combining affordable materials with intentional plant choices and strategic embellishments to achieve luxury aesthetics without premium pricing.
Material Mixing: Why Humble Pots Benefit From Upscale Wraps
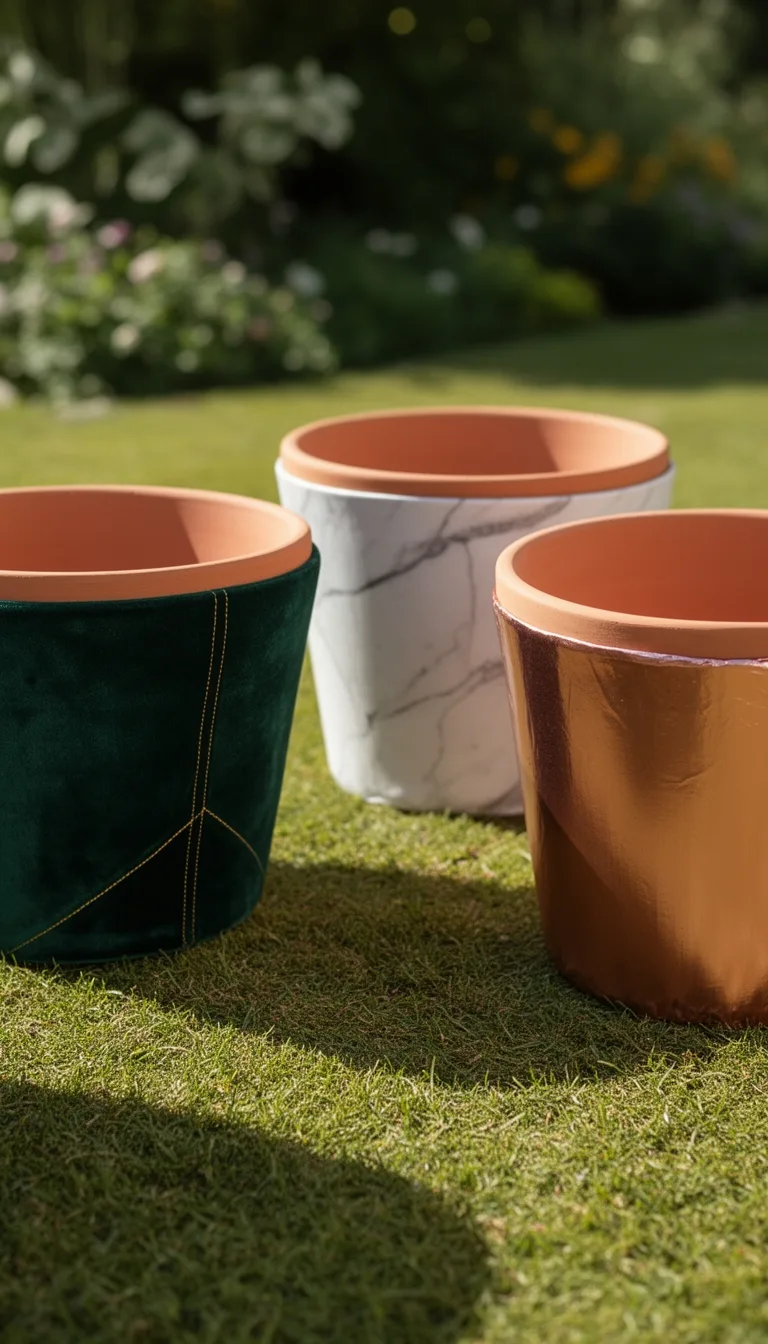
While paint and plants transform a budget planter’s exterior, what’s inside matters just as much.
You’ll create a premium growing environment by blending affordable materials strategically.
Combine one part perlite for aeration, one part coconut coir or peat moss for moisture retention, and one part compost for nutrients.
This balanced mixture mimics expensive commercial potting mediums without the price tag.
Mix thoroughly in a bucket, then moisten evenly before planting.
Leave approximately one inch of space between soil and rim to prevent water from running off the pot’s edge during watering.
Your humble pot now contains a professional-grade foundation that supports healthy root development and vigorous plant growth, proving that luxury isn’t about spending more—it’s about mixing smart.
Repurpose Barrels as Elevated Raised Planters
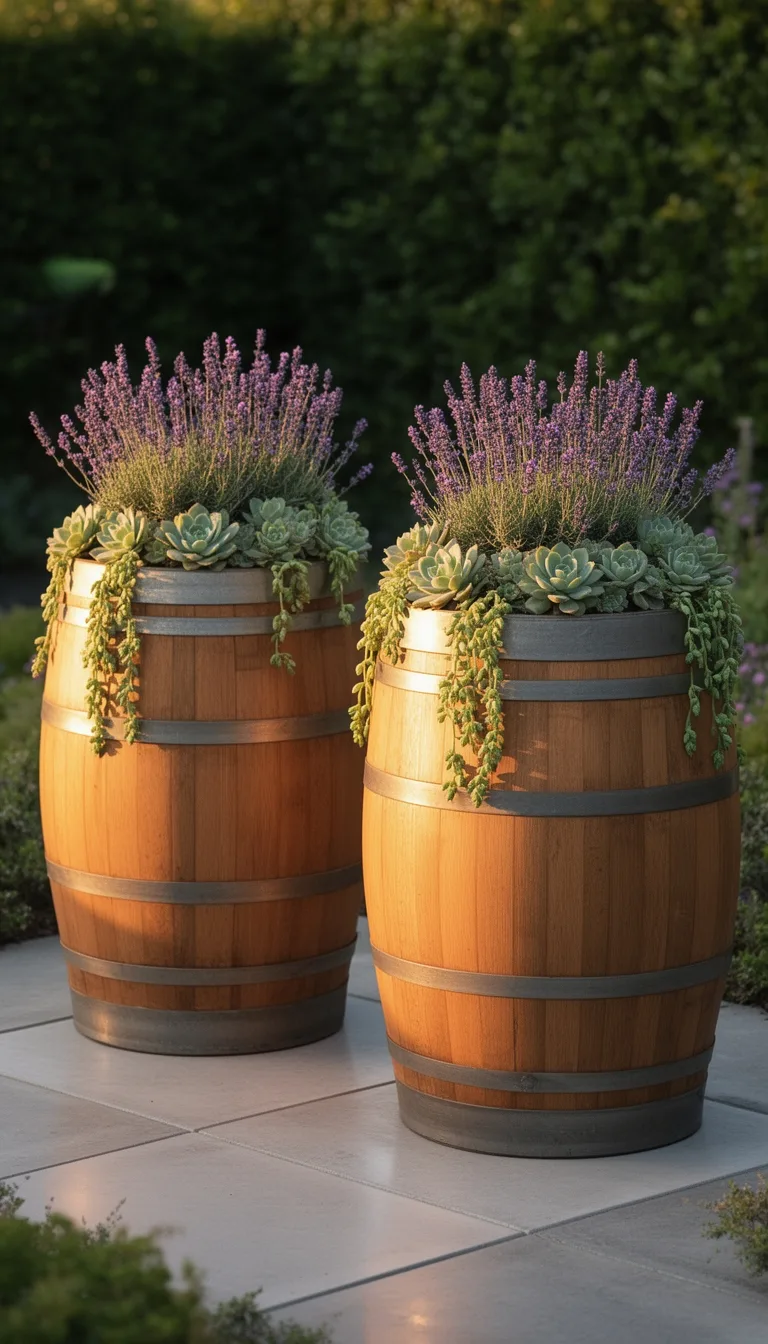
Because food-grade barrels cost next to nothing on local Facebook Marketplace, you’ll transform budget scraps into professional-grade planters that’ll rival expensive raised beds.
You’ll construct half-barrel planters for approximately $25 each using repurposed materials and basic tools.
Your assembly process involves:
- Measuring barrels and cutting 2×4 boards with precise overlap specifications
- Securing frames with 3-inch exterior screws at connection points
- Drilling ten ⅜-inch drainage holes strategically around the barrel
- Layering coarse gravel and burlap before adding soil
You’ll accommodate diverse crops—tomatoes, squash, herbs, beans—while providing ergonomic accessibility for any gardener.
Multiple installations create organized garden layouts perfect for small backyards. The 36-inch height of these raised planters significantly reduces back strain during weeding and harvesting compared to ground-level gardens.
Line Wine Crates With Fabric for Rustic Charm
You’ll transform vintage wine crates into charming planters by combining simple staining, strategic distressing, and fabric linings that deliver rustic appeal without requiring advanced woodworking skills.
Start by cleaning and sanding your crate, then apply dark brown stain in two coats for depth.
Distress the surface by sanding printed logos to reveal wood grain underneath.
Install sisal rope handles by drilling symmetric holes and securing with double knots.
Finally, line the interior with fabric to prevent soil spillage while enhancing visual appeal. For wine enthusiasts, this same technique works beautifully with 3 L wine boxes that can be repurposed as elevated planters for countertop displays.
This approach maximizes your budget while creating statement-worthy planters that showcase larger potted plants beautifully.
Stack Recycled Tires Into Tiered Garden Features
Recycled tires offer a budget-friendly alternative to wine crates that’ll give your garden dramatic vertical dimension and structure.
You’ll stack tires directly or slot varying sizes inside each other to create raised beds and towers.
Paint them in unified shades or brick patterns to mimic expensive stone planters.
For best results:
- Drill drainage holes to prevent root rot
- Use trailing succulents to camouflage tire material
- Stack flowering shrubs as central bed features
- Apply geometric designs for artistic appeal
The sun-heated tires dry soil faster, keeping roots warm and reducing rot while maintaining optimal growing conditions. This resourceful approach transforms surplus tires into functional, attractive tiered gardens while maximizing your planting space economically.
Upcycle Broken Wheelbarrows as Statement Planters
Why let a broken wheelbarrow rust away when it’s perfectly suited for container gardening?
You’ll transform it into a mobile planter by drilling drainage holes and layering lightweight filler materials with premium potting mix.
This reduces weight while maintaining soil depth, enabling easy repositioning for optimal sunlight.
Select shallow-rooted herbs like basil and thyme that thrive in confined spaces. The galvanized steel construction and visible wheel mechanism create visual interest without expensive hardscaping.
You’re salvaging functional equipment from waste streams while achieving an industrial aesthetic that looks curated and intentional—all for minimal cost and effort.
Make Galvanized Buckets Into Industrial Planters
Galvanized buckets offer an even more accessible entry point into industrial container gardening than repurposed wheelbarrows. You’ll find affordable options under $20 at farm supply stores or Dollar Tree.
The zinc coating naturally resists rust, ensuring durability.
Transform your buckets with these essential steps:
- Drill drainage holes using a hammer and nail starter
- Recycle plastic nursery pots inside to reduce weight
- Age new metal instantly with household ingredients for vintage appeal
- Layer potting soil with bold foliage plants like Canna Tropicana
These versatile containers adapt to urban, farmhouse, or contemporary styles seamlessly. For additional guidance on plant selection and care, consult Featured Articles from the Planters Place gardening community for timely subject matter.
Your industrial planters’ll deliver high-impact aesthetics without breaking your budget.
Apply Chalk Paint for Vintage Luxe Finishes
How do you transform basic containers into heirloom-worthy pieces?
You’ll start by lightly sanding and cleaning surfaces, then apply Chalk Paint by Annie Sloan liberally for a textured base.
Drag an almost-dry brush over semi-dry paint to create organic cracks.
Build two coats, picking out edges with contrasting colors like Graphite for character.
Once dry, apply Clear Soft Wax with a brush, buffing immediately, then Dark Wax in grooves.
After waxing sets, sand raised areas for that authentic vintage patina. Clear Wax first creates a protective buffer that prevents the Dark Wax from over-darkening your finish and shifting the overall tone too dramatically.
This layered approach yields luxurious, breathable finishes that look professionally aged.
Spray Metallic Paint on Plastic for Upscale Results
While chalk paint delivers that coveted vintage character, spray metallic finishes offer a sleeker alternative for modern elegance on plastic containers.
You’ll achieve upscale results by following these essentials:
- Hold the spray can 8 inches from the surface, moving in steady back-and-forth motions
- Apply multiple light coats minutes apart to prevent drips and ensure even coverage
- Shake the can for at least one minute before spraying for consistent pigmentation
- Mask interior areas with aluminum foil to protect plants and prevent overspray
- Remove dirt, wax, and oil from pot surfaces with a damp cloth before applying primer for optimal paint adhesion
Rust-Oleum’s metallic gold or stone-effect options transform basic plastic pots into designer-quality pieces without breaking your budget.
Stencil Patterns on Plain Pots With Acrylic
Ready to elevate plain terra cotta pots with custom designs?
You’ll achieve professional-looking stenciled patterns using acrylic paint and basic supplies.
Start by applying two coats of cream or white base paint, allowing complete drying between layers.
Secure your stencil with painter’s tape, then dab undiluted acrylic through openings using a dry sponge.
For raised textures, spread joint compound or stencil fiber paste over the stencil, then lift carefully.
After 24 hours, add accent details with complementary colors.
Sand lightly for an aged effect, then seal everything with water-based varnish to protect your design from moisture and wear.
Display your customized pots in grouped arrangements for maximum visual impact.
Create Faux Concrete Texture on Budget Pots
Transform budget-friendly pots into sophisticated faux concrete pieces using affordable materials you’ve probably got around the house.
Start by roughing up terracotta with sandpaper and priming the surface.
Mix Sandstone Texture with Soapstone paint, then apply your chosen textured finish:
- Drywall joint compound brushed in textured strokes
- Cobblestone paint stippled with Fresco powder
- Ready-mixed Stucco Patch rubbed into sections
- Plaster of Paris dabbed for concrete-like messiness
Sand lightly after drying for brushed concrete realism.
Layer contrasting paint using dry brush techniques to catch texture tops. For best results, maintain even brush strokes throughout application to ensure uniform texture coverage across the entire pot surface.
Your budget pots now rival expensive designer pieces.
Paint Ombre Gradients for Modern Appeal
If textured finishes aren’t your style, ombre gradients offer a sleek, contemporary look that’s equally achievable on a budget.
You’ll spray a dark saturated color lightly across the pot’s top, fading gradually to your white primer base.
For brush application, paint the upper three-quarters with your chosen color, then blend white paint into the bottom half where they meet.
Apply your second color quickly before the first dries to achieve seamless blending.
Use light misting techniques to overlap bands smoothly.
After letting layers dry one to two minutes between applications, allow three to four days total curing before planting.
Wrap Pots With Twine for Boho Texture
How do you transform basic clay pots into textured bohemian planters without breaking the budget?
You’ll wrap yarn and rope around painted pots to achieve that coveted boho aesthetic.
Start by basecoating your pots with acrylic colors, then brush on Mod Podge before wrapping yarn below the rim using your preferred color placement.
For securing materials, follow these steps:
- Apply hot glue along rope edges, pressing ends firmly
- Wrap while gluing every couple inches for stability
- Use a topcoat of Mod Podge after wrapping dries
- Mix cotton rope with jute or sisal for texture
Glue additional rope along the rim, covering imperfections and creating polished edges.
Add Burlap Fabric for Farmhouse Style
Since burlap’s natural texture and neutral tones perfectly complement rustic décor, you’ll find this material ideal for creating farmhouse-style planters that rival store-bought options. Sourced from jute plants in South Asia, burlap offers breathability for air pruning while remaining biodegradable and eco-friendly.
| Feature | Benefit | Application |
|---|---|---|
| Breathable weave | Promotes root aeration | Indoor/outdoor pots |
| Natural insulation | Maintains soil temperature | Year-round gardening |
| Biodegradable | Reduces environmental waste | Sustainable gardening |
| Reusable | Cost-effective solution | Multi-season use |
| Rustic aesthetic | Enhances décor appeal | Houseplants/gifts |
Wrap your pots snugly, secure edges with jute twine using bent needles, and enjoy sophisticated style without premium pricing.
Attach Moss to Create Living Green Covers
While burlap brings rustic charm to your garden containers, moss takes that aesthetic further by transforming ordinary pots into thriving vertical gardens. You’ll create living green covers using simple techniques and affordable materials.
Start by preparing your terracotta pot through light sanding or cleaning. Choose your method:
- Apply adhesive generously and press moss pieces firmly for layered coverage
- Blend moss with buttermilk into thick paint and brush onto surfaces
- Mix moss, buttermilk, and water for a spreadable consistency
Place your pot in shade for two to three weeks. Mist daily with water, maintaining moisture without oversaturation.
Within days, your moss covering establishes itself into a lush, textured masterpiece.
Glue Stone Pebbles for Rugged High-End Look
Want your garden pots to rival high-end landscaping displays? You’ll transform ordinary containers by adhering decorative stone pebbles using specialized stone adhesives. Adiseal delivers exceptional strength—over 3X stronger than competitors—ensuring your pebbles stay permanently secured. Start with thorough cleaning, apply adhesive to contact surfaces, and press firmly together. Polyurethane-based binders create attractive, permeable finishes that withstand weather year-round. Within 24–48 hours, you’ve achieved professional-grade results without premium pricing.
| Preparation Step | Action |
|---|---|
| Clean surfaces | Remove dust with fine brushes |
| Seal porous stone | Prevent adhesive bleeding |
| Apply adhesive | Cover contact areas thoroughly |
| Cure fully | Wait 24–48 hours |
Wrap With Cinnamon Sticks and Pinecones (Seasonal)
When you’re ready to add warmth and natural fragrance to your garden pots, scented pinecones and cinnamon sticks deliver seasonal charm without fuss.
You’ll create an elevated display by gathering fallen pinecones, baking them briefly to remove debris, then applying cinnamon essential oil to their centers.
Enhance your arrangement with these simple techniques:
- Apply 1-2 drops of cinnamon oil per pinecone for passive diffusion
- Wrap cinnamon sticks around pot bases for visual interest and scent
- Combine dried orange peels and star anise for layered fragrance
- Refresh scents every few weeks with additional oil drops
You’ll achieve a high-end, cozy aesthetic that costs pennies.
Design Teacup Succulent Gardens
How can you transform vintage teacups into living displays?
You’ll source affordable cups from thrift stores, then fill them with succulents for an elegant arrangement.
Start by adding drainage material and cactus mix to your prepared cup.
Position your largest cutting off-center, then arrange smaller rosettes to cover exposed soil.
Press gently around roots and add decorative pebbles on top.
Water minimally since there’s no drainage hole.
Match succulent colors to your teacup’s hues for cohesive styling.
These arrangements thrive for 18 months or longer, making perfect gifts for succulent enthusiasts or Mother’s Day celebrations.
Repurpose Birdcages for Trailing Plants
Moving beyond the contained elegance of teacup gardens, vintage birdcages offer you a larger canvas for creating dramatic vertical displays with cascading plants.
You’ll maximize small spaces while achieving gallery-worthy results affordably.
Start by preparing your cage properly:
- Line the base with coconut fiber or moss liner for drainage and soil retention
- Remove any interior perches or food holders before assembly
- Add drainage holes to prevent root rot
- Use container-specific potting soil for optimal plant health
Plant trailing petunias, verbena, or ferns through the cage bars.
Layer heights and textures strategically.
Secure with decorative stones, then hang from trees, fences, or posts for stunning vertical gardening that transforms overlooked spaces.
Hang Colanders as Herb Planters
Kitchen colanders—those perforated workhorses you’ve likely tucked away in a cabinet—transform into charming, functional herb planters that cost you nothing but creativity.
Their built-in drainage holes eliminate modification needs, while thrift-store finds offer vintage appeal affordably.
Line the interior with landscaping fabric to contain soil, then fill with potting soil mixed with compost.
Plant Mediterranean herbs like thyme, sage, and oregano, or try cutting lettuce varieties.
Drill evenly-spaced holes around the rim, thread chains through with S-hooks, and hang in sunny kitchen areas or outdoor patios.
Position on saucers to catch runoff and protect surfaces below.
Use Vintage Colanders for Elegant Drainage
Vintage colanders bring more to your garden than just practicality—they’re functional art pieces that elevate your planting displays.
These repurposed kitchen tools offer exceptional drainage while delivering sophisticated aesthetics without premium pricing.
You’ll appreciate their design benefits:
- Perforated patterns create natural drainage for healthy plant roots
- Enamel coatings provide vintage charm in navy blue or French retro finishes
- Sturdy construction withstands frequent watering and outdoor conditions
- Dual functionality transforms everyday strainers into decorative centerpieces
Their shallow bowls facilitate efficient water flow, while intricate geometric or floral motifs add character.
By handwashing with mild detergent and drying thoroughly, you’ll maintain their elegant appearance for seasons.
You’re essentially creating high-end garden displays affordably.
Stack Hexagonal Pots for Geometric Depth
Why settle for ordinary planters when you can create striking vertical gardens with stacked hexagonal pots? You’ll achieve modern geometric depth by stacking larger hexagons on upper tiers and tapering smaller ones below for a cascading effect.
The faceted shape adds visual interest while maximizing space in compact areas.
You can DIY them from plywood—cut six 200mm pieces, bevel at 30 degrees, tape and glue together, then paint white outside and gray inside. Alternatively, 3D-print them using PETG filament.
Your plants gain stunning visibility across levels while you enjoy that expensive-looking aesthetic without breaking the bank.
Arrange Wooden Crates Into Pyramid Displays
Looking for a budget-friendly way to display plants with visual impact? You’ll love creating wooden crate pyramids that transform your garden affordably.
Stack blocks in decreasing layers, offsetting each inward by one block.
Source materials from Dollar Tree for minimal cost, then secure layers with hot glue.
The stepped design creates visual interest while maximizing planting space.
Customize your pyramid by:
- Filling the center with rocks for drainage
- Planting succulents in the cavity
- Applying reindeer moss for an overgrown aesthetic
- Finishing with antique wax stain for aged charm
Adjust height and width based on your block supply.
These displays rival expensive garden installations without straining your budget.
Paint Brick Tiers White for Clean Luxury
When you’re ready to elevate your garden display beyond wooden crates, white brick tiers deliver the sophisticated look of luxury installations at a fraction of the cost.
You’ll achieve a crisp, clean aesthetic by using breathable masonry paint like Romabio, color-matched to Sherwin Williams Pure White or Benjamin Moore’s Olympic Mountains for optimal results.
The natural brick texture remains visible, adding depth while reflecting light to brighten your garden space.
White brick resists fading and chipping better than painted alternatives, requiring only occasional cleaning with mild soap and water.
This timeless approach creates an upscale appearance that transforms your entire outdoor area.
Layer Log Slices as Natural Elevated Planters
If you’ve got access to downed wood, you can build elevated planters that’ll cost you virtually nothing while creating a thriving ecosystem beneath your plants.
Stack log slices in alternating patterns, securing them with shallow trenches.
Fill progressively over seasons—start with potatoes to naturally build depth through hilling.
Wood acts as a sponge, releasing moisture slowly while:
- Beneficial fungi colonize the structure, breaking down organic matter
- Microbes add nutrients while decomposing wood releases heat
- Green layering provides nitrogen for decomposition
- Dense wood creates natural weed barriers
Your soil quality improves as wood biodegrades, eliminating synthetic border dependency.
Hang Macrame Pot Clusters for Vertical Impact
While log slice planters build fertility from the ground up, macrame pot clusters take your garden vertical, reclaiming overhead space without sacrificing drainage or plant health.
You’ll tie simple square knots using 4–6 strands of natural cotton cord, creating a support basket that distributes weight evenly and reduces stem compression.
Secure your pot with balanced knots around the rim, then install via toggle-wing anchors into drywall or direct ceiling hooks.
Trailing species like English ivy thrive in these hangers, their sway mimicking natural wind and stimulating sturdier growth.
Oil-treat your macrame every 90 days for UV protection, and you’ve maximized vertical garden space affordably.
Repurpose Ladders as Tiered Pot Stands
Why let old ladders gather dust when they’re perfect for creating a multi-tiered plant display?
You’ll transform weathered wooden ladders into stunning plant stands that showcase your collection beautifully.
Start by preparing your ladder:
- Sand lightly and paint two coats in your chosen color
- Measure each rung width, accounting for the ladder’s widening taper
- Cut cedar boards to fit between rungs with overhang
- Drill pilot holes before securing boards with screws
Arrange terra cotta pots on your tiered shelves, adjusting heights for varied plant sizes.
This movable, boho-style solution recycles materials while creating an affordable, sophisticated garden display that guests’ll admire.
Border Pots With Gravel for Polished Beds
How can you elevate your potted displays from ordinary to polished?
Border your pots with gravel to create a finished, intentional look that transforms ordinary garden beds into curated spaces.
Spread one to two inches of gravel around container bases to stabilize heavy pots and prevent sinking into soil.
This simple technique hides exposed earth, reduces visual clutter, and grounds your arrangements seamlessly.
Use decorative pea gravel or river stones to complement your design aesthetic.
The gravel acts as a practical separator between planters and lawn while reinforcing that expensive, professionally designed appearance you’re after.
Build Raised Frames From Cardboard and Plastic
Cardboard and plastic frames offer an affordable way to extend your growing season and organize raised beds without the expense of traditional construction materials.
You’ll appreciate the versatility and ease of this approach:
- 5-minute assembly makes construction accessible for any skill level
- Mobile design lets you reposition frames seasonally
- Corrugated plastic sheeting provides light transmission and weather protection
- Cardboard barriers suppress weeds while naturally enriching soil
Dampen cardboard thoroughly before adding six inches of soil.
Bamboo stakes or wooden frames anchor your plastic covering securely.
Foam board capping seals ends during cold periods, maximizing heat retention.
This resourceful method eliminates expensive landscape fabric while creating functional, budget-friendly garden infrastructure.
Cut PVC Pipes as Modern Vertical Planters
Transform ordinary PVC pipes into a space-saving vertical garden that’ll yield dozens of plants in just one square foot.
You’ll need 150mm PVC pipe, 40mm irrigation tubing, landscape fabric, and basic tools like a hack saw and hole saw.
Cut sections, drill strategic openings, and line interiors with fabric for drainage.
Add potting mix, insert your irrigation system, and plant lettuce or greens through pre-drilled holes.
This ingenious setup supports eighteen plants per tube while costing around thirty-five dollars total—significantly cheaper than traditional flower pots.
Perfect for patios, balconies, or tight spaces.
Conclusion
You’ve just discovered that your garden doesn’t need a luxury budget—it needs resourcefulness. Like a thrift store artist who transforms $2 finds into gallery-worthy pieces, you’re now equipped to turn everyday materials into show-stopping planters. Stack those tires, wrap those pots, and layer that gravel. Your neighbors won’t believe you didn’t spend hundreds. You’ve got the tricks; now you’re ready to create a garden that punches way above its price tag.
The Only Tools You Need for a Thriving Garden 🌱
Whether you're a weekend gardener or growing daily — these hand-picked tools make every session faster, easier, and more satisfying.