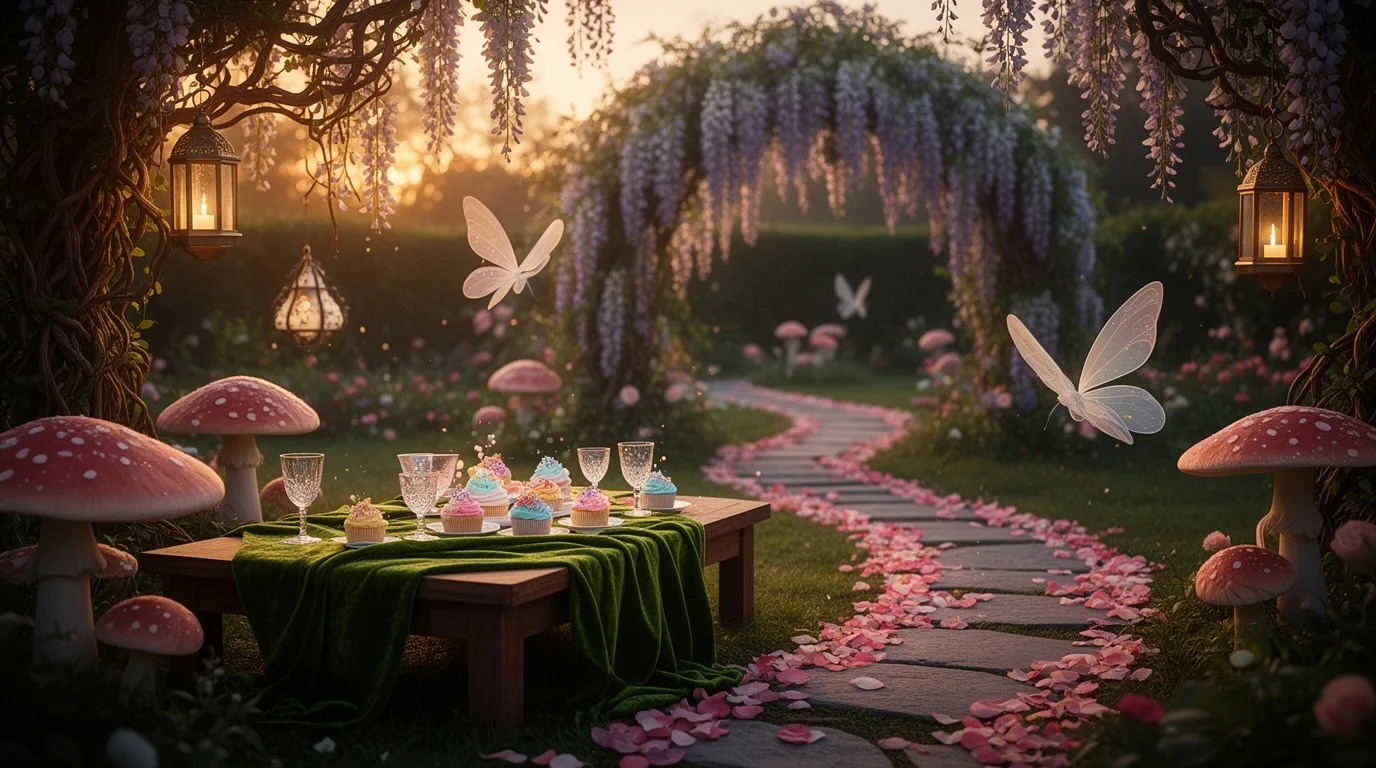
Imagine transforming a sheltered backyard nook into an enchanted fairy realm. You’ll craft mossy pathways and set tiny terracotta houses among the greenery. This guide details essential plant selections for instant whimsy and provides clear instructions for building a twinkling LED canopy. You’ll see how easily these practical steps create lasting magic, setting the stage for everything that follows.
Key Takeaways
- Choose a theme like Enchanted Woodland to guide plant selection and all decorative elements.
- Create pathways, fairy houses, and a twig arch storytelling corner as magical focal points.
- Serve whimsical treats and drinks like Fairy Fizz and acorn-shaped marzipan on a mossy tablescape.
- Add evening magic with fairy lights, flameless lanterns, and night-blooming plants like moonflowers.
- Set up activity stations for potting mini plants or crafting fairy crowns and seed bombs.
Define Your Fairy Garden Party Theme
Before you choose a single decoration, decide on a cohesive theme for your fairy garden party, as it’ll guide every choice you make, from invitations to plant selection. Ask yourself what magical realm you’re creating.
An “Enchanted Woodland” theme favors mossy ground covers, ferns, and miniature hostas, with a rustic, earthy color palette. For a “Sparkling Dewdrop” theme, you’d pick plants with silvery foliage like lambs’ ear and incorporate glistening, crystal-like accents.
Once you’ve chosen, stick to it. Select plants that fit your theme’s scale and aesthetic—think tiny-leaved herbs for a kitchen garden or colorful succulents for a desert scene. Your theme dictates your plant list; write it down before you visit the nursery.
Choose the Perfect Spot for Your Magical Gathering
With your theme in mind, you’ll need to pick a location that brings it to life and meets your plants’ needs.
First, scout your yard for a spot with dappled sunlight. Full shade can stunt growth, while full sun will wilt delicate fairy blooms like lobelia or alyssum.
Observe the area at your planned party time. Ensure the ground is level for seating and sturdy surfaces for tiny décor.
You’ll want proximity to a water source for both plants and guests. Consider a sheltered nook near a tree or hedge to anchor your magical scene.
Clear away any debris, then test the soil by pressing a spade in; it should be moist but not waterlogged for planting.
Craft an Invitation That Feels Like a Fairy Scroll
Once you’ve secured your magical spot, you can begin handcrafting an invitation that captures the enchantment of a fairy’s message.
Start by selecting a thick, textured paper in earthy tones like moss green or parchment beige. Tear the edges gently for an aged look, then lightly stain them with diluted tea or coffee.
Use a calligraphy pen or a fine-tipped marker to write your party details in elegant, flowing script.
For a final touch, press a small, delicate flower or leaf into one corner before the ink dries completely.
- Incorporate Botanical Elements: Affix a sprig of dried lavender or a tiny pressed fern with a dab of clear-drying glue.
- Use Natural Twine: Roll your scroll and secure it with a thin piece of jute or garden twine.
- Add a Wax Seal: Seal the twine with a droplet of melted sealing wax in a deep green or gold hue.
Set the Mood With Twinkling Fairy Lights
Twinkling fairy lights can instantly transform your garden into an enchanted grove as dusk settles in. You’ll need weatherproof, LED outdoor strands; warm white bulbs create the softest glow.
Begin by weaving lights through sturdy tree branches and shrubs like boxwood or laurel. You can drape them along fence lines or low garden walls.
For a magical floor, use solar-powered stake lights to line pathways among hostas or ferns. Secure all wires with discreet green garden ties to prevent tripping.
Hide power sources behind planters or under mulch. Test your entire setup during daylight to fix any issues before your party begins.
Finally, set them on a timer so they’ll sparkle automatically as night falls.
Create Fairy Garden House Centerpieces
Nestled among the foliage, miniature fairy houses become enchanting focal points for your tables.
Begin with small terracotta pots or purchased fairy homes as your base.
For plant selection, use tiny, hardy succulents like sedum or echeveria, moss sheets for instant lawn, and delicate ferns or baby’s tears for softness.
Anchor your house in a shallow dish filled with potting soil.
Tuck moss around the base and plant your succulents strategically to frame the entrance.
Add miniature accessories like a pebble path or a tiny bench to complete the scene.
- Layer Textures: Combine smooth river rocks, rough bark chips, and soft moss to create visual depth.
- Incorporate Scale: Use ultra-fine gravel for pathways and twig fragments for fences to maintain proper miniature proportions.
- Ensure Stability: Secure taller houses with hidden florist’s clay in the dish to prevent tipping.
Build a Magical Pathway for Guests to Follow
After your tables are adorned with tiny houses, lead your guests into the garden with a whimsical pathway. You can quickly craft one using simple materials.
First, define your path’s route with a bag of smooth pebbles or flat stepping stones. Space them a natural stride apart. Sprinkle a layer of glittery sand or moss between the stones for an enchanted floor.
Then, line the edges with low, fragrant plants. Choose creeping thyme for scent and soft texture, or use miniature mondo grass for lush, green borders. Tuck tiny solar-powered fairy lights under foliage to softly illuminate the way at dusk.
Finally, scatter a few polished “wishing stones” or tiny glitter-dusted pinecones along the sides to complete the magical journey.
Use Natural Elements to Define Your Party Space
Soft branches and flowering vines can shape your garden’s gathering areas. Weave willow or flexible dogwood stems into low arches to frame an entry. Guide clematis or sweet pea vines over simple structures to create living walls. This natural décor clearly defines your party space while blending seamlessly into the landscape.
For seating areas, arrange large, smooth stones or fallen logs in a circle to form a rustic fairy ring. You can even use clusters of potted ferns or ornamental grasses to softly partition different zones.
- Select pliable natives: Use species like red-twig dogwood or virgin’s bower vine that are easy to bend and secure with natural jute twine.
- Incorporate fragrant herbs: Plant lavender or rosemary borders; their scent enhances the ambiance and deters insects.
- Define with ground covers: Spread a carpet of creeping thyme or Irish moss around seating to visually anchor the space.
Dress Your Fairy Garden Table With Moss and Blooms
Moving from the natural framing of your space, your fairy garden table becomes the next focal point.
Begin by laying a lush base of sheet moss; it’s available at craft stores and creates instant, vibrant ground cover.
Select miniature blooms like creeping thyme, small sedums, or tiny violas for color and texture.
You can plant these directly into small pots or use cuttings tucked into the moss.
Add visual interest by scattering polished pebbles, acorn caps, or small pinecones.
To secure delicate elements, use a bit of florist’s putty.
Keep your arrangement hydrated by lightly misting the moss.
This living centerpiece will enchant your guests and anchor your enchanted tablescape.
Serve “Fairy Fizz” and Other Enchanted Drinks
Pour your magic into beverages by starting with a sparkling “Fairy Fizz.” Combine equal parts of chilled lemonade and sparkling water in a pitcher, then stir in a handful of fresh edible flowers like pansies or violets for color.
For other enchanting drinks, create “Moonlight Milk” by blending lavender syrup into cold milk. Always pick flowers you’ve grown yourself or sourced from an organic supplier to ensure they’re safe for consumption.
Present everything in delicate glassware to complete the mystical effect.
- Infuse simple syrup with fresh rosemary sprigs for an herbal “Pixie Potion” base.
- Freeze whole borage flowers into ice cubes to garnish any drink.
- Use hollowed-out cucumber slices as natural cups for a crisp, woodland-themed sip.
Bake Miniature Treats for Your Fairy Garden Party
Transform your party spread into an enchanted feast with bite-sized baked goods. Make tiny thumbprint cookies with edible flower petals like violas pressed into jam-filled centers.
You’ll bake mini mushroom cap cupcakes using chocolate batter and white fondant stems. Select fresh mint or lemon verbena leaves from your garden to garnish petit fours for a fragrant touch.
Craft acorn-shaped treats by molding marzipan and dipping the tops in melted chocolate. Always use a mini muffin tin for consistent sizing and bake at a slightly lower temperature to prevent over-browning.
Present these treats on moss-covered boards or nestled among clean, pesticide-free rosemary sprigs to create a truly magical woodland tableau.
Plan Fairy Garden Party Activities for All Ages
Hosting a fairy garden party lets you craft enchanting activities that engage guests from toddlers to adults. You can tailor stations to different skill levels, ensuring everyone finds magic. Focus on tactile, nature-based play that sparks imagination without requiring complex tools.
- Create a Potting Station: Provide small terracotta pots, a lightweight potting mix, and fast-growing plants like sweet alyssum or miniature sedum. Let guests pot their own take-home fairy garden start.
- Organize a Fairy House Decorating Contest: Supply natural materials like pinecones, smooth stones, acorns, and bark. Use nontoxic glue for safe assembly, encouraging whimsical designs.
- Lead a ‘Fairy Seed Bomb’ Making Workshop: Mix clay powder, compost, and wildflower seeds (like cosmos or poppies). Instruct guests to form small balls; these can be tossed in a designated garden area.
Offer a Build-Your-Own Fairy Crown Station
Because no fairy ensemble is complete without the perfect woodland accessory, you can set up a station where guests craft their own enchanting headpieces.
Gather flexible grapevine or willow twigs to form a base. Pre-soak them so they’re pliable.
For floral adornments, select garden clippings that won’t wilt quickly; consider rosemary sprigs, small lavender bundles, or baby’s breath. Have a mix of fresh and faux blooms for variety.
Supply floral wire, twine, and hot glue guns for secure attachment. Provide ribbons and thin jute for finishing ties.
Demonstrate by shaping a circle to fit a head, wiring the ends, then layering on greenery. Let each guest’s creativity blossom as they build their unique crown.
Organize a Tiny Fairy Treasure Hunt
Gather miniature treasures and hide them around your garden to send little fairies on a magical quest. Craft a simple map on aged paper or provide a rhyming clue list to begin their search.
Tuck sparkly glass gems under the broad leaves of hostas or lamb’s ear for easy discovery. Nestle tiny wooden toadstools or polished pebbles at the base of a flowering thyme plant, where their scent adds enchantment. For a final grand prize, conceal a special “fairy stone” in a hollow of a tree or beneath a fern frond. This activity directly engages children with your garden’s details.
- Utilize Plant Textures: Hide items in the soft, silvery foliage of dusty miller or the spiky tufts of ornamental grass.
- Incorporate Natural Containers: Use upturned acorn caps, seashells, or curled pieces of bark as tiny treasure chests.
- Create Subtle Pathways: Mark hiding spots with a trail of tiny, biodegradable glitter or a line of small, white alyssum flowers.
Design a Fairy Photo Booth With Whimsical Props
Transform your garden into an enchanted stage by designing a fairy photo booth that captures playful portraits. Begin by selecting a natural backdrop like a flowering archway of clematis or a wall of ferns. You’ll then craft whimsical props. Construct simple wings from wire, sheer fabric, and glitter. For a charming seat, stack moss-covered stones or use a vintage wooden stool. Encourage guests to interact with hanging crystal prisms that catch the light and oversized paper flowers for scale. Keep the area well-lit with string lights or a reflector to ensure every magical detail is photographically preserved.
| Prop Category | Materials & Plants | Assembly Instructions |
|---|---|---|
| Fairy Wings | Wire frame, iridescent fabric, hot glue | Bend wire into wing shapes, stretch and glue fabric taut. |
| Seating | Moss, flat stone, velvet cushion | Adhere moss to stone with spray adhesive for a toadstool look. |
| Interactive Elements | Crystal prisms, fishing line, large faux flowers | Hang prisms from tree branches to scatter rainbows. |
| Backdrop | Potted ferns, climbing ivy, flowering vines | Arrange plants in tiers using shelves or stakes for depth. |
Add a Whimsical Fairy Music Playlist
While you’re setting up the photo booth, you can enhance the enchanting atmosphere by curating a whimsical fairy music playlist. Use a portable, weatherproof speaker tucked into a flower bed for seamless sound. Select music that complements your garden’s vibe—think light classical, Celtic harp, or ambient nature sounds with soft melodies. Keep the volume low so it’s a subtle background layer, not a distraction.
- Incorporate Natural Soundscapes: Layer tracks with gentle birdsong, rustling leaves, or babbling brooks to blend the audio with your actual garden setting.
- Curate for Flow: Structure your playlist to begin with playful, energetic tunes for arrivals and transition into more serene music as the event settles.
- Consider Duration: Ensure your playlist is several hours long to avoid repetition or awkward silences.
Make DIY Fairy Wings for Your Guests to Wear
Invite your guests into the magic by crafting personalized fairy wings they can wear throughout the party. Start with a simple coat hanger frame bent into wing shapes. Use sheer, sparkly fabrics or colorful cellophane to cover them, securing the material with hot glue. For a natural touch, incorporate pressed flowers or fern fronds between layers of fabric.
Choosing the right decorations is key for different fairy aesthetics. Use this guide for inspiration:
| Fairy Type | Material Choice | Embellishment Idea |
|---|---|---|
| Flower Fairy | Pastel Organza | Glue on silk rose petals |
| Forest Fairy | Green Tulle | Attach small faux leaves |
| Crystal Fairy | Iridescent Cellophane | Sew on beads & sequins |
| Twilight Fairy | Black & Purple Mesh | Sprinkle with silver glitter |
Attach the finished wings to ribbon straps, ensuring they’re adjustable for a comfortable fit.
Prepare a Storytelling Corner Under a Twig Arch
After your guests have their wings, guide them to a storytelling corner sheltered by a twig arch.
Create the arch by pushing long, flexible willow or dogwood branches into the ground in two parallel rows, bending the tops together and securing them with jute twine.
Drape the structure with flowering vines like clematis or sweet peas for instant enchantment.
Layer the ground below with soft moss, plump cushions, and a thick, textured rug to define the cozy space.
This becomes your magical stage for sharing tales.
- Incorporate Sensory Herbs: Plant fragrant lavender or lemon thyme around the arch’s base to engage the senses during the story.
- Employ Subtle Lighting: Weave battery-operated fairy lights through the twigs to create a soft, dusk-ready glow.
- Utilize a Focal Prop: Place a rustic stool or a carved wooden box as a storyteller’s perch and a place to hold a special storybook.
Craft Simple Fairy Doors for Tree Decorations
Transform ordinary trees into gateways for enchantment by crafting simple fairy doors.
First, gather thin bark slices, moss, and small stones from your garden. For adhesive, use clear-drying, waterproof glue suitable for outdoor materials.
Cut bark into door shapes, roughly 2-3 inches tall. Attach a tiny stone as a handle.
Apply glue sparingly to the tree trunk in a spot free from sap flow, then press your door firmly onto it. Surround the base with moist moss fragments to create a natural doorstep; this greenery also helps conceal the glue edge. Secure any loose moss with a dab of glue.
These miniature portals instantly add a whimsical focal point, suggesting hidden pathways just beneath the bark.
Suggest Enchanted Attire for Everyone
While you’re adding those final touches to your fairy doors, you can also weave enchantment into what you wear, starting with a simple flower crown. You can craft one with fresh or faux flowers for durability. Select sturdy greenery for the base, like ivy or flexible willow stems. Choose small, lightweight blooms like pansies, daisies, or lavender.
Twist the greenery into a circle, securing it with floral wire, and then attach your chosen flowers. For attire, encourage guests to layer ethereal fabrics over everyday clothes. You can add whimsical accessories to elevate their outfits.
- Attach a vintage brooch or pin to a simple dress to create an instant focal point of antique magic.
- Apply subtle glitter or shimmer to cheekbones and hairline using a cosmetic brush for a natural, enchanted glow.
- Layer gauzy scarves or sheer shawls over a plain shirt to instantly create a soft, mystical silhouette.
Send Guests Home With Magical Fairy Party Favors
Just as your guests have been dressed in whimsical attire, you can also send them home with a bit of magic in their hands. Create enchanting favors by planting small, magical-looking plants like Irish moss, baby tears, or a miniature fern in tiny terracotta pots or repurposed teacups.
You’ll enhance them with whimsical details; glue a tiny seashell or a painted acorn to a stick to make a fairy door, and sprinkle the soil with glitter for pixie dust. Include a care tag with simple instructions: “Place in bright, indirect light and keep the soil moist. Your fairy garden grows with love!” This gives each guest a living reminder of your magical party.
Adapt Your Fairy Garden Party for Evening Magic
To cast a spell after sunset, you’ll want to focus on lighting and night-blooming plants. Swap solar lights for LED fairy lights, draping them through trees and shrubs for a glowing canopy.
Plant evening primrose or moonflower vines near seating areas; their luminous blossoms open at dusk, adding natural magic. You can guide guests along paths using flameless candle lanterns placed on stakes.
- Layer Your Lighting: Combine overhead string lights with ground-level flickering LED votives to create depth and prevent dark spots.
- Select Scented Night Bloomers: Incorporate fragrant plants like angel’s trumpet or night phlox to enhance the immersive sensory experience.
- Employ Reflective Elements: Strategically position mirrored ornaments or glass baubles to catch and scatter the available light, amplifying its effect.
Keep Your Fairy Garden Alive After the Party Ends
Ensuring your fairy garden’s enchantment lasts means transitioning from party decor to a sustainable miniature ecosystem.
First, carefully remove any temporary party pieces. Select sturdy, slow-growing plants that suit your climate and container. Choose succulents like hens-and-chicks for sunny spots or mosses and miniature ferns for shade. Ensure your pot has drainage holes; add a layer of pebbles before your potting mix.
Water sparingly, only when the soil feels dry an inch down. Overwatering is the fastest way to lose your tiny plants. Prune regularly to maintain scale and encourage bushy growth. Place your garden where it gets appropriate light, and shield delicate plants from harsh afternoon sun. A little consistent care keeps the magic thriving long after the guests leave.
Frequently Asked Questions
What if My Backyard Is Small or Not Grassy?
Use a patio or deck. Create mini gardens in pots with dwarf plants, moss and succulents. Hang fairy lights and lanterns. A small tabletop “fairyland” using a tray works perfectly. You’ll still craft a magical space.
How Can I Keep Costs Low for This Party Theme?
Use found items like pinecones for decor. Grow affordable seeds like sweet alyssum. Create tiny signs from painted rocks and sticks. Borrow string lights. Craft with cardboard for fairy houses. Make your own moss from dyed sponges.
What Do I Do if the Weather Is Bad?
Move your party indoors. Set up tiny fairy gardens in pots on tables. Use fairy lights in jars for ambiance. Have flower crown-making and decorate cookies as magical crafts. You’ll keep the enchantment alive.
Is This Party Idea Suitable for Adults Only?
It’s definitely suitable! You’ll focus on intricate miniatures and rare plants. Design sophisticated, detailed crafting stations. Source aged terracotta pots and propagate delicate succulents. Prepare botanical cocktails and plan an elegant, enchanted atmosphere for your guests.
Can I Host a Fairy Garden Party Indoors?
Yes, you can host it indoors. Use potted ferns, moss, and miniature plants like fairy vine. Arrange them on tables with tiny decor. Just ensure they’ve got enough light—a sunny window works perfectly.
Conclusion
After your party, gently remove temporary décor. Your baby tears will thrive with indirect light and consistently moist soil. Let the topsoil dry slightly between waterings, and mist them on warm days. The mossy paths and twig arch can remain as your garden’s enchanting bones. With simple, regular care, this sustainable nook will keep its magic long after the last fairy fizz is gone.
The Only Tools You Need for a Thriving Garden 🌱
Whether you're a weekend gardener or growing daily — these hand-picked tools make every session faster, easier, and more satisfying.