You’re planning a garden path and want it to be both functional and stylish, so you’re weighing options from rustic slate and reclaimed wood to sleek large‑format concrete pavers. Each material brings its own texture, maintenance needs, and visual impact, whether you prefer a curvy river‑rock trail or a low‑maintenance gravel strip with edging. The right choice will tie the whole landscape together while standing up to weather and foot traffic, and the details you pick next will shape the final look.
Key Takeaways
- Choose a material that matches your garden style, such as natural slate for a cool, textured look or reclaimed wood for rustic charm.
- Prepare a stable, well‑drained sub‑base using compacted sand or gravel, and add landscape fabric to prevent weeds.
- Lay pavers or stones in a consistent pattern (running bond, straight line, or gentle curve) with proper spacing and level checks.
- Use low‑profile edging or metal grates to retain the walkway material and maintain clean edges.
- Finish with subtle lighting, such as low‑voltage LED strips or solar path lights, to enhance safety and visual appeal at night.
Choose a Stone Walkway Idea With Natural, Weather‑Resistant Slate
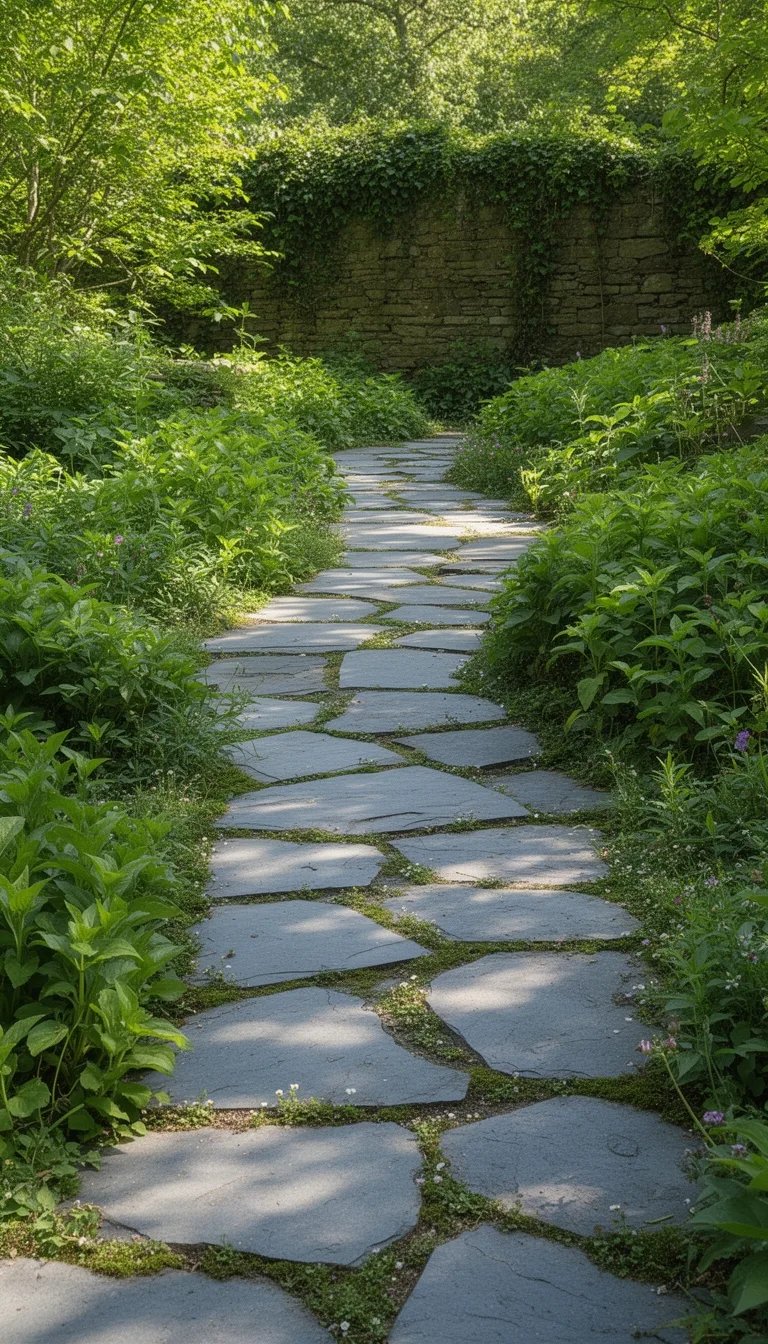
Stone pathways instantly add timeless charm, and slate’s natural durability makes it a perfect, weather‑resistant choice. You’ll find slate slabs stay cool under summer sun, yet they don’t crack when frost thaws.
Lay the slabs on a compacted sand base, spacing them evenly to create a steady tread. Use a level to keep each piece flat; a slight slope directs water away from the garden beds. Seal the joints with polymeric sand to prevent weed growth and erosion.
When you walk, the textured surface offers gentle traction, and the subtle color variations blend with surrounding foliage. Maintenance is simple: sweep debris, rinse with a hose, and reseal every few years to preserve the stone’s natural beauty.
Lay a Rustic Brick Walkway Idea Using Classic Running Bond
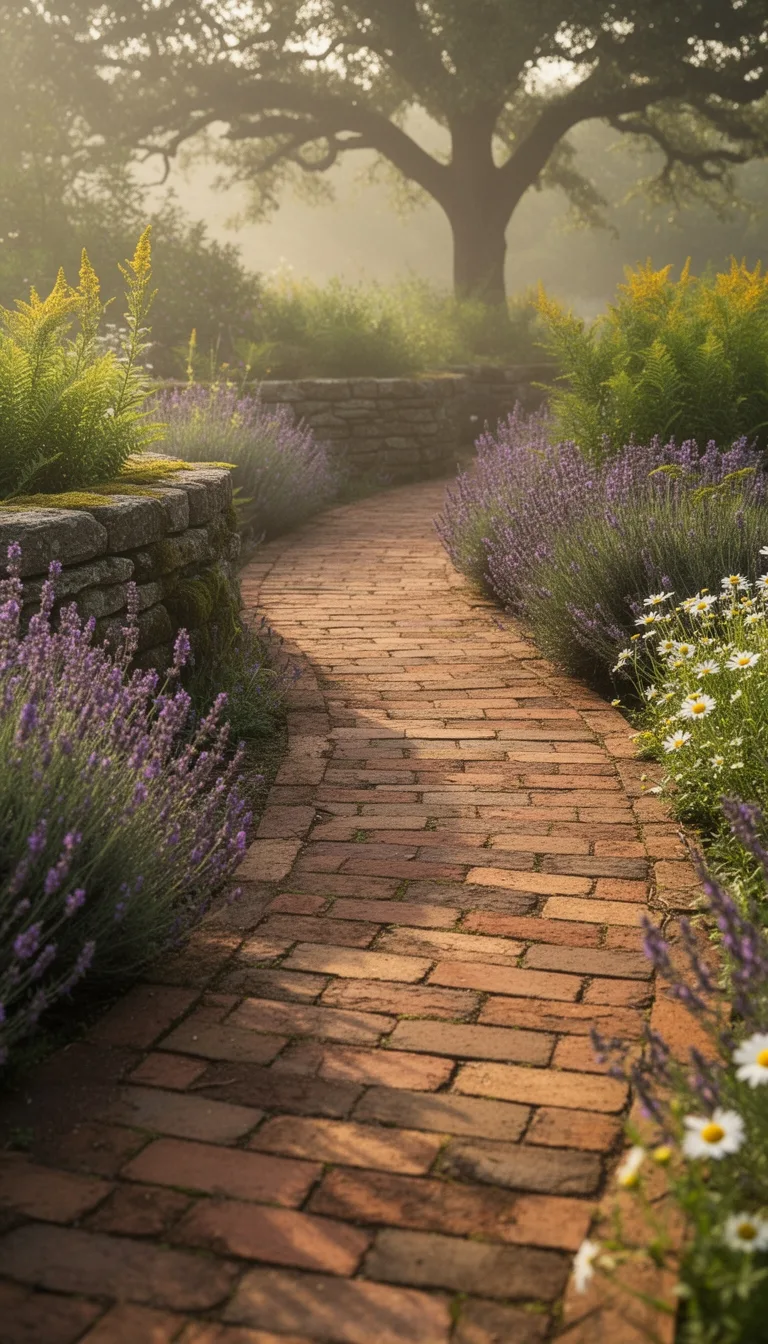
After enjoying the cool, weather‑resistant slate, you can switch to a warm, rustic brick walkway that still offers durability and visual interest.
Start by marking the path with string and stakes, then excavate to a depth of six inches, allowing space for a two‑inch sand base and a one‑inch brick layer.
Lay a geotextile fabric to prevent weeds, spread compacted sand, and screed it level.
Place bricks in a classic running bond, offset each row by half a brick to create a staggered pattern that distributes load evenly.
Tap each brick with a rubber mallet, checking for levelness, and fill joints with sand, sweeping it in and misting with water to lock the bricks.
Finish with a sealant if you want extra weather protection.
Create a Modern Minimalist Walkway Idea With Large‑Format Concrete Pavers
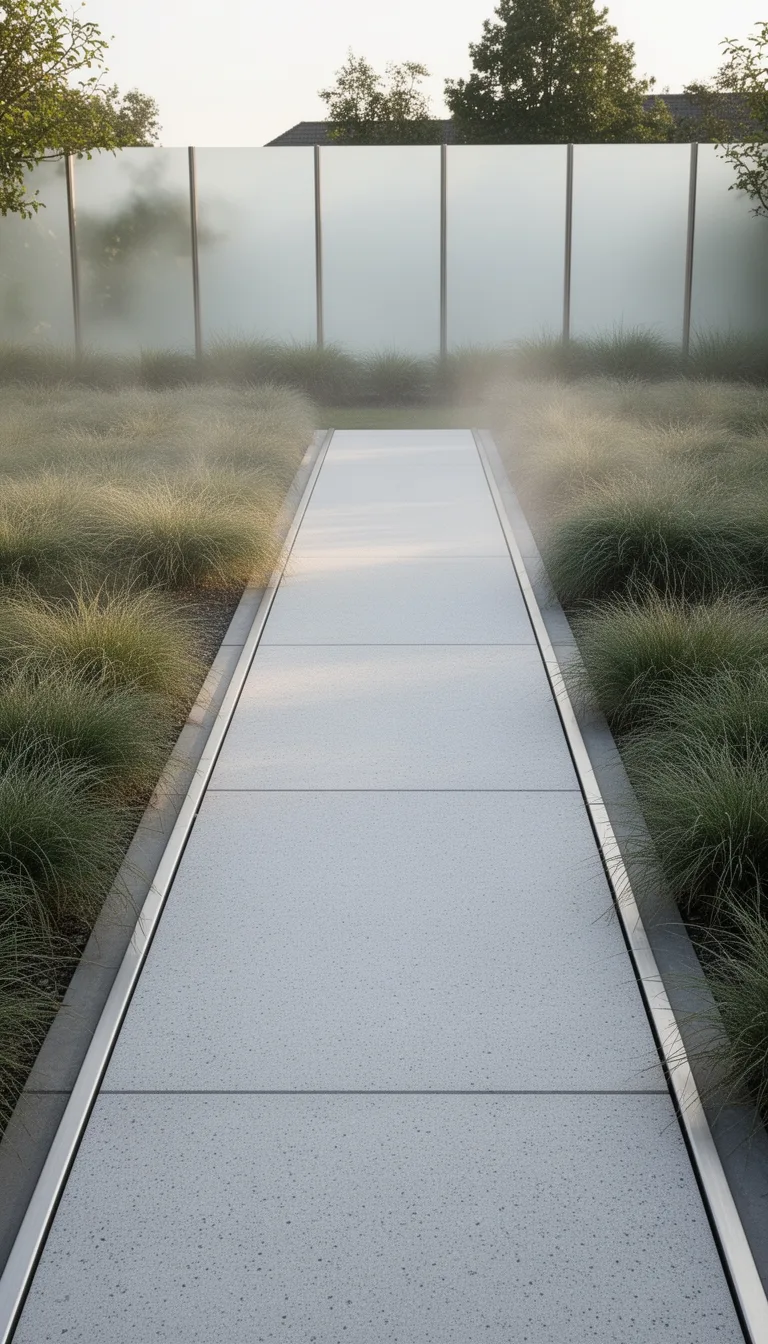
When you want a sleek, contemporary look that still feels sturdy, lay large‑format concrete pavers in a clean, straight line. Choose pavers 24‑30 inches wide, a uniform gray or warm beige, and a smooth, honed surface.
Prepare a compacted sand‑base, level it, then set each slab with a thin mortar joint to keep the line tight. Align edges with a string line for perfect straightness, and use a rubber mallet to seat each piece evenly.
Add subtle lighting along the perimeter for night‑time ambience. Keep surrounding plantings low‑maintenance—grasses or dwarf ornamental shrubs—so the pavers remain the focal point.
This minimalist approach delivers a durable, modern pathway that complements any garden style.
Design a Curvy Garden Trail Idea With Hand‑Set River Rocks
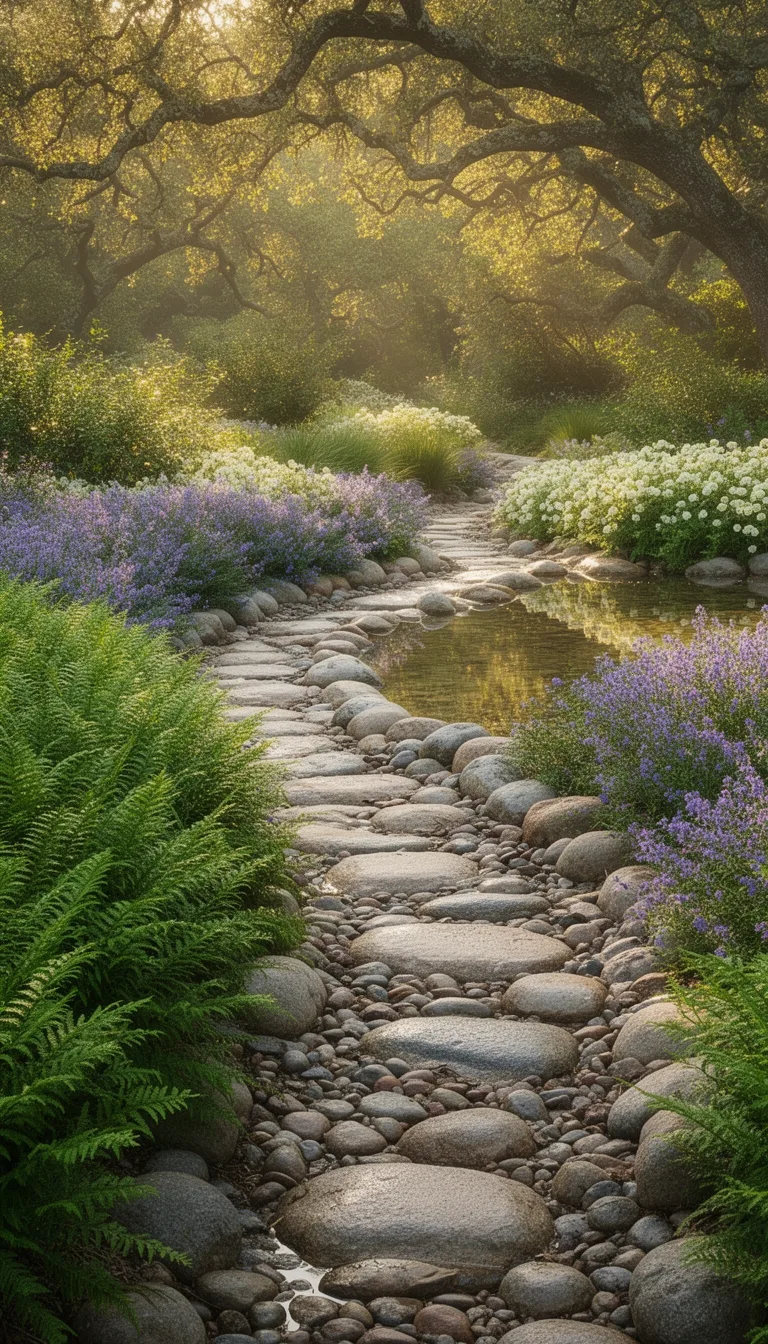
Swapping the straight‑line concrete look for a softer, organic flow, you can shape a winding garden trail using hand‑set river rocks. Begin by sketching a gentle S‑curve on graph, then mark the path with a garden hose or flexible rope.
Clear the soil to a depth of six inches, adding a layer of coarse sand for drainage. Lay a landscape fabric to suppress weeds, then spread a thin sand bed.
Choose uniformly sized river rocks, arranging them so each stone nests snugly against its neighbors, creating a seamless, tactile surface. Press each rock firmly to prevent shifting, and fill gaps with sand or fine gravel.
Finish by edging with low‑profile metal or stone borders to keep the rocks in place and maintain the curve’s elegance.
Install a Low‑Maintenance Gravel Walkway Idea With Edge Restraints

Choosing sturdy edge restraints lets you keep a gravel walkway neat and low‑maintenance, preventing stones from spilling onto lawns or flower beds.
First, mark the path with a garden hose or string, then dig a shallow trench about 4 inches wide and 2 inches deep. Lay a geotextile fabric to stop weeds, and spread a 2‑inch layer of compacted sand as a base.
Next, install the edge restraints—metal, plastic, or stone curbs—driving them into the trench and securing them with concrete or compacted soil. Finally, pour the gravel, raking it level and edging it against the restraints.
- Dig and prep base
- Install and secure restraints
- Add and level gravel
Build a Whimsical Mosaic Tile Walkway Idea for Colorful Impact
Create a whimsical mosaic tile walkway by first sketching your design on paper, then laying out the pattern with temporary spacers before you set any tiles.
Choose a mix of glazed ceramic, glass, and stone pieces in bright hues; arrange them into spirals, hearts, or abstract blocks that echo your garden’s theme.
Prepare a level base of sand‑cement mix, compact it, and add a thin layer of mortar.
Press each tile firmly into the mortar, using spacers to keep grout lines even, and trim edges with a wet saw for a clean finish.
Once the layout feels right, remove spacers, fill joints with sand or grout, and sweep away excess.
Seal the surface to protect colors and enhance durability, then step back and enjoy the vivid, personalized path.
Use Reclaimed Wood Plank Walkway Idea for Sustainable Warm‑Toned Paths
Sustainability meets warmth when you lay reclaimed wood planks as a garden walkway, turning salvaged timber into a sturdy, earth‑toned path that ages gracefully underfoot.
You’ll notice the natural grain and weathered patina blend seamlessly with surrounding foliage, creating an inviting, tactile surface.
Before installation, treat the wood with a low‑VOC sealant to resist moisture and UV damage, then lay a compacted sand base for stability.
The result feels cozy under each step while honoring recycled resources.
- Prep the site – clear debris, level the ground, and spread a 2‑inch sand layer.
- Treat the planks – sand, clean, and apply eco‑friendly sealant.
- Lay and secure – stagger joints, use stainless‑steel screws, and add a border of gravel for drainage.
Add Ground‑Level LED Strip Walkway Idea for Subtle Night‑Time Glow
After the warm, reclaimed‑wood path settles into your garden, a low‑profile LED strip can add a subtle night‑time glow without disrupting the natural aesthetic.
Choose a weather‑proof, flexible strip that fits snugly in a shallow trench or under a thin stone cap. Lay the strip along the edge of the walkway, keeping it flush with the ground to preserve a seamless look. Use a dimmable controller so you can adjust brightness for evenings or moonlit nights. Seal the connections with silicone sealant to guard against moisture.
Position the LEDs just a few centimeters above the soil to illuminate stepping stones while casting gentle shadows on surrounding foliage. This understated lighting guides you safely and enhances the garden’s nocturnal charm.
Power Your Pathway LEDs Safely and Efficiently
Powering your pathway LEDs safely and efficiently starts with choosing the right low‑voltage transformer and waterproof connectors. You’ll want a transformer rated for outdoor use, with a voltage output matching your LED strip’s specifications, and connectors sealed against moisture. Keep wiring hidden in conduit or under mulch to protect it from foot traffic and weather. Test the circuit before burying anything, and use a GFCI outlet for added safety.
- Select a transformer – match wattage, ensure IP65 rating.
- Install waterproof connectors – twist‑lock, silicone‑sealed, UV‑resistant.
- Route and protect wiring – conduit, trench, mulch cover, GFCI protection.
Follow these steps, and your garden path will glow reliably night after night, with minimal maintenance and maximum safety.
Craft a Formal Symmetrical Walkway Idea With Interlocking Porcelain Tiles
Once your LED system is securely installed, you can shift focus to the pathway surface itself. Choose high‑gloss porcelain tiles in a neutral tone, then lay them in a mirrored herringbone pattern that radiates from the garden’s central axis.
Measure the space, mark a precise 45‑degree grid, and cut tiles with a wet saw to fit corners without gaps. Use a polymer‑based thin‑set mortar for durability, and press each tile firmly to ensure even spacing.
After the mortar cures, sweep a fine‑grit sanded joint filler into the seams, then seal with a penetrating stone sealer to protect against moisture and foot traffic. The result is a sleek, symmetrical walkway that guides visitors gracefully while showcasing the crisp, reflective surface of the porcelain.
Integrate a Water‑Feature Border Walkway Idea With Pebble‑Lined Stream Beds
Lay a gentle water‑feature border along your garden walkway by embedding a shallow, recirculating stream that runs parallel to the path. The flowing water catches light, while a pebble‑lined bed adds texture and a natural edge. You’ll keep the system low‑maintenance by using a closed‑loop pump and selecting native stones that resist shifting.
1⃣ Dig a trench 4‑6 inches deep, line it with a flexible liner, and slope it gently toward the pump reservoir.
2⃣ Fill the trench with washed river pebbles, arranging them in staggered layers for stability and visual interest.
3⃣ Install a discreet pump, connect a solar panel if desired, and test flow before covering edges with edging stones.
The result is a soothing border that guides walkers, frames plantings, and creates a tranquil garden ambience.
Construct a Raised Boardwalk Walkway Idea Over Wet Soil With Composite Decking
If your garden sits on soggy ground, a raised boardwalk lets you stroll comfortably while keeping the soil dry.
Begin by marking a straight line and installing pressure‑treated lumber posts 12‑18 inches apart, driven into compacted gravel for stability.
Attach composite decking boards to the posts with hidden fasteners, spacing them ¼‑inch apart for drainage.
Composite material resists rot and mold, so you won’t need frequent sealing.
Add a simple railing of metal balusters if you want extra safety on steeper sections.
Finish the edges with a low‑profile trim to hide gaps and keep leaves from slipping under.
The result is a sturdy, dry pathway that blends with your garden’s natural look while requiring minimal upkeep.
Apply Textured Stamped Concrete Walkway Idea for Stone‑Like Finish
Create a textured stamped concrete walkway to give your garden a stone‑like finish that’s both durable and low‑maintenance.
First, you’ll prepare the sub‑base, compacting gravel and adding a moisture barrier to keep the concrete stable.
Next, pour a smooth concrete slab, then press a patterned stamp before it sets, mimicking flagstone or slate.
Finally, apply a tinted sealant that enhances color depth and protects against weather.
- Sub‑base preparation – level, compact, and dampen the base for optimal adhesion.
- Concrete pouring and stamping – work quickly, use a flexible stamp, and vibrate to release air bubbles.
- Sealing and curing – choose a UV‑resistant sealant, apply in thin coats, and let cure for at least 48 hours.
This process yields a realistic stone look with minimal upkeep, letting you enjoy a sturdy, attractive path all season.
Install a Decorative Metal Grate Walkway Idea for Industrial‑Chic Appeal
Installing a decorative metal grate walkway instantly gives your garden an industrial‑chic vibe while providing a sturdy, slip‑resistant surface.
Choose a grate pattern that complements your landscape—hexagonal, linear, or perforated—and select a finish that resists rust, such as powder‑coated steel or galvanized aluminum.
Lay a compacted sand base, then set the grates on top, securing them with stainless‑steel screws or brackets to prevent movement.
Trim edges with matching metal flashing to keep soil from spilling onto the walkway.
Incorporate low‑lying LED strips beneath the grates for subtle illumination at night, enhancing both safety and visual interest.
This approach blends modern aesthetics with durability, creating a functional path that stands up to foot traffic and weather.
Use Compacted Clay (Pressed Earth) Walkway Idea for Eco‑Friendly Trail
By compacting clay into a solid, low‑maintenance path, you’ll give your garden an eco‑friendly trail that blends seamlessly with the landscape.
First, gather native clay, sand, and a little organic matter; mix them until the texture feels gritty yet cohesive.
Next, lay the blend in a shallow trench, tamp it down with a plate compactor or sturdy board, and repeat until the surface reaches a firm, level finish.
Finally, seal the edge with a thin gravel curb to prevent erosion and keep the path defined.
- Prepare the material – combine clay, sand, organic matter.
- Form and compact – spread, tamp, repeat for density.
- Finish and protect – add curb, water lightly, let cure.
This method yields a durable, natural walkway that absorbs rain, supports plant health, and requires minimal upkeep.
Build Mixed‑Material Walkway Idea With Stone, Wood, and Metal Accents
After compacted clay, you can add visual interest and durability by mixing stone, wood, and metal in a single walkway. Start by laying a base of compacted sand, then set large flagstones at regular intervals for stability.
In the gaps, insert weather‑resistant timber slats, cutting them to fit snugly and sealing them with outdoor varnish. Add metal accents—steel or copper brackets, decorative bolts, or thin railings—along the edges to tie the materials together and prevent shifting.
Choose contrasting textures: smooth stone, warm wood grain, and brushed metal. Ensure each component is level, secure, and properly drained to avoid water pooling. The result is a sturdy, eye‑catching path that blends natural and industrial aesthetics.
Create a Playful Foam‑Tile Walkway Idea for Kids
Often the best way to turn a simple garden path into a kids’ playground is to lay interlocking foam tiles that cushion steps and spark imagination. Choose tiles with bright, non‑toxic colors and a slip‑resistant surface. They snap together quickly, so you can cover a curved or straight strip in under an hour. Keep the edges flush with surrounding mulch or stone to prevent tripping.
- Prep the base – remove weeds, level soil, and add a thin layer of sand for stability.
- Lay the tiles – start at one end, interlock each piece, and trim excess with a utility knife.
- Secure and seal – apply a child‑safe adhesive if needed, then spread a clear UV‑resistant sealant to protect against weather.
Your garden path now invites safe play, bright visual cues, and easy maintenance.
Finish With a Curved Hedge Border Walkway Idea for Seamless Lawn Transition
When you want a garden path that flows naturally into the lawn, a curved hedge border walkway does the trick. Plant low‑maintenance shrubs—boxwood, lavender, or dwarf rosemary—along a gentle S‑curve that mirrors the path’s line.
Space the plants 18‑24 inches apart, then trim them to a uniform height of about 12 inches for a tidy edge. Mulch the base with fine bark or gravel to suppress weeds and improve drainage.
As the hedge arches, it creates a soft transition, guiding eyes from the walkway to the open lawn without harsh borders. Install subtle edging stakes to keep the curve steady, and water the hedge early in the morning for best growth.
The result is a seamless, inviting flow that feels both structured and organic.
Conclusion
Pick the style that fits your garden’s vibe, then follow the basics: prep a solid base, lay the chosen material, add edging or lighting, and seal or maintain as needed. Whether you go rustic with slate, sleek with concrete pavers, or playful with foam tiles, each walkway will guide foot traffic, enhance curb appeal, and stand up to weather. With proper installation and upkeep, your path will stay beautiful and functional year after year.
The Only Tools You Need for a Thriving Garden 🌱
Whether you're a weekend gardener or growing daily — these hand-picked tools make every session faster, easier, and more satisfying.