Now’s your time to build garden resilience for next season. You’ve got a critical list to tackle before the deep cold sets in. Don’t just clear debris—test your soil, protect vulnerable plants, and winterize your tools correctly. The difference between a good year and a great one lies in these meticulous steps. Are you covering everything, or is a key task slipping past you before the ground freezes solid?
Key Takeaways
- Remove and discard all plant debris to eliminate overwintering sites for pests and diseases.
- Apply a thick mulch layer around plants after the first hard freeze to insulate roots.
- Test soil pH and nutrient levels, then amend with compost to enrich it over winter.
- Prune dormant trees and shrubs to remove dead wood and improve shape for spring.
- Winterize irrigation systems and clean then store garden tools in a dry area.
Understand Why Winter Prep Is Essential
Because you’re not just tending a garden for a single season, you’re cultivating a living system. Winter prep protects that system’s health and sets its stage for spring vigor.
You’re insulating perennial roots and crowns against damaging freeze-thaw cycles. You’re disrupting pest and disease lifecycles, denying them cozy overwintering sites.
When you improve soil structure now, you enhance drainage and aeration before the heavy rains or snows settle in. This work saves you significant time and trouble later; a well-prepped garden revives faster, with fewer setbacks from rot, infestation, or winterkill.
Think of it as preventive medicine for your plot. Your actions this fall directly determine next year’s resilience, early growth, and ultimately, your harvest’s abundance. It’s a foundational investment.
Start With a Thorough End-Of-Season Cleanup
While a bit of natural debris can offer shelter to some beneficial insects, a thorough cleanup is your most effective first strike against next year’s pests and diseases. Start by removing all spent annuals and vegetable plants, as they can harbor pathogens. Don’t just cut perennials back; clear every leaf and stem from the soil surface. Bag and trash any diseased material—never compost it. This meticulous removal eliminates overwintering sites for insects and fungal spores, giving you a clean slate for spring.
| Task | Reason |
|---|---|
| Remove all annual plants | Eliminates decaying matter that shelters pests |
| Cut back & clear perennial debris | Prevents disease carryover on old foliage |
| Rake up all fallen leaves & fruit | Destroys habitats for insects and rot organisms |
| Bag & discard diseased material | Stops pathogens from recycling into your garden via compost |
| Clean & store supports & pots | Removes attached pests and prevents soil-borne disease transfer |
A clean garden bed denies pests a home and drastically reduces spring disease pressure.
Test and Amend Your Soil Before It Freezes
Following your thorough cleanup, turn your attention to the foundation beneath it all: your garden’s soil. Test its pH and nutrient levels now; you can’t fix what you don’t measure. Use a home test kit or send a sample to your local extension service. The results will tell you precisely what amendments you need.
If your soil is too acidic, you’ll work in some lime. If it’s alkaline, you’ll add sulfur. This is also the perfect time to incorporate generous amounts of well-rotted compost or aged manure. These organic materials will slowly break down over the winter, enriching the soil structure and boosting microbial life. By amending before the ground freezes, you give these improvements a head start for a vibrant spring.
Protect Vulnerable Plants With a Layer of Mulch
Now, shield your garden’s tender plants from winter’s harshness with mulch. Apply a two-to-four-inch layer around the base of perennials, roses, and newly planted trees or shrubs after the ground’s first hard freeze. Don’t pile it against stems or trunks, as that invites rot and pests. You’re creating an insulating blanket that moderates soil temperature, preventing damaging freeze-thaw cycles that heave roots from the ground. It also conserves soil moisture during dry, windy spells. Choose organic mulches like shredded bark, straw, or leaf mold; they’ll decompose and enrich your soil come spring.
| Mulch Type | Best Use | Key Benefit |
|---|---|---|
| Shredded Bark | Around trees & shrubs | Excellent insulation, decomposes slowly |
| Straw | Over perennial beds & vegetables | Lightweight, allows airflow |
| Leaf Mold | Throughout flower borders | Improves soil structure as it breaks down |
| Pine Needles | Around acid-loving plants | Allows water penetration, deters weeds |
Shield Sensitive Shrubs With Burlap Screens
Having safeguarded your plants with mulch, turn your attention to sensitive shrubs vulnerable to winter wind and sun. Evergreens like rhododendrons or boxwoods can suffer from desiccation, where foliage dries out from harsh conditions.
Erecting a simple burlap screen provides crucial protection without trapping damaging moisture against the plant itself. You’ll need stakes, twine, and burlap fabric.
- Drive four sturdy wooden stakes into the ground to frame the shrub, ensuring they’re taller than the plant.
- Staple or tie burlap to the windward and sun-facing stakes, creating a protective barrier that doesn’t envelop the foliage.
- Leave the top open for light and air circulation, and secure the material firmly so it won’t whip in the wind and cause damage.
Wrap Young Tree Trunks to Prevent Sunscald
Because young trees are especially susceptible to sunscald, you should wrap their tender trunks. This damage occurs when winter sun warms bark on freezing days, rupturing tissue.
Use a commercial tree wrap or craft your own from breathable material like burlap. Start wrapping from the base, securing it at the bottom, and spiral upwards to just below the lowest branches.
Don’t wrap too tightly; you’ll need to allow for some trunk expansion. Ensure the wrap overlaps so it provides continuous coverage.
Apply it after the first hard frost and remember to remove it promptly in early spring. If you leave it on too long, you’ll risk trapping moisture and encouraging pests or disease.
Prune Deciduous Trees and Shrubs While Dormant
Although winter is the quiet season in the garden, it’s the ideal time to prune your deciduous trees and shrubs while they’re dormant.
With the leaves gone, you can clearly see the branch structure, making it easier to remove deadwood and shape the plant.
Dormant pruning minimizes stress on the plant and reduces the risk of disease transmission.
You’ll need sharp, clean tools.
Focus on these three precise actions:
- Remove any dead, damaged, or diseased branches first, cutting back to healthy wood.
- Thin out crowded areas by eliminating crossing or inward-growing branches to improve air circulation.
- Make your final cuts to shape the plant, always pruning just above a bud or branch collar and never leaving a stub.
Cut Back Perennials That Need It (And Leave Those That Don’t)
Now shift your focus from woody plants to your perennial beds. This task isn’t a blanket chop job; you must be selective.
Cut back the messy, flopping foliage of hostas and peonies to the ground after a hard frost to remove disease havens. Trim ornamental grasses in late winter before new growth appears.
However, leave standing any perennials with strong stems, seed heads, or architectural interest, like sedums, coneflowers, or ornamental grasses. These provide crucial winter food and shelter for birds and insects.
Leaving the crown and some foliage also offers the plant’s own insulation against freeze-thaw cycles. Always sanitize your pruners between plants to prevent spreading any lingering pathogens.
Winterize Your Irrigation System
To protect your irrigation system from freezing damage, start by turning off the main water supply and setting the controller to “rain mode” or shutting it down completely.
You’ll then need to drain all the water from the pipes, valves, and sprinkler heads to prevent costly cracks. This process is meticulous but straightforward.
- Open the system’s manual drain valves at low points and let the water run out.
- For stubborn water, use a compressed air blow-out method, but keep the pressure under 50 PSI to avoid damaging the lines.
- Insulate any above-ground components, like backflow preventers, with foam covers, ensuring they’re sealed tight against the cold.
Prepare Your Garden Beds for Early Spring Planting
Because you want your garden beds ready for early spring planting, it’s best to start preparing them now before the ground freezes solid.
First, remove all spent plant material and weeds to prevent pests and diseases overwintering.
Next, you’ll want to test your soil’s pH and nutrient levels; amend it accordingly with compost or other organic matter.
Gently incorporate these amendments into the top few inches of soil.
This process improves soil structure and fertility, allowing amendments to integrate over winter.
Finally, consider applying a light layer of mulch, like straw or shredded leaves, to protect the soil surface from erosion and extreme temperature fluctuations.
This meticulous prep work means you’ll have fertile, workable beds ready for your first seeds.
Plant Spring-Blooming Bulbs Before the Frost Is Deep
After you’ve readied your beds, shift your attention to planting spring-blooming bulbs while the soil is still workable. You must get them in before a deep, hard frost locks the ground solid.
Select healthy, firm bulbs like tulips, daffodils, and crocus for a vibrant spring display. Follow these precise steps for success:
- Dig each hole to a depth three times the bulb’s height, using a trowel or bulb planter for uniformity.
- Place the bulb with its pointed end facing up and roots down, then backfill with soil, firming it gently to eliminate air pockets.
- Space them according to variety, typically two to three bulbs’ width apart, to allow for proper growth and airflow.
A final light watering settles them in for their winter dormancy.
Build Simple Cold Frames for Extended Harvests
You can stretch your fresh harvest well past the first frost by constructing simple cold frames over your existing garden beds. Use old storm windows or clear polycarbonate sheets as lids, hinging them to wooden sides built from scrap lumber. Angle the frame southward to capture maximum winter sun.
On sunny days, prop the lid open a few inches with a stick to prevent overheating and vent excess moisture. Before a hard freeze, cover the frame with an old blanket or burlap sack for added insulation.
This creates a protected microclimate, letting you continue harvesting cold-hardy greens like spinach and kale for weeks. Just ensure you’ve anchored the frame securely against winter winds.
Give Your Lawn a Final Winter Prep
Ensure your lawn survives winter’s stresses and rebounds vibrantly come spring by completing these final preparations. You’ll prevent matted grass and fungal issues by giving it a proper send-off.
Start with a final, careful mowing, setting your blade slightly lower than usual to reduce excessive foliage that can harbor mold under snow. Next, rake thoroughly to remove all fallen leaves, twigs, and debris; this eliminates damp, decaying mats that suffocate grass roots. Finally, apply a winterizing fertilizer with a higher potassium content to strengthen cell walls and boost root resilience against freezing temperatures.
- Mow Strategically: Cut the grass to about 2 inches, collecting clippings to avoid leaving a thick, wet blanket.
- Rake Meticulously: Clear every leaf and branch, exposing the soil and grass to air and light.
- Feed for Strength: Apply a slow-release, high-potassium fertilizer to nourish roots without spurring top growth.
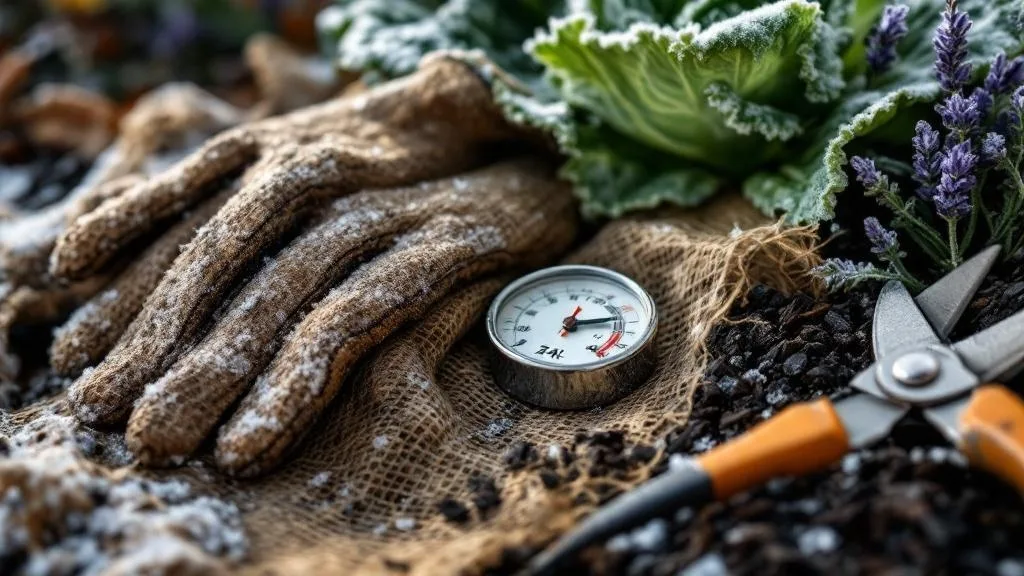
Clean and Sharpen Your Garden Tools for Storage
Transition your attention from the lawn to the shed, because giving your tools a thorough cleaning and sharpening now prevents rust and ensures they’re ready for spring.
Start by scrubbing off all soil and sap with a wire brush and soapy water; dry them completely. For metal parts, wipe a light coat of oil on blades and hinges to inhibit corrosion.
Sharpen the cutting edges of pruners, loppers, and shovels with a file or whetstone, maintaining the original bevel.
Check wooden handles for splinters, sanding them smooth, and apply a coat of linseed oil.
Finally, organize everything in a clean, dry storage area. This meticulous care extends your tools’ life and makes your first spring tasks effortless.
Store Tender Bulbs and Tubers Indoors for Winter
Often, tender bulbs like dahlias and gladiolus need a cozy winter refuge indoors. After the first frost blackens their foliage, carefully dig them up, keeping your spade a good distance away to avoid damaging the tender structures. You’ll then cure and store them properly to ensure they survive until spring.
- Gently brush off most of the soil and let the bulbs cure in a dry, airy spot for about a week.
- Pack them in ventilated boxes or paper bags filled with slightly moistened peat moss, sawdust, or vermiculite.
- Label each container clearly and store it in a cool, dark location where temperatures stay consistently between 40-50°F, checking monthly for rot or desiccation.
Plan and Order Next Year’s Seeds Now
As you tuck those bulbs away for winter, your attention can turn to next spring’s garden by planning and ordering seeds now. Review your garden notes or last year’s seed packets to recall what thrived and what failed. Early ordering ensures you’ll get your first-choice varieties before they’re sold out.
Decide on any new vegetables or flowers you’d like to try and research their specific needs against your garden’s conditions. Check your stored seed viability, tossing anything past its prime. Organize a master list by planting dates to avoid last-minute confusion. Then, choose a reputable supplier and place your order promptly. Having your seeds in hand by late winter lets you start your schedule precisely when the time is right.
Attract Birds That Help Your Winter Garden
You’ll discover that birds aren’t just pleasant visitors; they’re active partners in maintaining your winter garden’s health. They’ll diligently consume overwintering insect eggs, larvae, and weed seeds, providing natural pest control. To reliably attract these helpful allies, you must provide consistent food, water, and shelter. Your meticulous planning now ensures their presence throughout the coldest months.
- Offer high-energy foods like black oil sunflower seeds, suet cakes, and nyjer seed in clean, sheltered feeders to sustain them.
- Provide liquid water using a heated birdbath, as finding unfrozen water is their greatest winter challenge.
- Leave some perennials uncut and create brush piles to offer crucial shelter from wind and predators.
Check on Your Garden After Heavy Snow or Ice
While a deep snow blanket can insulate plants, heavy accumulations or ice demand prompt inspection to prevent damage.
Gently brush heavy snow off evergreen shrubs and hedges before it compacts into ice; use a broom and push upward from underneath branches to avoid breaking them.
Check for ice glaze on limbs and carefully chip it away if you can without causing harm.
Inspect tree branches, especially on young or weak trees, for signs of bending or cracking under the weight.
Look for snowdrifts that might bury or crush smaller plants or perennials.
Clear any major accumulations from paths and structures to prevent collapse and ensure you can safely navigate the garden for these essential checks.
What to Do During a Winter Thaw?
A sudden winter thaw lets you tackle tasks that were buried under snow and ice. Use this mild window for a meticulous inspection and corrective work to protect your garden’s health. Focus on these key actions:
- Check for heaving and drainage: Gently press any exposed perennials or bulbs back into softened soil if frost has pushed them up. Clear any clogged drains or channels so melting water flows away from plant crowns and foundations.
- Prune winter damage: Carefully snip off broken branches from trees and shrubs, making clean cuts just outside the branch collar. Remove any tattered foliage from ornamental grasses or perennials that’s been crushed by snow.
- Assess protective covers: Remove heavy, waterlogged row covers or burlap to let plants breathe and prevent rot, but be ready to recover them if a hard freeze is forecast.
Create Your Spring Planting Schedule
To craft a timely spring planting schedule, you’ll need to account for your local frost dates and each plant’s specific germination or transplanting window. Consult seed packets for “days to maturity” and mark your calendar backward from your area’s last expected frost.
Group plants by their cold tolerance. You can direct-sow hardy peas and spinach several weeks before that frost date. Start tender tomatoes and peppers indoors 6-8 weeks prior. Schedule transplanting them only after all frost danger has passed.
You’ll want to stagger plantings of quick crops like radishes for a continuous harvest. Keep this schedule flexible; monitor soil temperature and weather, ready to adjust your timing for optimal results.
Frequently Asked Questions
Can I Use Leaves From My Trees as Mulch?
Yes, you can use leaves as mulch. Shred them first to prevent matting. Apply a 2-3 inch layer around plants; it’ll insulate roots, suppress weeds, and enrich your soil as it decomposes over winter.
What Temperature Kills Most Garden Pests Over Winter?
Sustained temperatures below 10°F will kill many pests, but you must expose them. Till your soil to bring insects to the surface where a hard freeze can reach their overwintering eggs and larvae.
How Do I Protect My Roses in Pots Over Winter?
First, wrap your pot in bubble wrap or burlap to insulate it. Then, mound mulch over the base of the rose to protect the crown. You’ll also want to move the pot to a sheltered, cool spot.
Should I Water My Evergreens in the Winter?
Yes, water them during warm spells when the ground isn’t frozen. Their roots still need moisture, but you’ll only do it a few times over the season when the soil is dry.
Is Snow Cover Good or Bad for My Garden?
Snow cover’s generally good—it’s a natural insulator protecting plant roots and crowns. Just brush heavy, wet snow off fragile branches to prevent breakage; otherwise, you’ll let it do its beneficial work.
Conclusion
You’ll thank yourself next spring. Wrap up these tasks methodically, and your garden will be set. Remember to sharpen those tools and check on your shrubs after storms. You’ve laid the groundwork; now you can watch winter work its quiet magic on your well-prepped beds. Just be ready to remove those wraps when the weather finally turns.
The Only Tools You Need for a Thriving Garden 🌱
Whether you're a weekend gardener or growing daily — these hand-picked tools make every session faster, easier, and more satisfying.