You’ve probably looked at your backyard and thought it could be so much more. It’s time to transform that space into a true extension of your home. We’ve got 25 practical ideas to help you create zones for living, growing, and relaxing. You’ll discover how to add structure, year-round color, and those special features that make a garden truly your own paradise. Let’s start planning your retreat.
Key Takeaways
- Define your garden’s purpose to guide plant selection and design choices for a cohesive layout.
- Use curved paths and layered borders to create visual interest and reveal garden vignettes.
- Incorporate pergolas and arbors with climbing vines for vertical structure and seasonal blooms.
- Add a fire pit or meditation corner to create a focal point for relaxation and entertaining.
- Plant mixed borders with nectar-rich flowers for continuous color and to support pollinators.
Define Your Garden’s Purpose Before You Plant

Before you pick up a shovel or buy a single seed, you’ve got to ask yourself what you really want from your garden. Is it a kitchen garden bursting with tomatoes and herbs for your summer meals? Perhaps you dream of a cutting garden filled with blooms for your own bouquets. Maybe you need a low-maintenance, drought-tolerant space that looks great with minimal water.
You could be planning a quiet retreat for morning coffee, where fragrant plants and gentle sounds create a sanctuary. Defining this core purpose guides every decision you’ll make. It determines your plant choices, your budget, and how much time you’ll spend tending your paradise. Get this right, and you’re building on a solid foundation.
Plan Your Garden Layout by Zoning Your Space

Now that you’ve identified what you want from your garden, you can map out where it all goes. Zoning organizes your space for both beauty and function. Think of your yard in distinct activity areas. You’ll group elements with similar needs—like full-sun veggies or shaded relaxing spots—creating efficient, stunning sections. Sketch a simple layout, noting sunlight patterns and existing features. This planning prevents chaos and ensures every plant and pathway has a purpose.
| Zone Type | Key Elements |
|---|---|
| Active Growing | Vegetable beds, herb gardens, compost bins |
| Entertaining | Patio, dining area, barbecue station |
| Quiet Relaxation | Ornamental borders, water features, aromatic plants |
| Utility/Storage | Shed, tool storage, potting bench |
| Play & Recreation | Lawn space, play structures, game areas |
Build a Cozy Garden Seating Nook

After you’ve mapped out your garden zones, transform a quiet relaxation area into a personal sanctuary by building a cozy seating nook. Choose a sheltered spot and start by laying a simple, level base using gravel or pavers.
Weather-resistant furniture is key; select a small bench or a pair of armchairs that invite you to sit down. Arrange them to face your garden’s best view.
You’ll add instant comfort with cushions in durable fabrics and a small, sturdy side table for your book or teacup. Finish by enhancing the sense of enclosure. You can install a lightweight pergola overhead or train climbing vines along a nearby trellis to frame your new retreat perfectly.
Create a Vibrant Flower Border for Year-Round Color

To bring continuous life to your garden, consider planting a vibrant border that offers changing colors and textures through every season.
Start by choosing a mix of perennials, annuals, and shrubs.
For spring, plant bulbs like tulips and early bloomers such as creeping phlox.
Follow with summer stars like coneflowers and daylilies.
Incorporate autumn’s glow with sedum and ornamental grasses.
Don’t forget winter interest from evergreen foliage or the bright stems of dogwood.
Arrange plants in layers, placing taller varieties at the back and shorter ones in front.
Ensure you group at least three of the same plant for visual impact.
You’ll achieve a dynamic display that evolves beautifully month after month.
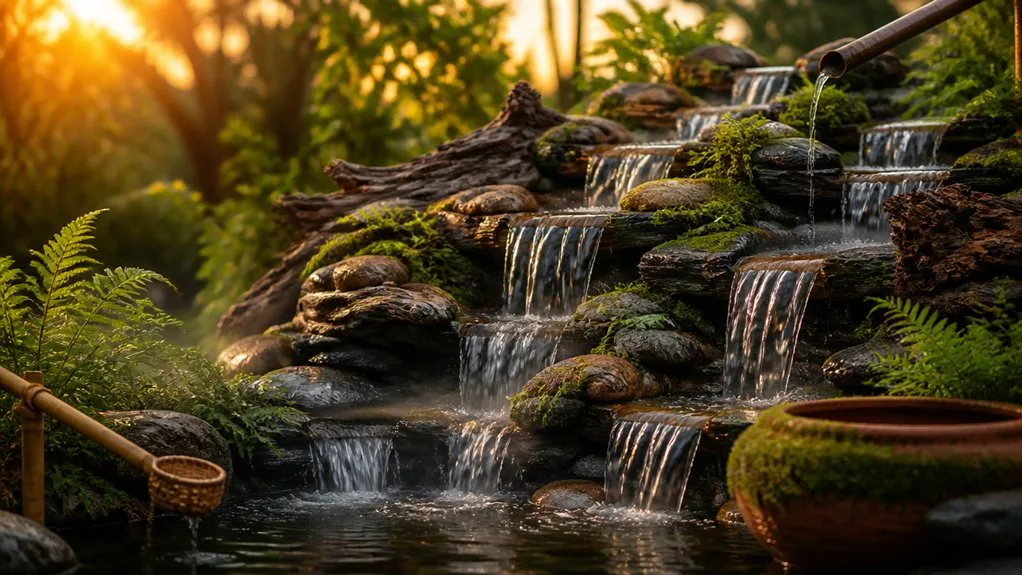
Install a Simple Water Feature for Instant Serenity
You’ll begin by choosing your water feature, considering a compact fountain or a small birdbath that suits your space.
Next, you’ll find its perfect spot, ensuring it’s both visible for enjoyment and practical for power access.
Finally, you’ll keep it clean and balanced, adding a simple maintenance routine to preserve its tranquil charm.
Selecting Your Water Feature
Since a backyard water feature can transform your space into a tranquil oasis, let’s explore the simple options available to you.
First, consider a classic birdbath; it’s inexpensive and instantly attracts wildlife.
For gentle sound, a wall-mounted spout or a modest self-contained fountain is perfect—they recirculate water and are easy to install.
If you have a bit more room, a small pond or a bubbling rock feature creates a captivating focal point.
Always think about your desired maintenance level. A basic container water garden with aquatic plants is low-care, while a pond with fish requires more commitment.
Your choice should blend seamlessly with your garden’s size and your personal style for maximum impact.
Placement And Design Tips
Now that you’ve chosen your water feature, placing it thoughtfully in your backyard can enhance its serene effect. Consider visibility from your main seating area, so you can enjoy its calming sound.
A level, stable base is essential, using pavers or a concrete pad. Position your feature away from overhanging trees to minimize debris in the water.
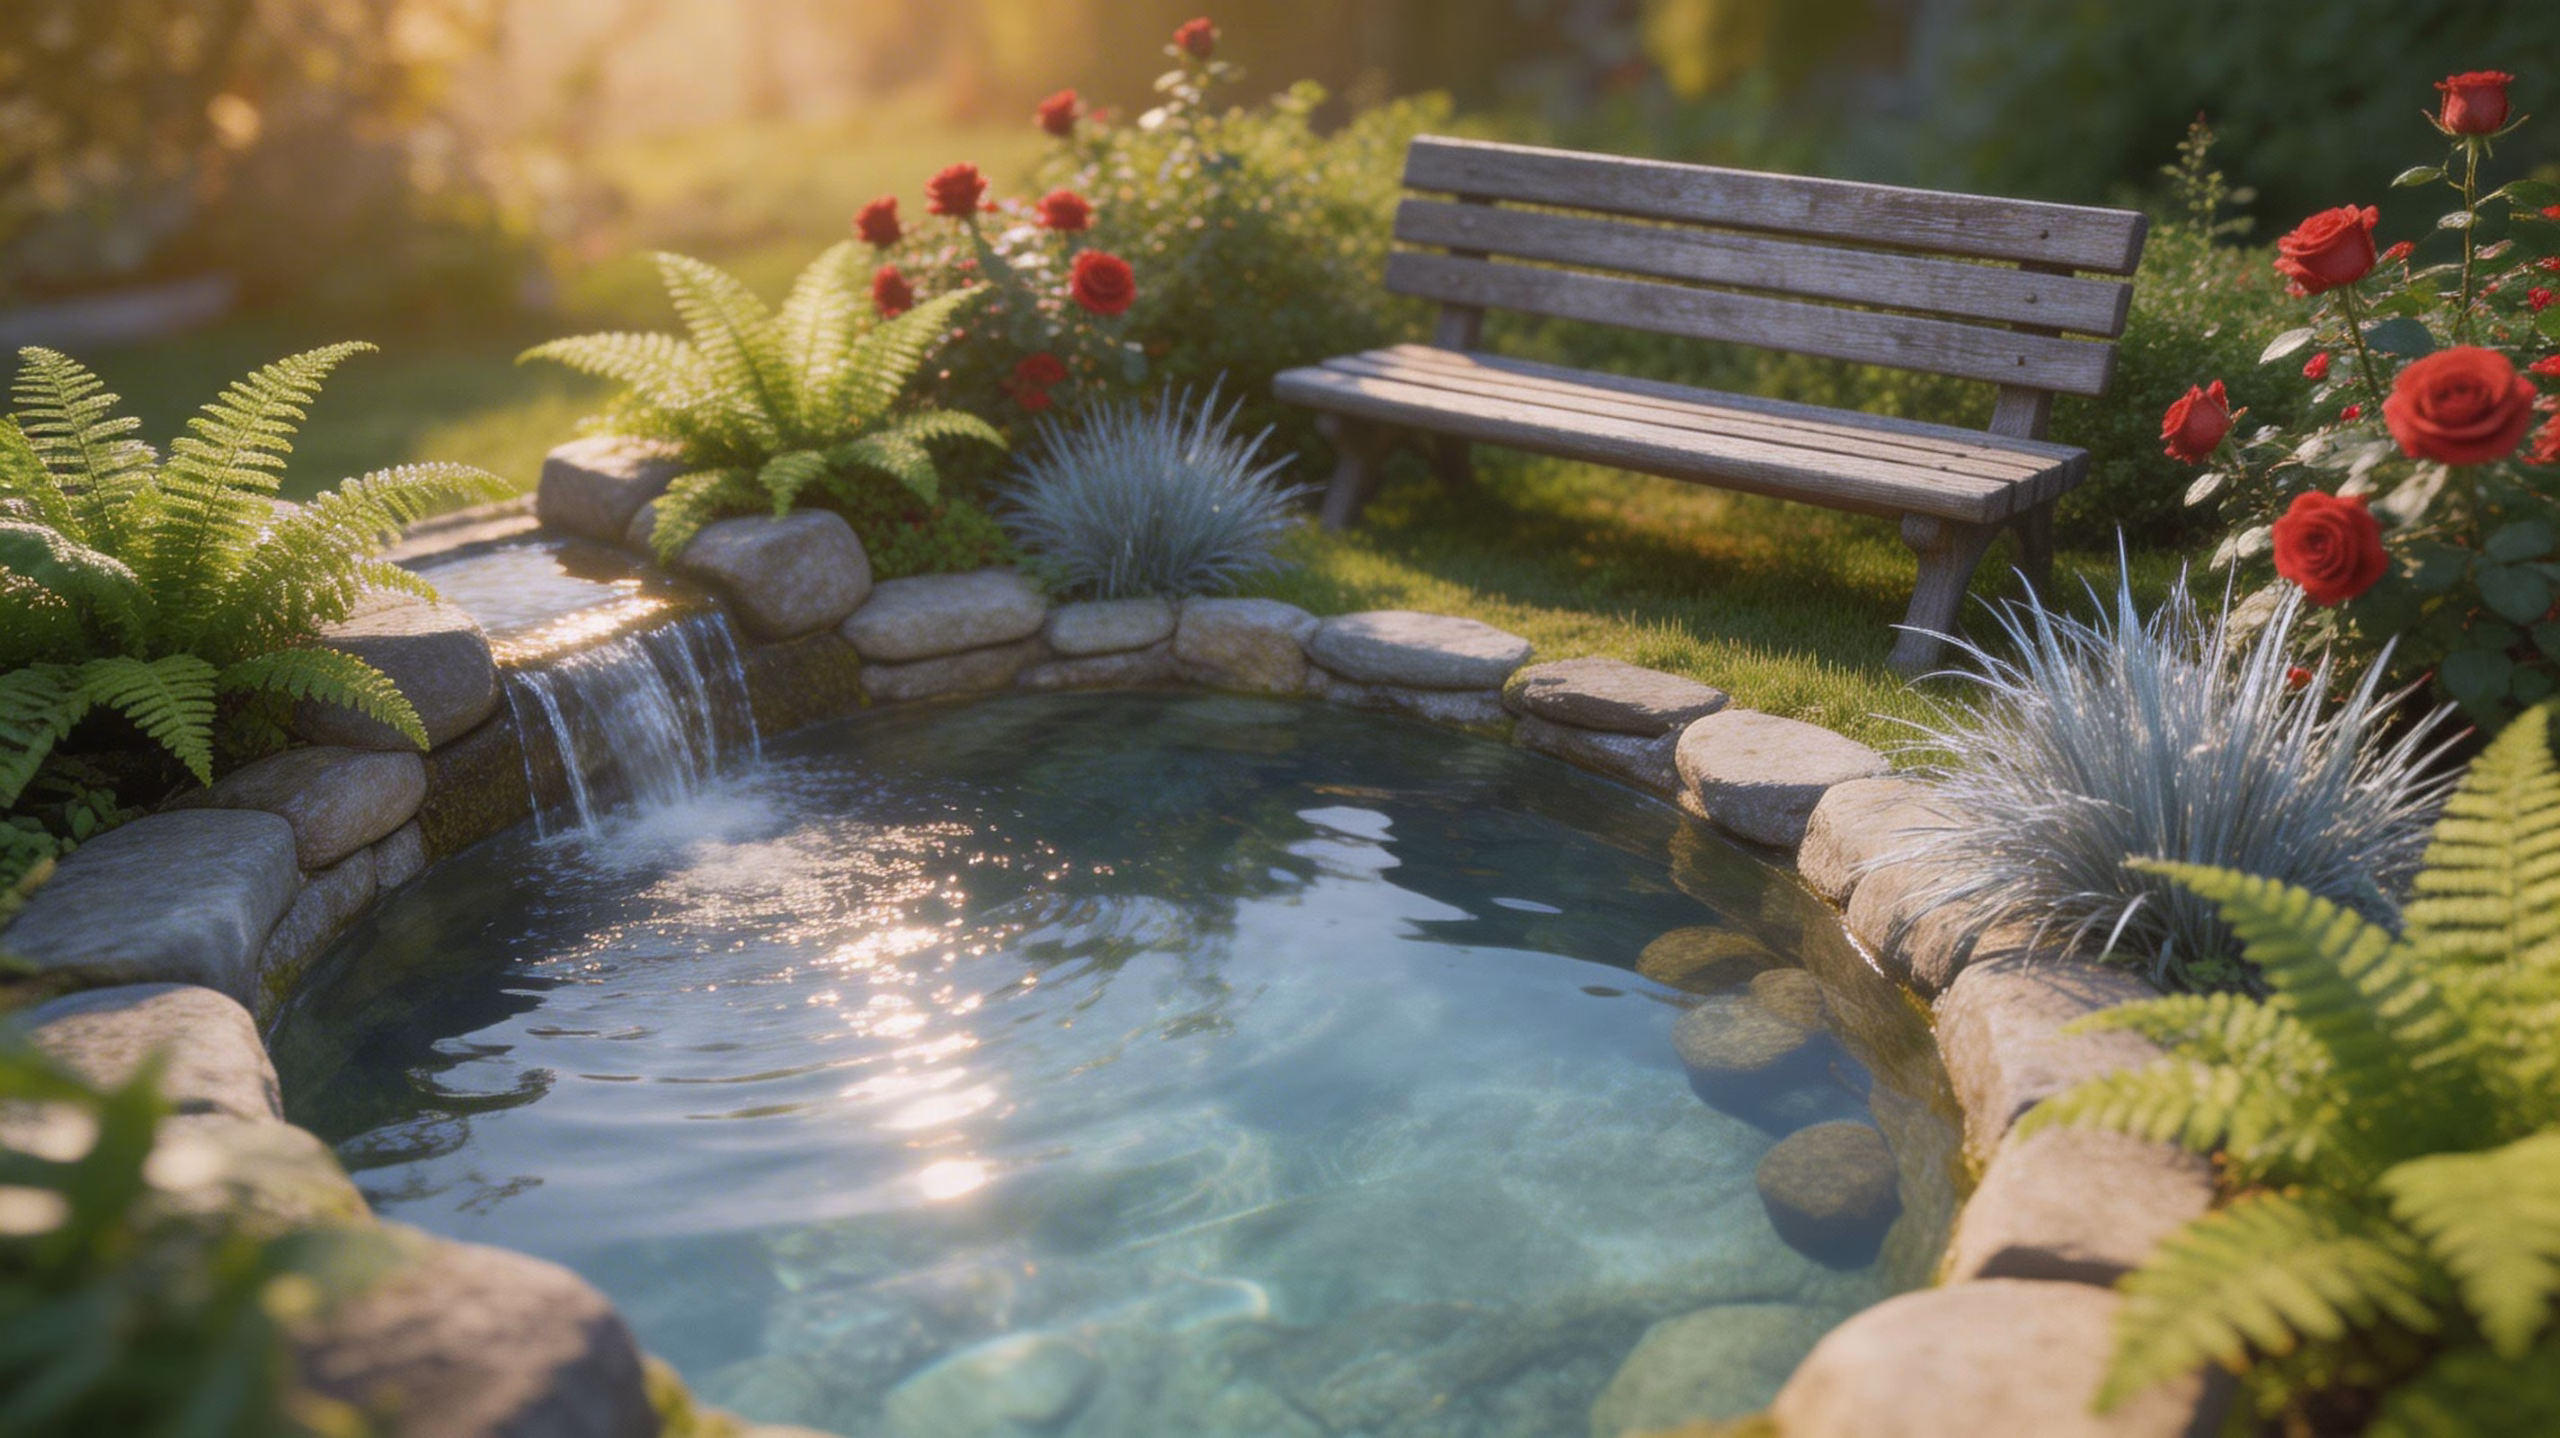
You’ll also want easy access to an outdoor power outlet for the pump. Think about integrating the design with your existing landscape; surround a small fountain with moisture-loving ferns or place a birdbath amidst your flowerbeds.
This careful placement turns a simple fixture into a natural focal point, instantly elevating your garden’s tranquil atmosphere.
Maintaining Water Feature Health
Regularly maintaining your water feature’s health is simple but essential for keeping that serene ambiance intact.
You’ll want to check the water level weekly, topping it off to protect your pump.
Scoop out fallen leaves and debris every few days to prevent clogs and algae.
Give the pump’s filter a good rinse monthly to ensure strong water flow.
For algae control, consider adding an aquatic plant like water lettuce or a barley straw bundle; they’re natural solutions.
In colder months, you’ll need to winterize your feature to prevent freeze damage.
This quick, consistent care takes minutes but guarantees your backyard paradise remains a crystal-clear, tranquil retreat all season long.
Design a Functional and Fun Family Lawn Area

Picture transforming your lawn into the family’s favorite gathering spot; it’s about creating a versatile space that effortlessly blends play, relaxation, and connection.
Start with a durable turf grass that withstands foot traffic. Define zones: a flat area for a portable badminton net or soccer goals, and a separate, shaded lounge space with comfortable, weatherproof seating.
Incorporate fun elements like a simple bocce court or a giant outdoor checkerboard painted on the grass. Add whimsy with solar-powered stake lights for evening games and durable, all-weather storage for toys.
You’ll want soft landing spots, so consider a mulch border around play equipment. This practical setup invites spontaneous play and cozy conversations, making your lawn the heart of your home.
Grow Your Own Kitchen Garden in Raised Beds

Kick your homegrown produce into high gear by cultivating a kitchen garden in raised beds, which give you control over soil quality and drainage while making planting, weeding, and harvesting a breeze.
Construct your beds from rot-resistant lumber or composite boards, keeping them no wider than four feet so you can easily reach the center from either side.
Fill them with a nutrient-rich blend of topsoil, compost, and well-rotted manure. This superior soil warms faster in spring, letting you plant earlier.
You’ll concentrate water and fertilizer exactly where your plants need it, reducing waste. Elevation also helps deter pests and minimizes soil compaction, ensuring strong root growth for a prolific harvest of herbs, salad greens, and vegetables right outside your door.
Pick Easy-Care Plants If You’re Always Busy

You’ll adore low-maintenance plants like sedum or hosta because they practically thrive on neglect.
Choose drought-tolerant selections such as lavender or Russian sage to save you from constant watering.
These smart picks keep your backyard beautiful without demanding all your free time.
Low Maintenance Plant Choices
| Plant Type | Key Low-Maintenance Perks |
|---|---|
| Ornamental Grasses | Provide year-round structure, need no deadheading. |
| Hostas | Thrive in shade, have dense foliage that suppresses weeds. |
| Sedum (Stonecrop) | Succulent leaves store water, very drought tolerant. |
| Daylilies | Tolerate various soils, bloom prolifically with minimal care. |
Drought Tolerant Selections
Since you don’t have time for frequent watering, focusing on drought-tolerant plants ensures your garden thrives even when you’re busy.
Start by selecting robust succulents like sedum or agave for striking texture. Lavender and rosemary add fragrant beauty while needing minimal moisture. Ornamental grasses, such as blue fescue, provide year-round structure.
For color, choose vibrant perennials like blanket flower or coreopsis; they flourish in dry heat.
Always group these plants together to create efficient watering zones. Amend your soil with compost to improve water retention initially, then let nature do the work.
Once established, these selections will survive on rainfall alone, freeing you from the hose and guaranteeing a lively, low-effort paradise.
Craft a Private Paradise With Strategic Screening

While a beautiful garden is a joy, true relaxation often requires a sense of seclusion. You can create that private sanctuary with strategic screening.
Start by planting fast-growing evergreen hedges like arborvitae or bamboo, ensuring they’ll block sightlines year-round. You can also install a stylish lattice or trellis and train climbing roses or clematis to cover it quickly. For an instant screen, use large, dense shrubs or decorative outdoor panels.
Position these barriers to shield seating areas or hide unsightly utilities. Remember to layer your screening—combine a low wall with taller plantings for depth. You’ll find this thoughtful enclosure transforms your space into a personal retreat where you can truly unwind.
Illuminate Your Garden for Evening Ambiance
Transform your nighttime garden into a glowing retreat by focusing on strategic light placement to highlight favorite trees or architectural features.
You’ll add both safety and style with lanterns and dedicated pathway lighting that guide your steps softly after dusk.
Then, experiment with colorful bulbs to instantly shift the mood from warm and welcoming to vibrant and festive for your evening gatherings.
Strategic Light Placement
As you plan your outdoor retreat, strategically placing lights can turn your garden into a magical evening escape. Think beyond simple visibility; you’re sculpting with light. First, use uplighting to graze a textured wall or dramatically silhouette a sculptural tree from below.
Downlighting from a high branch mimics moonlight, casting soft, dappled shadows across your patio. Always highlight your garden’s best features—like a stunning water feature or a prized specimen plant—with focused spotlights. Remember to layer different lighting types and intensities for depth.
Place fixtures to minimize glare in seating areas, ensuring comfort. You’ll create inviting pockets of light that extend your living space well into the night, making every evening feel special.
Lanterns and Pathway Lighting
From accenting features with strategic beams, you can also guide movement and define spaces with lanterns and pathway lights.
Start by outlining walkways with low-voltage LED stake lights, ensuring safe navigation without overwhelming glare. Place them about six to eight feet apart for consistent illumination.
For a soft, welcoming glow, hang solar-powered lanterns from shepherd’s hooks along your garden’s edge or cluster them on a patio table.
Use sturdy, weather-resistant path lights to mark steps or level changes clearly. You’ll transform purely functional routes into charming visual journeys, extending your enjoyment long after sunset.
This layered approach creates depth and makes your entire yard feel intentional and inviting for evening gatherings.
Mood With Colorful Bulbs
If you’ve already established functional lighting, you can amplify the evening atmosphere by experimenting with colorful bulbs.
Swap standard white LEDs in your path lights or uplights for warm amber or soft blue hues. Amber casts a cozy, inviting glow, while blue can evoke a cool, moonlit serenity. You can use green to highlight foliage or a vibrant magenta for a dramatic focal point.
Look for weatherproof, LED bulbs designed for outdoor use; they’re energy-efficient and offer a wide color spectrum. Install them in strategic spots—behind a sculptural plant, within a pergola, or along a deck railing.
You’ll instantly transform your space into an enchanting, multi-sensory retreat as daylight fades.
Choose the Perfect Patio or Deck Surface
Crafting an ideal outdoor space begins with selecting a patio or deck surface that balances style with your lifestyle.
First, consider durability and maintenance. You’ll love natural stone for timeless elegance, while poured concrete offers a modern, cost-effective canvas. Composite decking resists splinters and fading with minimal upkeep, perfect for busy households.
Think about texture underfoot; smooth pavers feel sleek, and textured wood-grain composites provide safer traction.
Your climate matters too—choose materials resistant to local freeze-thaw cycles or intense sun. Blend your surface with your home’s architecture for a cohesive look.
Finally, factor in your budget for both installation and long-term care. This foundation sets the stage for all your future outdoor enjoyment.
Incorporate Vertical Gardening to Save Space
Once you’ve established your patio or deck, look up to make the most of your backyard’s vertical space. You can install simple wall-mounted planters or build a living wall with modular panels. Use this method to grow culinary herbs, strawberries, or cascading flowers like petunias.
Hanging baskets are perfect for adding color at eye level, while a trellis or obelisk supports climbing vines such as clematis or beans. Even repurposed items, like a pallet transformed into a strawberry planter, work wonderfully. Vertical gardening isn’t just a space-saver; it creates lush, layered depth and turns plain fences or walls into vibrant, living art. You’ll maximize your planting area and enjoy an immersive garden experience.
Add a Garden Fire Pit for Year-Round Gatherings
Transform your backyard into a cozy, year-round destination by adding a garden fire pit. You’ll need to select the right pit for your space and style, follow key installation steps for a solid foundation, and prioritize safety to ensure worry-free evenings.
Let’s explore your material options, proper setup techniques, and essential rules for keeping your gatherings both fun and safe.
Choosing Your Fire Pit
Think about extending your outdoor living season by adding a fire pit to your backyard design.
First, decide between a wood-burning or gas model. A wood-burning pit offers that classic crackling sound and smoky aroma, while a gas fire pit provides instant, clean ignition with less maintenance.
Next, consider the size and material. A compact steel bowl fits a small patio, while a grand, stone-lined pit becomes a central gathering spot.
You’ll also choose between permanent, in-ground installations and portable units you can move.
Ensure your selection complements your garden’s aesthetic—a sleek, modern fire table suits contemporary spaces, whereas a rustic, rock-ringed pit enhances a cottage-style yard.
Prioritize safety features and local regulations before you buy.
Fire Pit Installation Tips
Now that you’ve picked your perfect fire pit, proper installation ensures it’s both safe and ready to use. You’ll want to start by finding a permanent, level spot that’s far from structures, trees, and overhangs. Clear a generous area of any flammable debris.
For a permanent in-ground or stone pit, excavate the base and lay a sturdy foundation of gravel or fire-rated materials. If you’re using a portable model, simply place it on a non-combustible, stable surface like a patio slab or a purchased fire pit pad.
Always double-check your local regulations and your manufacturer’s instructions—they’re your best guides. Once it’s settled, you can immediately arrange seating and stock your kindling for that first magical evening under the stars.
Essential Safety Considerations
Whether you’re enjoying summer evenings or crisp autumn nights, keeping safety at the forefront is absolutely key to ensuring your garden fire pit provides years of warm, worry-free gatherings.
First, always choose a wide-open location, keeping the pit at least ten feet from your house, overhanging trees, and any flammable structures.
Check your local fire ordinances before you start digging or building.
You must never leave a burning fire unattended, and always have a bucket of water, sand, or a fire extinguisher within immediate reach.
Use a sturdy metal screen to contain popping embers.
Finally, establish a clear, supervised zone for kids and pets.
Design a Butterfly and Bee-Friendly Habitat
Creating a vibrant sanctuary for butterflies and bees starts by choosing nectar-rich flowers like lavender, coneflower, and sunflowers that bloom from spring through fall.
Don’t forget to plant host species, including milkweed for monarch caterpillars and parsley for swallowtails, giving them a place to raise their young.
You’ll want to provide shallow water sources with stones for perching, and leave some patches of bare, undisturbed soil for ground-nesting bees.
Arrange your plants in large, sunny clumps, as pollinators are more attracted to bold blocks of color.
By avoiding all pesticides, you’re ensuring a safe haven.
This approach transforms your space into a lively, essential habitat, buzzing with beneficial activity and fluttering wings all season long.
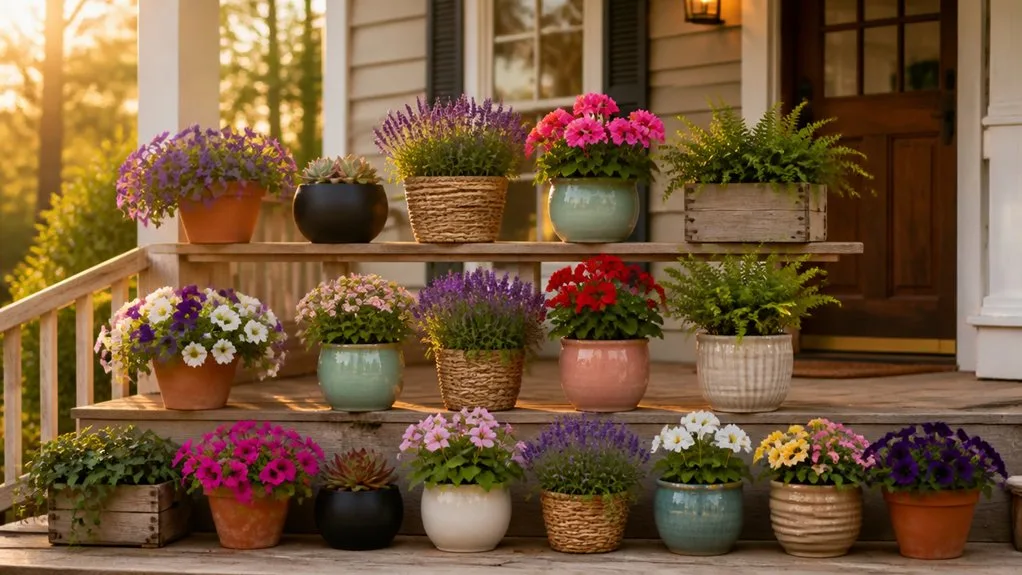
Use Containers for Flexible and Movable Color
Light up your garden by packing containers with vibrant blooms, herbs, or even small shrubs to bring instant, movable color wherever you need it. You can easily refresh a dull corner or highlight an entryway, then relocate your pots as your design evolves. Remember to consider the container’s size, material, and drainage—terra-cotta breathes well, while glazed ceramic holds moisture longer. Mix plants with complementary watering needs for healthier displays. Your container choices are limitless, allowing you to experiment with seasonal themes or create a permanent, miniature garden.
| Container Type | Best Plant Choices | Key Consideration |
|---|---|---|
| Terra-Cotta Pots | Succulents, Herbs | Excellent drainage, prone to drying out |
| Glazed Ceramic | Annual Flowers, Ferns | Retains moisture, less porous |
| Plastic Tubs | Vegetables, Small Shrubs | Lightweight, cost-effective, versatile |
| Wooden Boxes | Perennials, Berry Bushes | Natural look, may require lining |
| Metal Urns | Architectural Plants (e.g., Cordyline) | Can heat up; use in partial shade |
Build a Pergola or Arbor for Shade and Structure
Transform your backyard into a structured oasis by building a pergola or arbor; it’s a classic way to introduce shade, vertical interest, and a focal point for your garden. Choose durable woods like cedar or redwood for longevity. For a solid, shaded roof, space rafters closely; for dappled light, set them wider.
You’ll immediately have a perfect frame for climbing vines like clematis or wisteria, which add lush greenery and seasonal blooms. This structure defines an outdoor room, ideal for dining or lounging. Anchor it over a patio or at a path’s end to draw the eye. You can customize it with string lights or outdoor curtains, creating a private, enchanting retreat you’ll use for years.
Create a Meandering Path to Explore Your Garden
You’ll start by sketching out a path with gentle, curved lines to invite a sense of discovery as you wander.
Then, choose materials like gravel or stepping stones that fit your garden’s style and your budget.
Finally, you’ll plant lush, low borders along the edges to soften the walkway and guide your steps.
Design With Curved Lines
While a straight path gets you from point A to B efficiently, a gently curving one invites you to linger and discover. Design your meandering path with purpose, using sweeping arcs to frame a focal point or tighter bends to create intimate, hidden nooks. You’ll naturally slow your pace, noticing the textures and colors you’ve planted along the way. Keep the curves organic; avoid sharp angles for a more natural flow. This layout also maximizes planting space on the inner and outer bends, letting you layer in lush vegetation.
| Path Curve Intent | Garden Experience Created |
|---|---|
| Long, Sweeping Arc | Frames a distant tree or sculpture beautifully. |
| Gentle ‘S’ Bend | Reveals new garden vignettes step-by-step. |
| Tight Turn | Creates a secret corner for a bench or specimen plant. |
| Open Curve | Provides a broad view of a flowering border. |
| Series of Curves | Makes a small space feel larger and more intriguing. |
Choose The Right Materials
A material’s texture, color, and durability will shape your path’s character and its long-term charm. For a rustic, natural feel, consider irregular flagstones or bark mulch; they’ll blend seamlessly with your garden.
If you prefer a more polished look, smooth slate or concrete pavers create a clean, contemporary line. Remember, you’ll walk on this surface daily, so prioritize durability.
In wet climates, choose porous materials like gravel or crushed stone to prevent slippery puddles. For sunny spots, select light-colored stones that won’t absorb excessive heat.
You can mix materials—perhaps use brick for the main tread and pebbles for the borders—to add visual interest and define your meandering route’s gentle curves.
Add Flanking Plant Borders
Frame your new path with living borders to transform a simple walkway into a captivating journey. You’re not just edging a trail; you’re building green walls that guide the eye and frame delightful views.
Start by selecting plants with contrasting textures and heights. For structure, use low, dense shrubs like boxwood. Then, add softer, billowing perennials such as lavender or catmint to spill gently onto the path. Incorporate seasonal color with easy-care annuals like marigolds or petunias.
Remember to space plants according to their mature size to avoid a crowded look. This thoughtful layering creates depth and a sense of lush enclosure, making every stroll feel like a personal discovery through your own vibrant, living gallery.
Create a Zen Meditation Corner in Your Garden
Amidst the hustle of daily life, you can carve out a peaceful sanctuary right in your backyard by creating a dedicated Zen meditation corner. Start by selecting a secluded, level spot. Define the space with a simple gravel or sand bed, raking it into soothing patterns. Add a comfortable, flat meditation stone or a weatherproof cushion as your seat. Frame the area with minimalist, structural plants like bamboo or ornamental grasses, which provide gentle sound and movement. The goal is simplicity; every element should invite calm and focus.
| Sensory Element | Emotional Benefit |
|---|---|
| Raked Gravel Patterns | Instills order and mindful focus |
| Soft Bamboo Rustle | Washes away mental clutter |
| Smooth Stone Seat | Grounds and centers your body |
| Scent of Clean Earth | Connects you to the present moment |
| Enclosed Green Walls | Creates a feeling of safe seclusion |
Incorporate Art and Sculpture for Personal Flair
Your garden’s personality can truly shine when you incorporate unique art and sculpture. Choose pieces that reflect your style, whether it’s a modern metal structure or a rustic ceramic pot. Place sculptures to create focal points along pathways or nestled among foliage.
You’ll want to consider scale; a large piece anchors a space while smaller items add whimsical detail. Weather-resistant materials like stone, bronze, or treated wood ensure longevity.
Integrate art by hanging a mosaic on a fence or setting a kinetic piece that moves with the wind. These elements add visual interest and make your space uniquely yours. They’re not just decorations; they’re conversation starters that infuse your garden with character and charm.
Install an Irrigation System to Simplify Watering
Keeping your garden vibrant doesn’t have to mean hours of hauling a hose. Installing an irrigation system automates watering, saving you time and ensuring consistent hydration for your plants.
Start with a simple drip irrigation kit; it delivers water directly to the roots, minimizing evaporation and waste. You’ll lay flexible tubing along your beds, using emitters for individual plants or soaker hoses for dense rows. Connect the main line to a timer on your outdoor faucet. This lets you program watering for early morning, the most efficient time.
You can zone different areas, giving thirsty vegetables more water than drought-tolerant natives. It’s a weekend project with a huge payoff: a healthier, lusher garden with minimal effort.
Repurpose Materials for a Unique Garden Charm
You can turn old boots or teapots into charming reclaimed object planters for your herbs and flowers.
Get creative with found material decor by using driftwood for a rustic trellis or colorful bottle caps for a playful mosaic.
These simple projects instantly add personality and save you money on garden accents.
Reclaimed Object Planters
Add a unique touch to your garden by turning reclaimed objects into one-of-a-kind planters; this approach not only recycles materials but also infuses your backyard with personality.
You’ll transform everyday items into charming focal points. Just ensure your chosen object—like an old boot, a colander, or a ceramic teapot—has proper drainage. Drill a few holes in the bottom to prevent soggy roots.
Then, fill it with a quality potting mix suited for your plants. For an aged container, consider succulents or herbs that thrive in well-draining soil.
This creative method lets you showcase your style, telling a story with each piece you plant. It’s a wonderfully simple way to craft a garden that feels truly your own.
Found Material Decor
Scout around your home for interesting discards—like wooden pallets, colorful bottles, or leftover bricks—and you can easily breathe new life into them as garden art.
You can stack and stagger bricks to create a whimsical, rustic path or a short border for your flower beds.
Take those old bottles and embed them neck-down along a pathway; they’ll catch the sunlight beautifully.
An unused wooden ladder becomes a perfect vertical display for hanging small pots or trailing vines.
Even chipped teacups can be glued to a post to make a charming bird feeder.
You’re not just decorating; you’re giving forgotten items a story.
This approach adds incredible personality and saves money, making your paradise truly one-of-a-kind.
Build a Compost Bin to Enrich Your Soil
Getting started with backyard composting means you’re turning kitchen scraps and yard waste into nutrient-rich fertilizer for free.
You’ll build a simple bin using wooden pallets or a plastic container with ventilation holes.
Layer your brown materials like dried leaves with green materials like vegetable peels, adding a bit of soil to introduce microbes.
You must keep the pile moist but not soggy, and turn it every few weeks with a shovel to aerate it.
This active decomposition process heats up, breaking everything down into dark, crumbly humus.
In a few months, you’ll harvest this “black gold” to mix into your garden beds, dramatically improving soil structure and fertility without any cost.
Create a Lush Garden With Layered Planting
Layering your plantings vertically, like a natural forest floor, transforms your backyard into a densely packed, vibrant oasis.
You’ll start by planting tall canopy trees or shrubs as your top tier. Beneath them, add a middle layer of shade-tolerant beauties like hydrangeas or ferns.
Finally, fill the ground plane with sprawling perennials and groundcovers, such as hostas or creeping thyme. This method maximizes your space, smothers weeds, and creates a rich habitat.
Choose plants with varied textures and bloom times for year-round interest. You’re not just planting a garden; you’re engineering a living, breathing ecosystem that feels established and full the moment you put it in.
Add a Playful Garden Game Zone
Spruce up your outdoor space by carving out a dedicated area for fun, turning your garden into a hub for activity and laughter.
You can install a classic horseshoe pit or a set of cornhole boards on a level patch of lawn. For a more permanent feature, consider inlaying a concrete slab for a bocce ball court or painting a hopscotch grid on a paved path.
Hang a sturdy dartboard on a fence or tree, ensuring a safe backdrop.
You’ll want to provide simple storage nearby for game pieces, like a weatherproof bench with a built-in box.
This zone invites everyone to play, blending recreation seamlessly with your garden’s natural beauty.
Keep Your Garden Thriving With a Seasonal Checklist
To ensure your garden flourishes year-round, you’ll want to create a straightforward seasonal checklist that guides your tasks and timing.
In spring, focus on clearing winter debris, amending your soil, and sowing seeds. You’ll also divide perennials and apply a layer of fresh mulch.
Summer demands consistent watering, diligent weeding, and harvesting vegetables promptly to encourage more production. Don’t forget to deadhead flowers!
Come autumn, it’s time to plant spring bulbs, collect seeds, and protect sensitive plants from early frosts.
Winter is for planning next year’s layout, sharpening tools, and pruning dormant trees and shrubs.
Frequently Asked Questions
How Much Will These Garden Ideas Cost?
Costs range from nearly free to thousands. You’ll spend, for example, $50 on seeds, $500 on raised beds, or $5,000+ for a patio. Prioritize your biggest dream first; you can add more later.
How Do I Maintain These Features in Winter?
You’ll want to winterize your garden features; protect delicate plants, clean and cover furniture, and check irrigation systems. Seasonal maintenance keeps your paradise vibrant for spring, so you don’t lose your hard work.
Are These Ideas Suitable for a Very Small Yard?
Yes, they’re absolutely suitable! You can scale features like a mini pond or vertical planters. You’ll focus on a few key elements to create depth without clutter. It’s all about smart, multi-purpose design.
Which Projects Can I DIY Versus Hire a Professional?
You can DIY planting, containers, and small paths. You’ll need a pro for hardscaping, major grading, electrical, and large structures like decks, as they require specific skills and permits to handle safely.
How Long Do Most of These Projects Take to Complete?
Your projects take one day for planting to months for a large deck. Plan for weekends for DIY beds and paths, but hire pros for major builds, as their timelines often run several weeks.
Conclusion
So start with your plan and work zone by zone. Remember, you’re building a paradise, not finishing it in a weekend. Add those sensory layers—the scent of herbs, the sound of water, the texture of stone. Your seasonal checklist will keep it thriving. Now step outside, put your vision into the soil, and watch your beautiful, purposeful backyard come to life.
The Only Tools You Need for a Thriving Garden 🌱
Whether you're a weekend gardener or growing daily — these hand-picked tools make every session faster, easier, and more satisfying.