You’ll maximize your garden space by combining five core methods: row cropping for traditional efficiency, block gardening to eliminate walkways, square-foot gardening for standardized spacing, mobile containers for flexibility, and vertical systems for upward growth. Orient beds north-south for consistent sunlight. Use 30-inch main paths for wheelbarrow access. Stack containers in tiers, mount plants on walls, and install A-frame trellises to double your growing surface. Succession plant radishes, then rotate crops annually to maintain soil fertility and boost yields significantly. You’ll discover how each technique compounds the others.
Key Takeaways
- Vertical systems like A-frame trellises and wall-mounted panels double growing area per square foot while reducing disease.
- Raised beds with 12-inch minimum depth support deep-rooted vegetables and maximize root development in limited spaces.
- Square-foot gardening divides beds into 12″ × 12″ blocks, standardizing plant quantities and eliminating wasted walkway space.
- Dense block planting with tight spacing (3–12 inches) reduces weeds, cuts water consumption, and increases yield per square foot.
- Mobile containers on wheels and stacked tiers adapt to any space, enabling vertical growth in small or irregular areas.
Choose Your Space-Saving Method: 5 Layouts Ranked
How you arrange your vegetables determines what you’ll harvest and how much effort you’ll invest in maintenance. You’ve got five proven methods to choose from, each with distinct advantages.
Row cropping works best if you prefer traditional planting and need convenient access for weeding and fertilizing.
Block gardening maximizes your space by eliminating wide walkways and minimizing bare ground where weeds thrive.
Square foot gardening offers a simplified, structured approach with standardized 12″×12″ blocks and defined plant quantities per square.
Companion planting pairs compatible crops with different maturation speeds, letting you harvest radishes while carrots still develop.
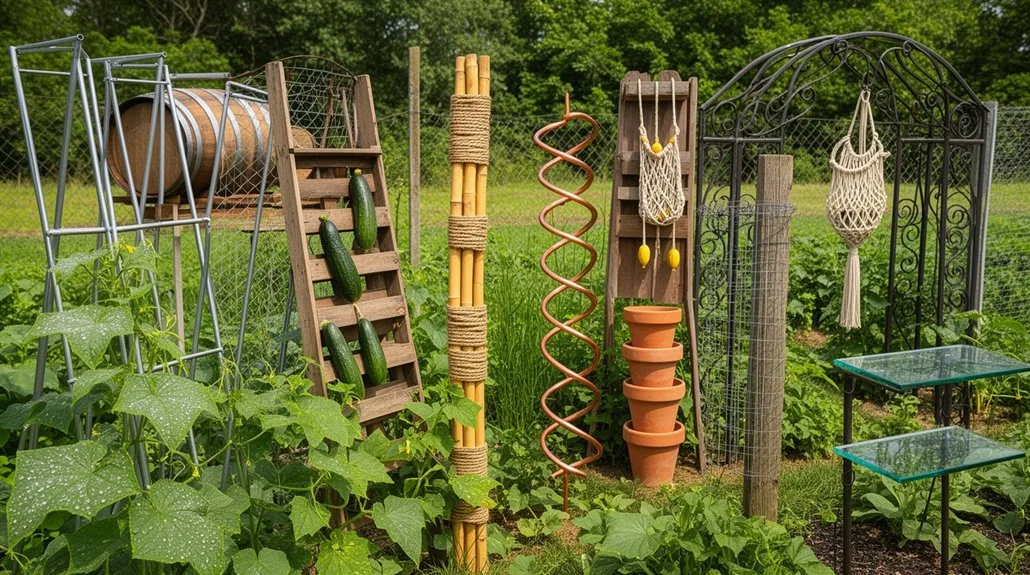
Mobile layouts provide ultimate flexibility—containers on wheels let you chase sunlight, while vertical designs and straw-bale gardens transform limited spaces into productive gardens.
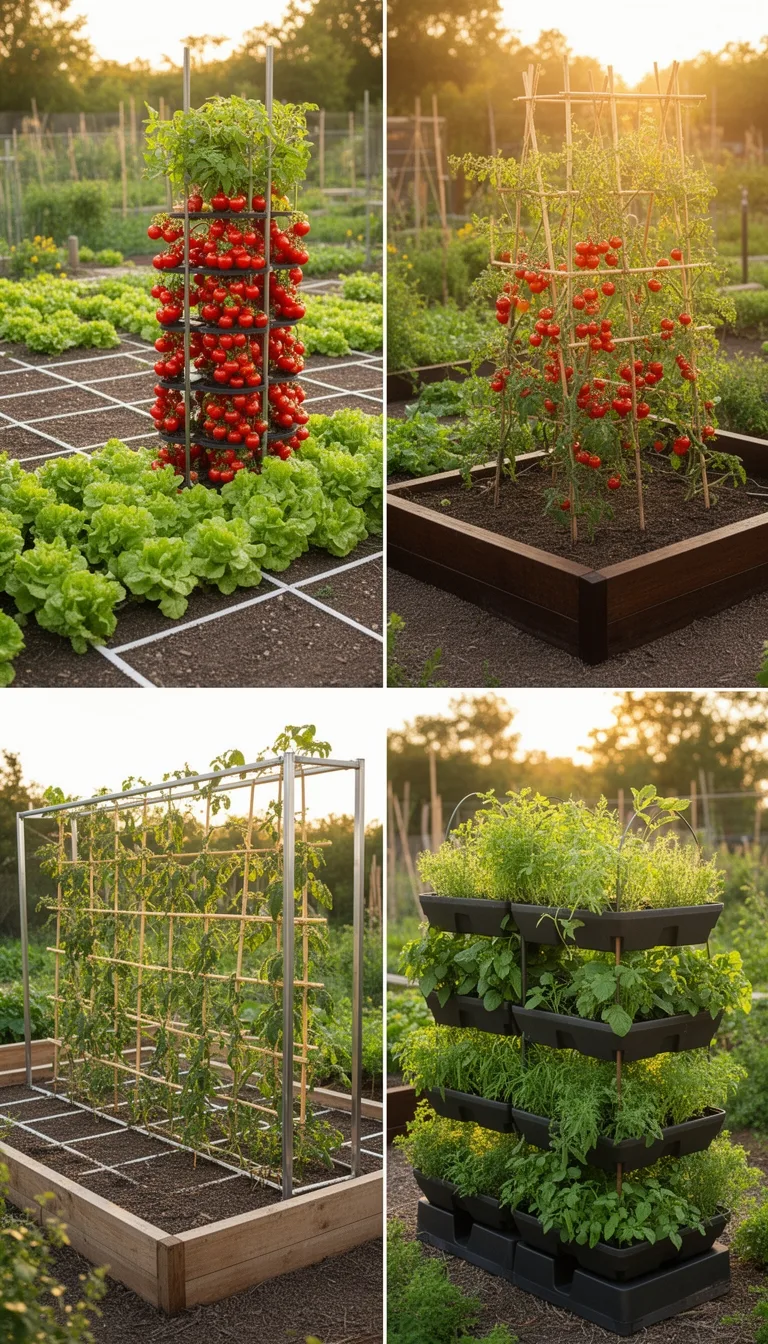
Stack Containers for Maximum Vertical Yield
While row cropping and block gardening demand significant ground space, stacked containers let you build upward instead of outward—transforming cramped patios, balconies, and apartment corners into productive growing zones.
You’ll increase your growing area per square foot by layering multiple tiers, each tier holding different plants.
Stack tomatoes with surrounding herbs on one level, pole beans climbing vertically on another, and shallow-rooted lettuces or peppers on a third.
Align notches carefully when assembling, and fill each tier completely with soil before stacking for stability.
This tiered approach reduces weeding, simplifies watering and fertilizing, and keeps plants elevated for healthier growth while minimizing pest damage and soil contamination.
Mount Plants on Walls and Fences to Free Ground Space
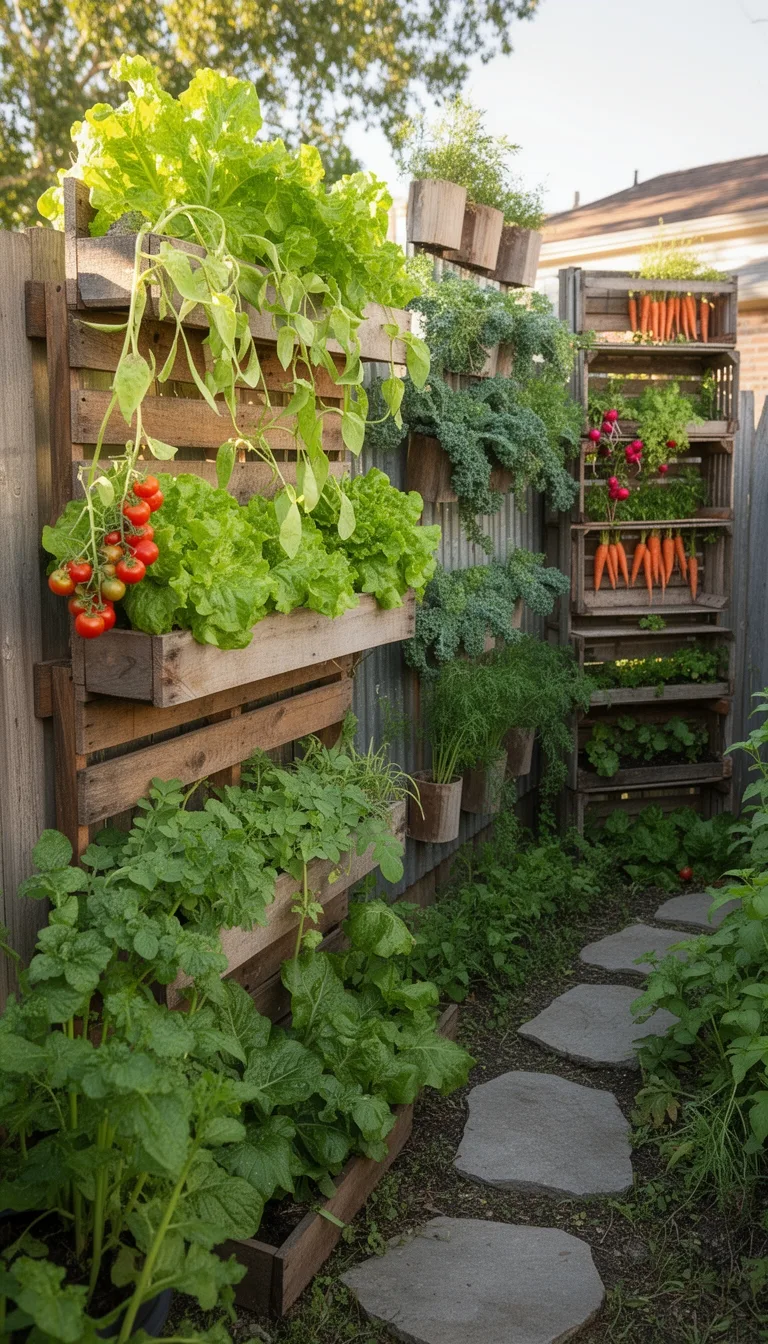
When you’ve exhausted ground space but still crave higher yields, vertical wall and fence gardens become your secret advantage.
You can attach slatted wood panels to concrete walls, then fill them with planters and pots for herb and salad gardens.
Consider using the Vego Garden Wall Trellis, which features rustproof connectors for easy installation without soil contact.
For a more advanced approach, ZipGrow Farm Walls recirculate water and nutrients while mounting on vertical surfaces, supporting climbing plants and leafy greens.
You’ll position plants at eye level, save valuable ground space, and create a heat island effect that raises temperatures two degrees for faster growth.
This strategy transforms unused wall space into productive growing zones.
Double Your Harvests With Vertical A-Frame Trellises
Why settle for a single growing surface when you can build an A-frame trellis that doubles your planting capacity? You’ll maximize vertical space by training vining plants upward on both sides, freeing ground level for shade-tolerant crops like lettuce or radishes.
| Benefit | Impact |
|---|---|
| Air Circulation | Reduces fungal diseases significantly |
| Space Efficiency | Fits more plants in compact areas |
| Harvesting | Eye-level picking minimizes bending |
A-frames encourage upward growth instead of sprawling, transforming small footprints into productive zones. The elevated structure keeps foliage and fruit off the ground, reducing pest damage and disease. You’ll enjoy cleaner produce, stronger growth from increased sunlight exposure, and simplified maintenance. Cucumbers, pole beans, peas, and small squash varieties all thrive on A-frames, extending your production season.
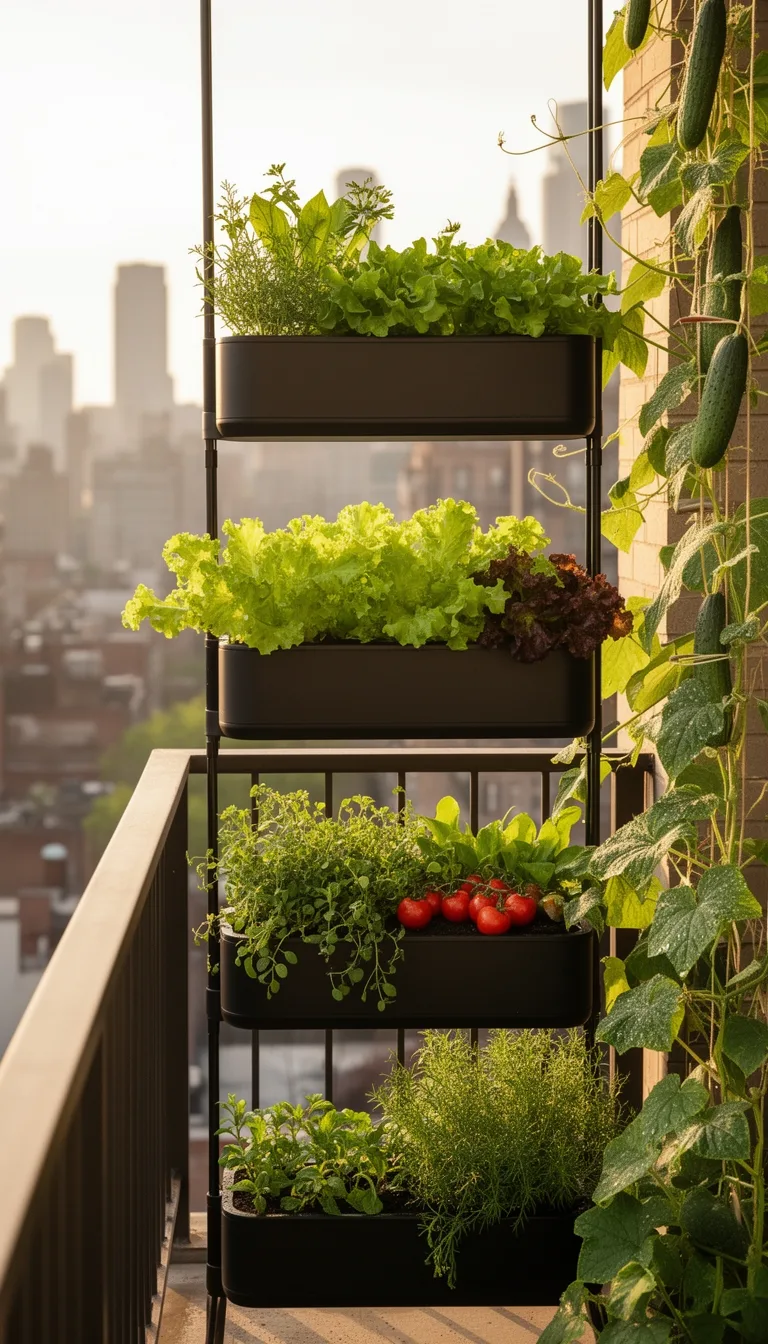
Hang Herbs and Greens From Baskets to Save Square Footage
After you’ve maximized your ground-level space with vertical trellises, hanging baskets offer the next frontier for expanding your harvest without consuming precious square footage.
You’ll isolate plants from ground pests like slugs, snails, and rabbits while creating eye-level displays on patios or balconies.
Fill baskets halfway with soilless potting mix, then plant trailing herbs like creeping thyme and prostrate rosemary around the edges using the thriller-filler-spiller pattern.
Position them in spots receiving 6-8 hours of sunlight daily.
Water frequently since baskets dry quickly, especially in heat.
Fertilize regularly with a 1:2:1 ratio and snip herbs to stimulate new growth.
Deadhead spent flowers to maintain productivity throughout the season.
Pair Crops to Reduce Pests and Maximize Yield
How can you slash pest problems and boost harvests without relying on chemical interventions? Strategic crop pairing and rotation systems do exactly that.
Rotate nightshade vegetables with unrelated crops over three years to reduce soil-borne pathogens by 40-60%. Follow heavy feeders like tomatoes with nitrogen-fixing legumes—you’ll see tomato yields jump 20-25% afterward. Then plant light feeders like root vegetables to capitalize on replenished soil.
Intercropping mixed varieties attracts beneficial predators like carabid beetles, naturally suppressing insect populations. For specific pests, use targeted nonhost rotations: stem nematodes require 3-4 years away from their hosts using small grains and beans; dodder needs two years with cotton or grains.
This methodical approach yields increases of 27-48% while maintaining pest control integrity throughout your garden layout.
Seven Proven Companion Pairs for Shared Containers
Seven proven companion pairs transform container gardening by maximizing limited space while amplifying the pest-control and yield benefits you’ve established through crop rotation.
You’ll find tomato-lettuce-basil-marigold combinations particularly effective, as basil repels thrips while marigolds deter additional pests.
Eggplant pairs well with bush beans, both thriving in compact containers without sprawling vines.
For vertical growing, squash-nasturtium pairings work excellently, with nasturtium trailing edges while attracting beneficial insects.
Peppers paired with alliums—onions, chives, or scallions—repel aphids and thrips effectively.
Finally, carrots and tomatoes coexist harmoniously; their different root structures eliminate competition, and tomatoes attract parasitic wasps that eliminate hornworms.
These strategic combinations ensure you’ll harvest more from confined spaces.
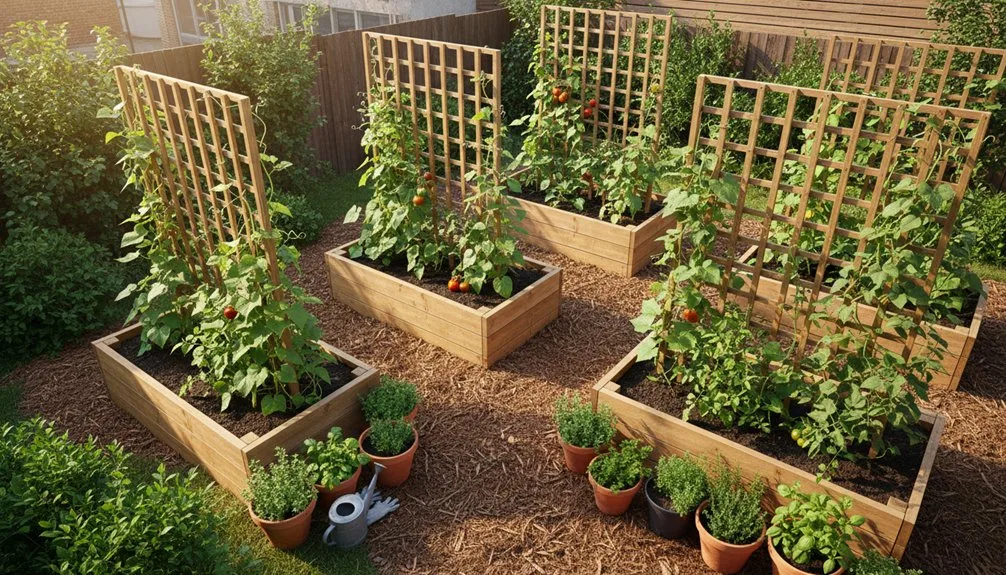
Plant in Dense Blocks Instead of Rows to Crowd Out Weeds
While companion planting maximizes your container yields, you’ll unlock even greater productivity by shifting your approach to your garden beds themselves.
Instead of traditional rows, plant vegetables in dense blocks using concrete-block raised beds.
This intensive arrangement shades the soil surface, preventing weed seeds from germinating and establishing roots.
You’ll dramatically reduce maintenance time since dense foliage naturally suppresses weed growth and minimizes open soil exposure.
Dense block planting maximizes your square footage by eliminating wasted space between rows.
You’ll grow significantly more produce per square foot while maintaining proper spacing that prevents crowding.
The elevated sides of concrete-block beds support these intensive plantings while improving drainage.
Within one to four years, your increased yields will recoup the initial investment, making this layout strategy both economical and highly productive.
Build Raised Beds North-South for 6+ Hours of Sun
To maximize sunlight exposure across your raised beds, orient them on a north-south axis to ensure your plants receive the minimum 6+ hours of direct sun they need daily.
This alignment leverages the sun’s east-west arc, distributing light evenly across all rows without tall plants casting shadows on shorter ones.
When positioning your beds, follow these key steps:
- Place tallest crops like tomatoes and pole beans on the north end
- Position shorter plants on the south side for unobstructed light access
- Orient your longest bed side facing south for optimal solar exposure
This strategic arrangement prevents inner bed plants from light blockage.
You’ll achieve consistent sunlight from one hour after sunrise through one hour before sunset, supporting robust growth throughout your garden while maintaining efficient spacing for maintenance access.
Make Your Raised Beds at Least 12 Inches Deep
Why settle for shallow beds when you can unlock significantly better root development by digging just 6 inches deeper? A 12-inch depth supports vegetables like sweet potatoes and enables roots to access nutrients beyond the top 6 inches. You’ll experience doubled water retention, reducing watering frequency while preventing root rot through improved drainage. Deeper beds elevate roots above compacted native soil, ideal for heavy clay sites.
| Depth | Water Capacity | Root Access |
|---|---|---|
| 6 inches | Standard | Limited |
| 12 inches | Doubled | Enhanced |
| 18 inches | Maximized | Extensive |
| 24 inches | Optimal | Complete |
| Variable | Situational | Adaptable |
This investment delivers larger, more vigorous plants with higher yields per square foot. You’ll achieve warmer soil temperatures that extend your growing season while supporting intensive planting arrangements that maximize your garden’s productivity.
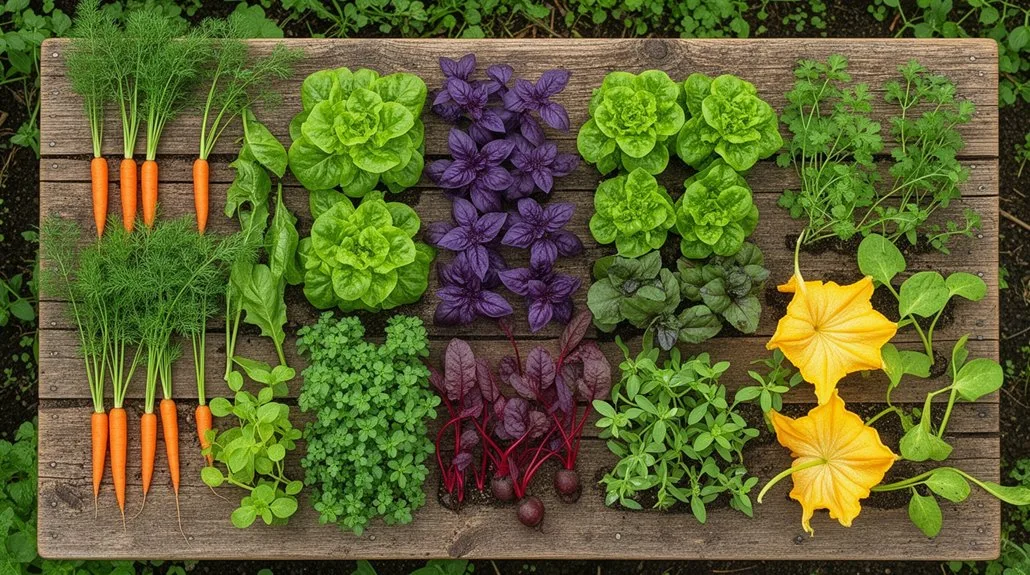
Space Plants Tightly Using Intensive Spacing Charts
Now that you’ve built deeper raised beds, you can capitalize on every square inch by spacing plants far more tightly than traditional row gardens allow.
Intensive spacing dramatically increases your yield while reducing weeds and water consumption.
Use these spacing guidelines based on plant size:
- 3-inch spacing for beets, carrots, onions, and radishes
- 6-inch spacing for Swiss chard, leaf lettuce, and parsley
- 12-inch spacing for broccoli, cabbage, cauliflower, corn, and peppers
Calculate plants per square foot by dividing 12 inches by your spacing requirement.
For example, 3-inch spacing yields 16 plants per square foot, while 12-inch spacing fits just one plant.
This methodical approach eliminates wasted space and row paths.
You’ll maintain proper plant health through adequate air circulation while maximizing productivity in your compact garden beds.
Position Your Main Paths at 30 Inches Wide for Easy Access
How you design your pathways will make or break your garden’s functionality.
You’ll want to position your main paths at 30 inches wide—a standard that balances accessibility with efficiency.
This width accommodates wheelbarrow passage comfortably while preventing soil compaction around your plant roots during foot traffic.
At 30 inches, you can kneel in front of beds without disturbing adjacent growing areas.
You’ll also reduce overall pathway maintenance compared to narrower configurations, since you’re creating fewer pathways within your garden footprint.
This consolidated spacing means less weeding and less non‑growing space to manage throughout the season.
Consider your specific equipment and personal dimensions when finalizing your layout.
However, sticking with this standard width ensures consistent access across all your growing beds and maximizes your usable growing area.
Harvest Radishes Early to Make Room for Slower Root Crops
Once you’ve maximized your 30-inch pathways, you’ll want to think strategically about what you plant in those beds—and when you harvest it.
Radishes are your secret weapon for space optimization.
Most varieties mature in just 30-45 days, freeing up valuable garden real estate for slower root crops like carrots and beets.
Here’s your succession strategy:
- Plant spring radishes 4-6 weeks before your last frost
- Harvest when roots reach 1-inch diameter at the shoulder
- Immediately replant with slower-maturing crops
Don’t delay harvesting—late radishes crack, turn woody, and bolt.
You’ll lose that crisp texture entirely.
By pulling radishes promptly, you’ll unlock 20-45 days of additional growing time.
This approach transforms a single bed into multiple production cycles annually, maximizing your layout’s potential without expanding square footage.
Rotate Crops Annually to Maintain Soil Fertility
While succession planting lets you squeeze multiple harvests from a single bed each season, you’ll deplete soil nutrients faster than nature can replenish them—unless you rotate your crops strategically.
Annual crop rotation rebuilds soil fertility naturally. You’ll boost nitrogen availability by 20-30% using legume-cereal rotations, increase organic matter by 15-25%, and enhance microbial activity by 35-40%. This approach cuts fertilizer needs while maintaining manure effectiveness at 95%.
| Crop Sequence | Fertility Benefit |
|---|---|
| Legume-Cereal | +20-30% nitrogen |
| Maize-Soybean | +5-10% yield |
| High-Demand-Legume | Potassium elevation |
| Diverse Rotation | +28.1% yield average |
| Multi-Year System | +11.8% total nitrogen |
Rotating your vegetable beds annually reduces disease pressure, improves soil structure, and increases yield resilience during droughts. You’ll see measurable improvements within five years while lowering long-term input costs and boosting profitability.
Calculate Sunlight Before Choosing Your Layout
Sunlight exposure is the foundation of your garden layout—get it wrong, and you’ll struggle with poor yields, weak plants, and disease pressure regardless of soil quality or crop rotation.
Before positioning beds, you’ll need to assess your site’s actual sunlight patterns:
- Observe peak hours between 10 a.m. and 4 p.m. when intensity matters most
- Track full-day exposure using stakes and string to map shadows
- Note filtered light through trees—it counts as partial shade, not full sun
Orient rows north-south for even sun distribution.
South-facing sites provide all-day exposure ideal for fruiting vegetables requiring 6+ hours direct sun.
Avoid east-west rows that create plant shading.
Place taller crops strategically so they don’t block shorter varieties.
Winter’s lower sun angle demands careful positioning.
Document findings before finalizing your layout.
Conclusion
You’ll absolutely transform your garden into a productivity powerhouse by implementing these space-maximizing strategies. Stack those containers sky-high, mount plants everywhere—walls, fences, everywhere—and you’re basically growing a jungle in a closet. Rotate crops methodically, calculate every sunlight angle precisely, and you’ll harvest an embarrassingly abundant bounty from what you thought was impossibly tiny space. Your neighbors won’t believe what you’re yielding.
The Only Tools You Need for a Thriving Garden 🌱
Whether you're a weekend gardener or growing daily — these hand-picked tools make every session faster, easier, and more satisfying.