Your weekend can transform your garden without breaking the bank. These eighteen practical DIY projects use common materials like scrap wood, old bottles, and leftover tiles. You can build a raised bed, craft a vertical pallet garden, or set up a simple drip irrigation system. The most rewarding part is seeing quick results before Sunday evening. Let’s explore which idea might be the perfect starting point for your own space.
Key Takeaways
- Create hanging herb planters from plastic bottles to grow basil or parsley.
- Build simple raised garden beds from scrap wood for cultivating vegetables.
- Install a decorative gravel or stone border to define and edge your garden.
- Construct a vertical garden from a pallet for growing herbs and trailing plants.
- Assemble a cozy fire pit area with pavers and seating for evening ambiance.
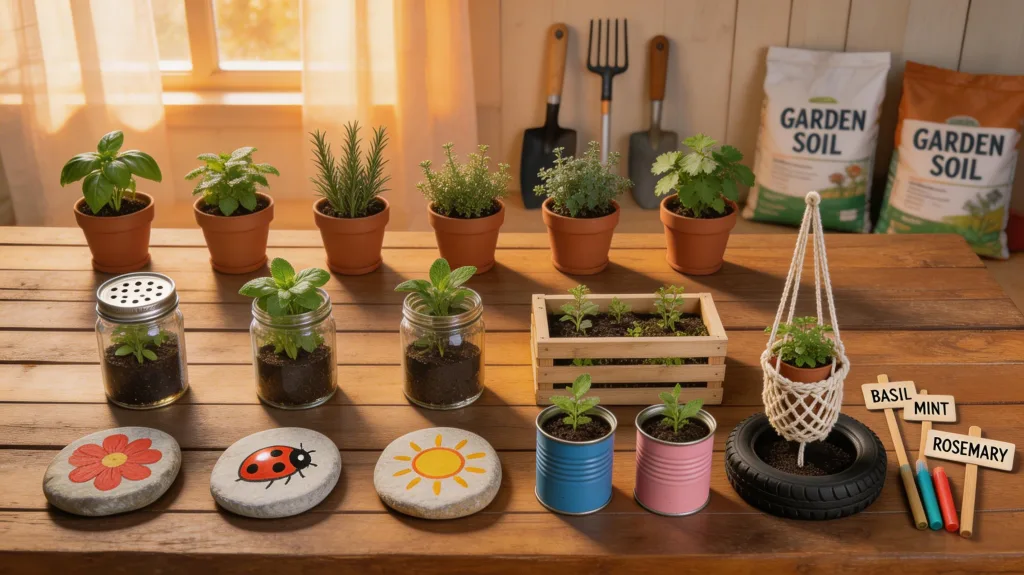
Start With a Hanging Herb Garden From a Plastic Bottle

You can kickstart your DIY garden by turning a simple plastic bottle into a hanging herb garden.
First, grab a clean, empty one or two-liter bottle. Use scissors to carefully cut off the top third. Then, puncture several drainage holes in the bottom section. Fill this section with a light potting mix, not dense garden soil.
Now, sow your herb seeds or transplant small seedlings like basil or parsley. You can create a simple hanger by threading sturdy twine through two holes punched near the rim.
Find a sunny spot, like a porch railing or a bright window frame, and hang your planter. Remember to water gently when the soil feels dry. You’ll soon have fresh herbs within easy reach.
Build a Simple Raised Garden Bed From Scrap Wood
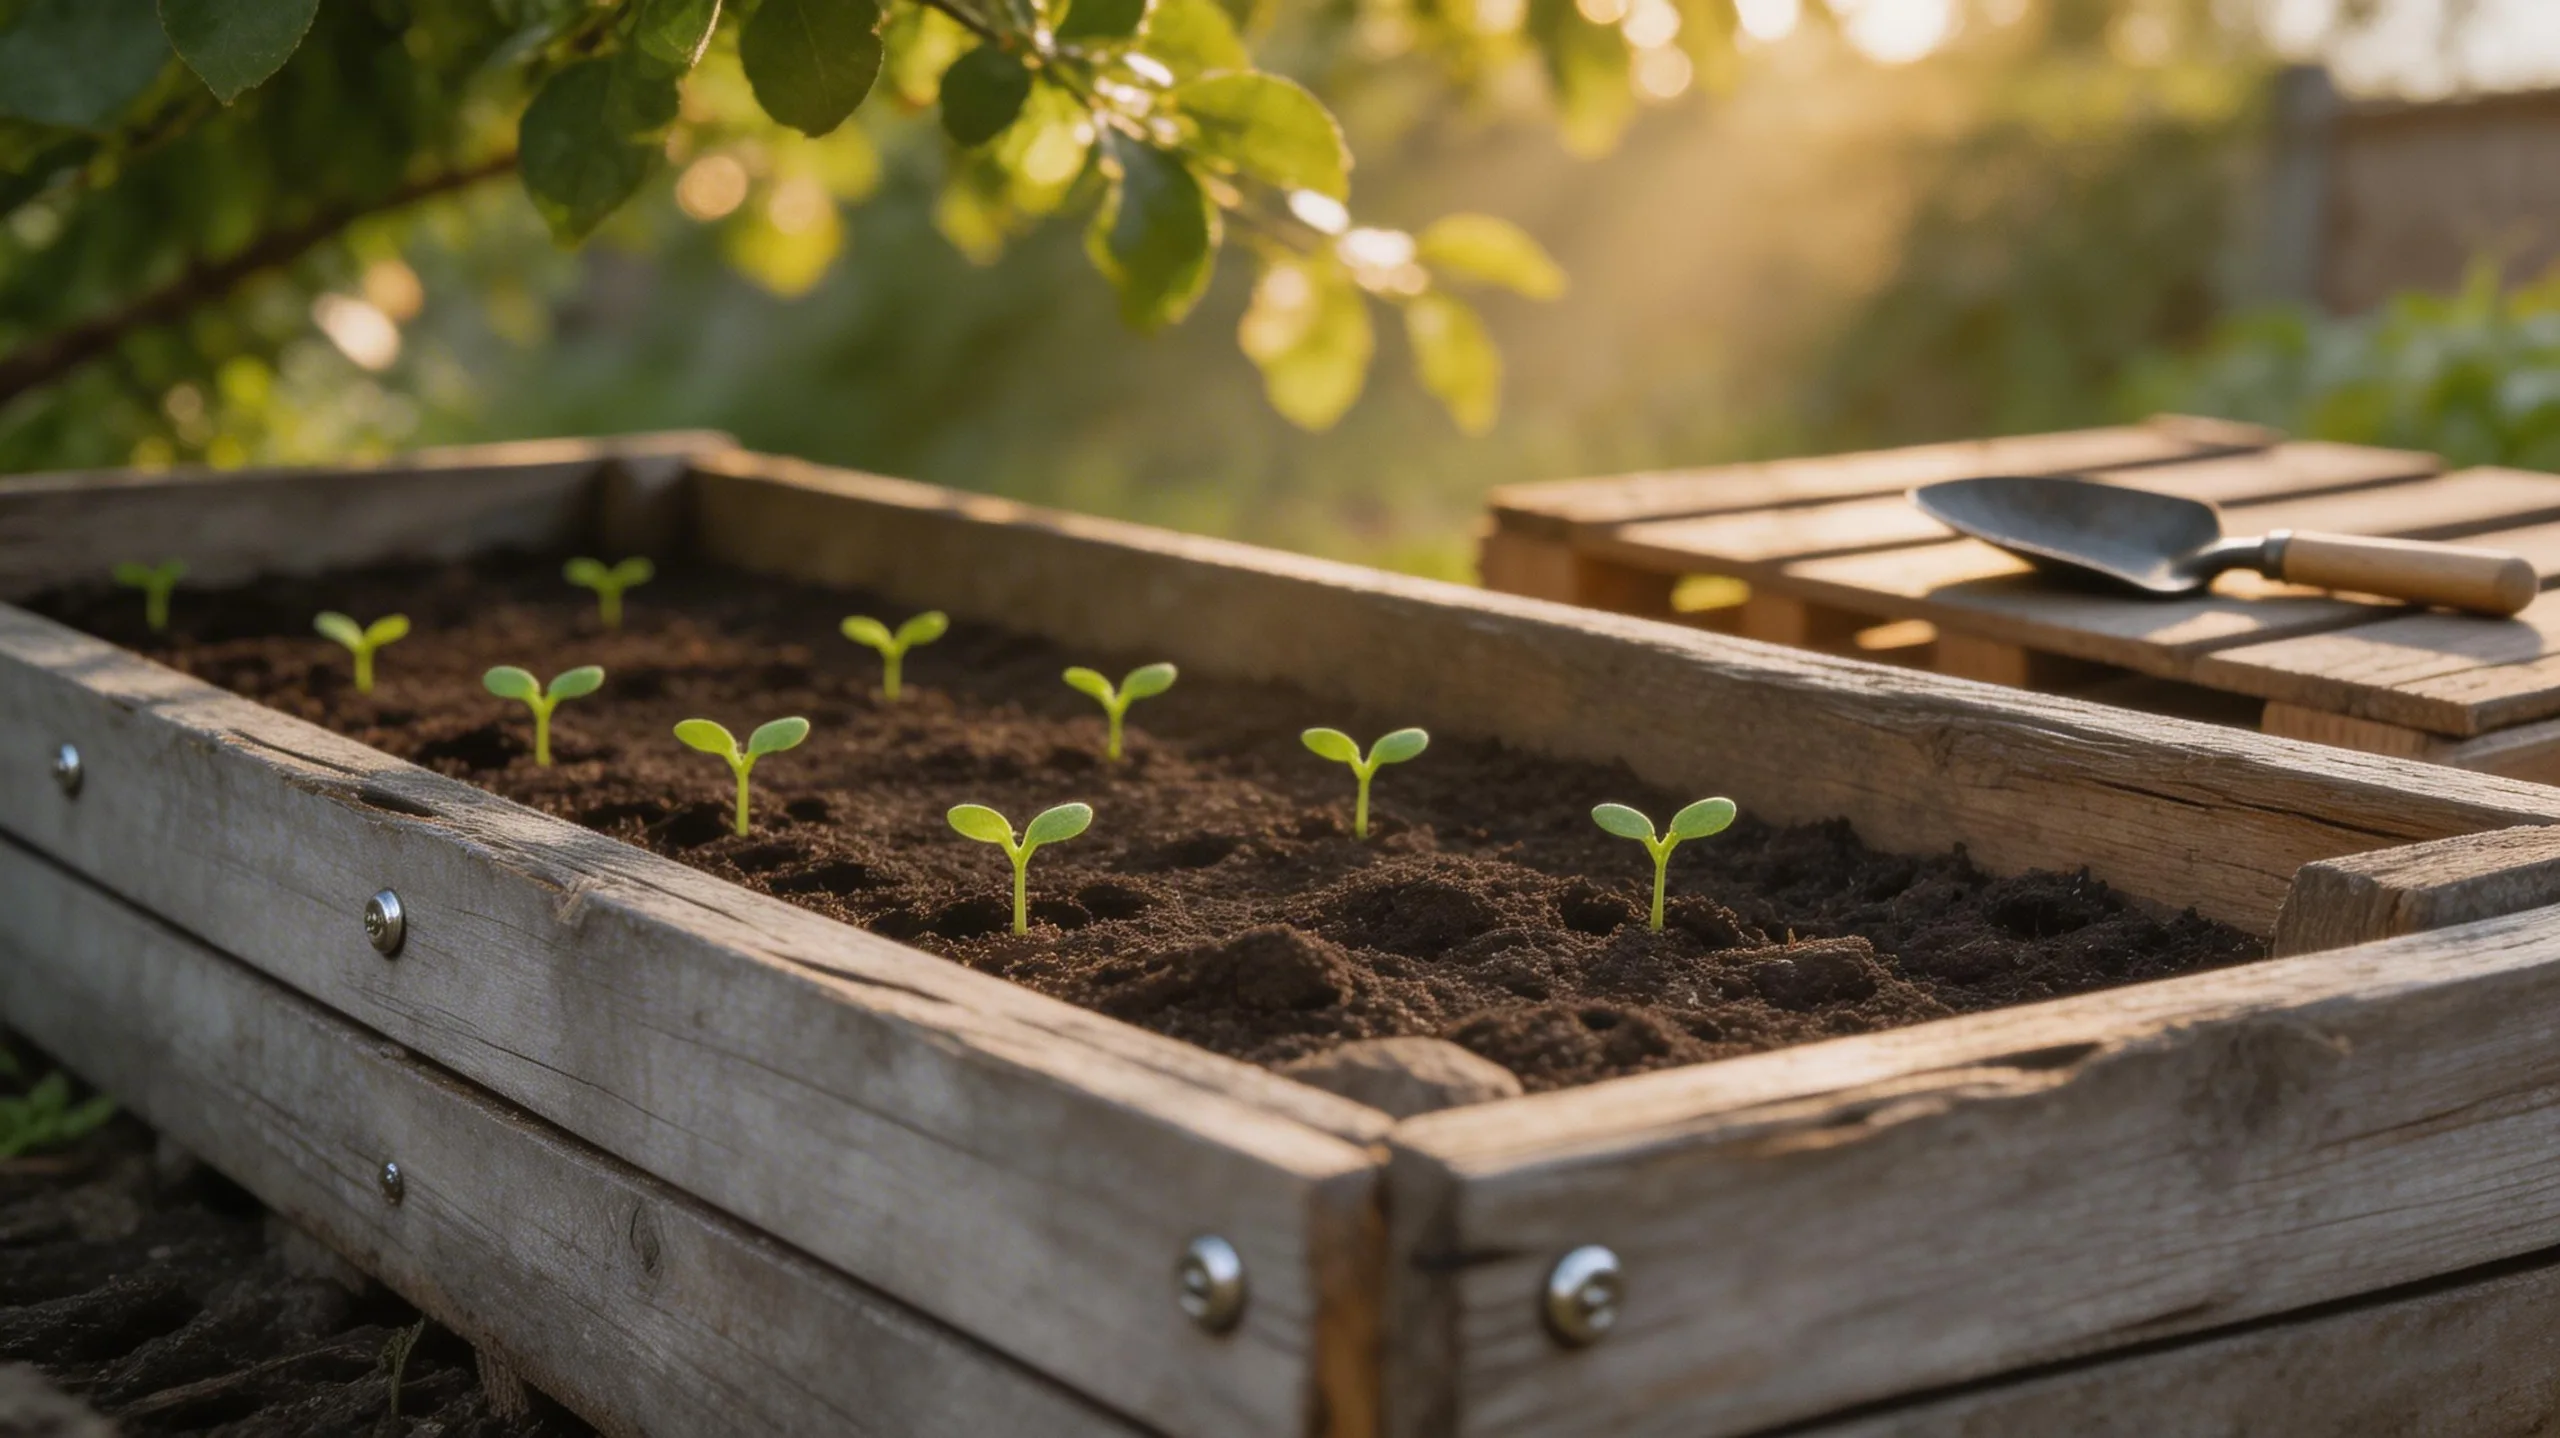
For a sturdy and accessible planting space, constructing a raised bed from scrap wood is a perfect weekend project.
First, gather reclaimed 2×6 or 2×8 lumber. You’ll need four equal-length boards for the sides.
Pre-drill holes to prevent splitting, then screw the corners together using galvanized deck screws and scrap wood blocks for internal bracing.
This creates a simple box frame. Avoid using treated wood if you’re growing edibles.
Place your frame in a sunny spot, directly on cleared ground or a weed barrier.
Fill it with a quality soil mix, leaving a few inches from the top.
You’ve now created an elevated garden that reduces back strain and improves drainage for thriving plants.
Upcycle Old Boots and Tins Into Quirky Planters
Don’t relegate that worn-out pair of boots or empty food tins to the trash; they’re perfect candidates for whimsical, character-filled planters.
For boots, drill several drainage holes in the sole and fill the bottom third with gravel for aeration before adding potting mix. A pair of work boots can hold herbs, while tall rain boots make a statement with trailing petunias.
For tins, clean them thoroughly and poke holes in the bottom with a nail. You can group assorted sizes together for a charming, eclectic display.
These containers add instant personality to a patio step or garden border. They’re a fantastic way to repurpose materials, reduce waste, and create a garden feature that’s uniquely yours.
Paint and Personalize Plain Terracotta Pots
Terracotta pots can really come to life with a bit of paint and creativity, turning them from plain vessels into standout garden features.
Start by cleaning your pot with soapy water and letting it dry completely. Apply a coat of primer if you’re using acrylics; this helps the paint adhere and last longer outdoors.
Then, unleash your personal style. You can use painter’s tape for clean geometric patterns, try a simple sponge-stenciling technique, or just freehand some colorful designs.
Remember to seal your finished artwork with a clear, waterproof outdoor sealant to protect it from the elements. This simple project instantly adds a cohesive or playful touch to your patio or plant collection.
Sew Simple Fabric Grow Bags for Your Veggies
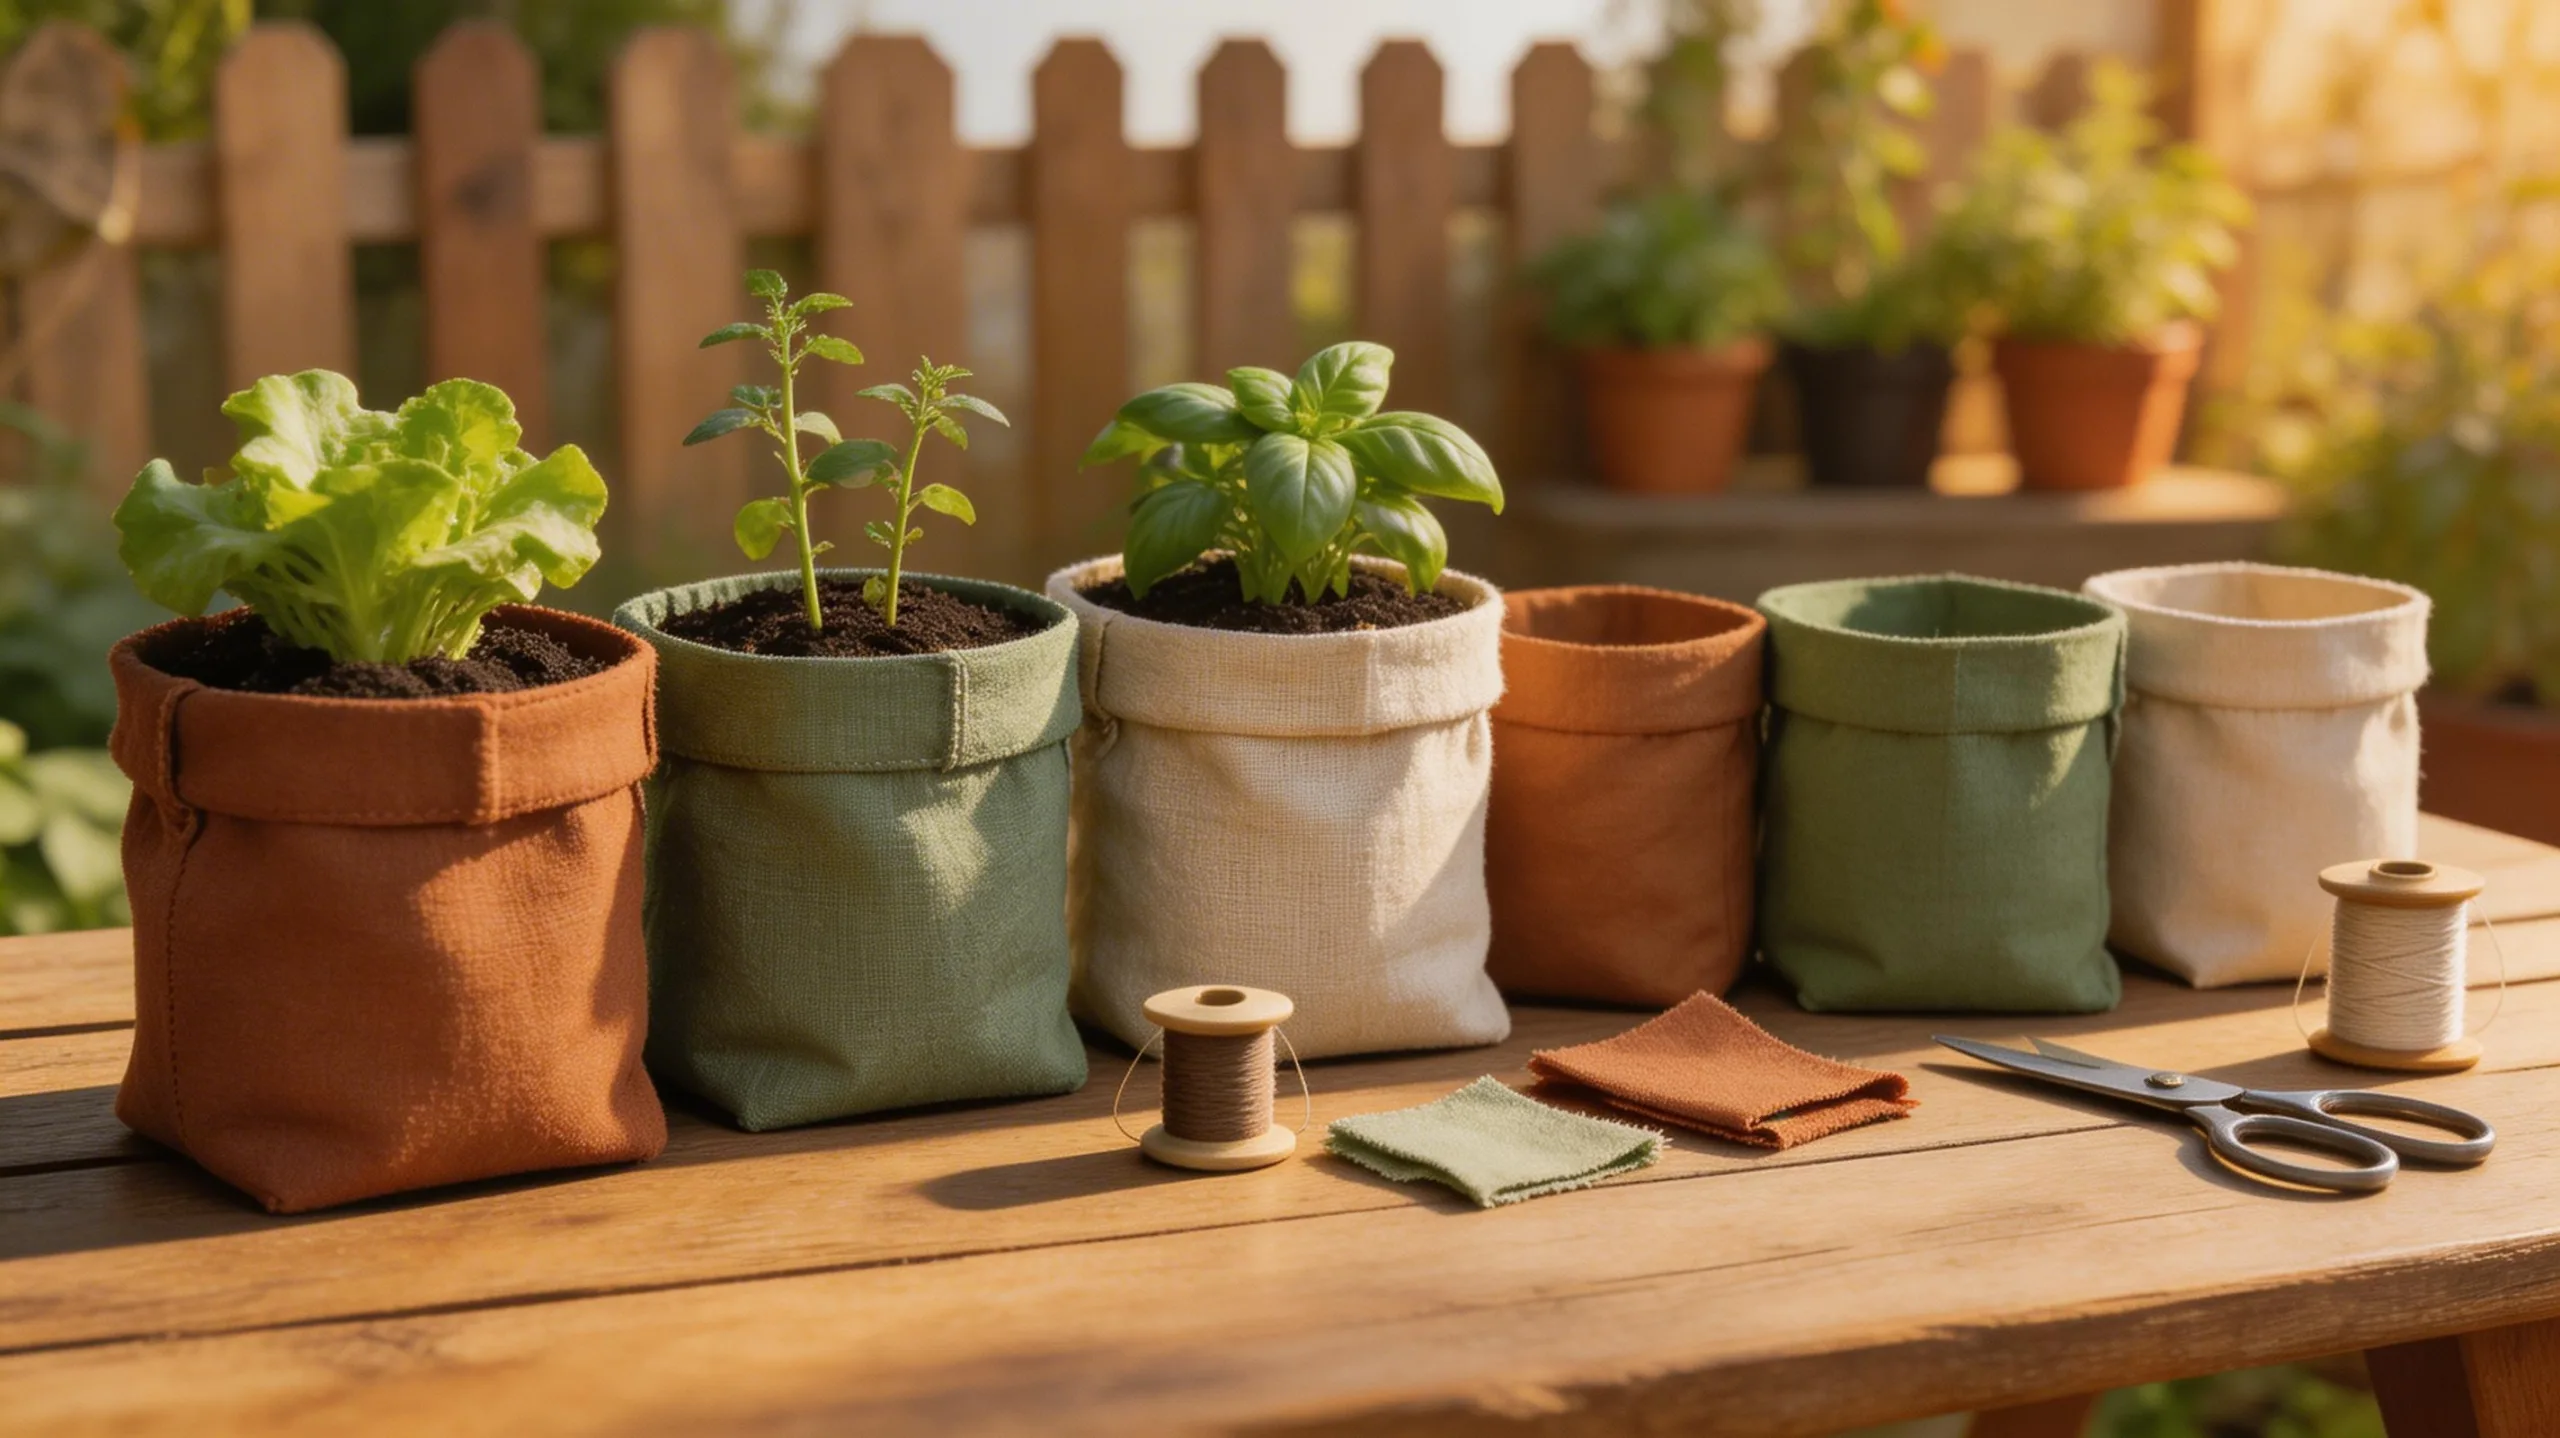
Sewing your own fabric grow bags gives you a customizable, breathable home for vegetables like tomatoes and peppers. You’ll need durable, breathable fabric like landscape cloth or heavy-duty canvas. Cut two identical rectangles for your desired size—a 12-by-12-inch square is perfect for peppers. Place the fabric pieces right-sides together and sew three sides shut, then box the bottom corners for a flat base. Turn it right-side out, fold the top edge over twice, and stitch to create a sturdy cuff for handling. Fill it with a quality potting mix, and you’re ready to plant.
| Fabric Choice | Best For |
|---|---|
| Landscape Fabric | Excellent root aeration |
| Canvas Duck | Long-lasting, sturdy support |
| Burlap (Lined) | Good drainage, rustic look |
| Polyester Felt | Consistent moisture control |
Create a Charming Garden Pathway With Stepping Stones
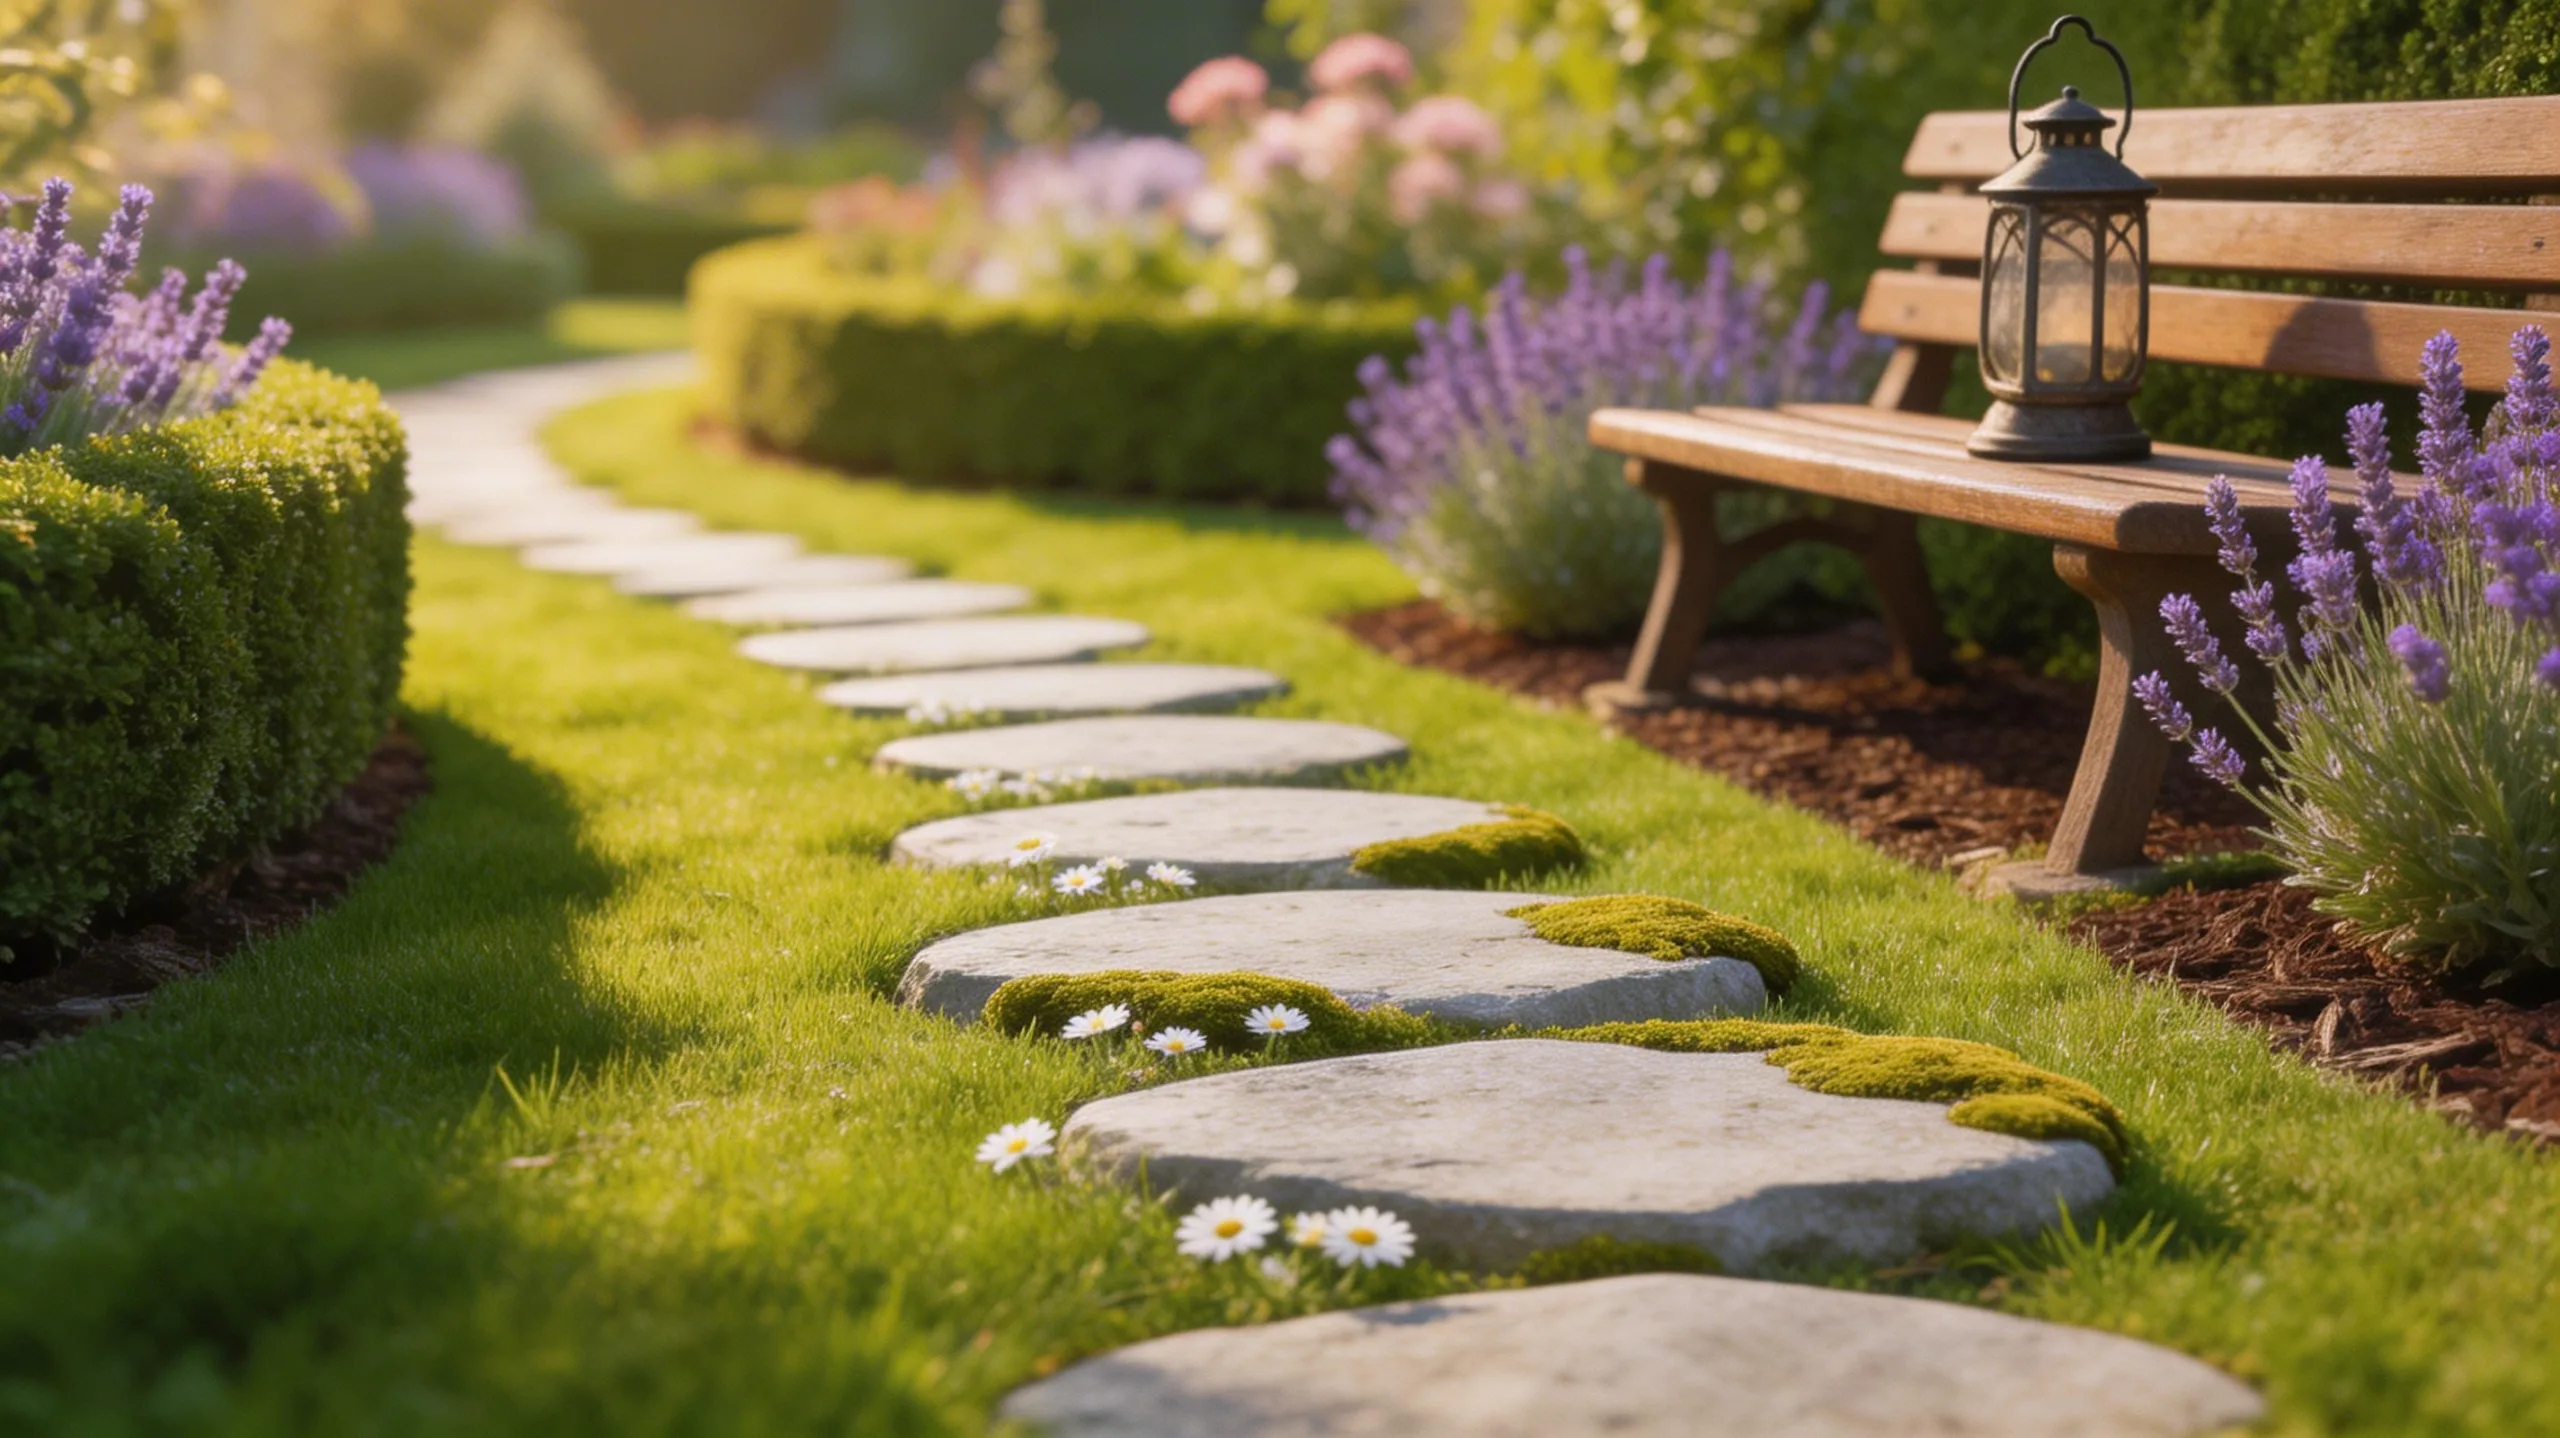
While you might design your garden beds with care, connecting them with a charming pathway adds both function and visual appeal.
Start by defining your path’s route with a garden hose, then excavate the area about three inches deep. Fill the trench with a one-inch base of paver sand, tamping it firm and level.
Now, arrange your stepping stones. You’ll want them spaced for a natural walking gait, typically about a foot apart. Settle each stone firmly into the sand, checking they sit just above the surrounding soil to avoid puddling.
Finally, fill the gaps between stones with decorative gravel, compacted soil, or creeping ground cover like thyme. This simple project instantly organizes your space and invites exploration.
Craft a Decorative Stone or Glass Garden Border
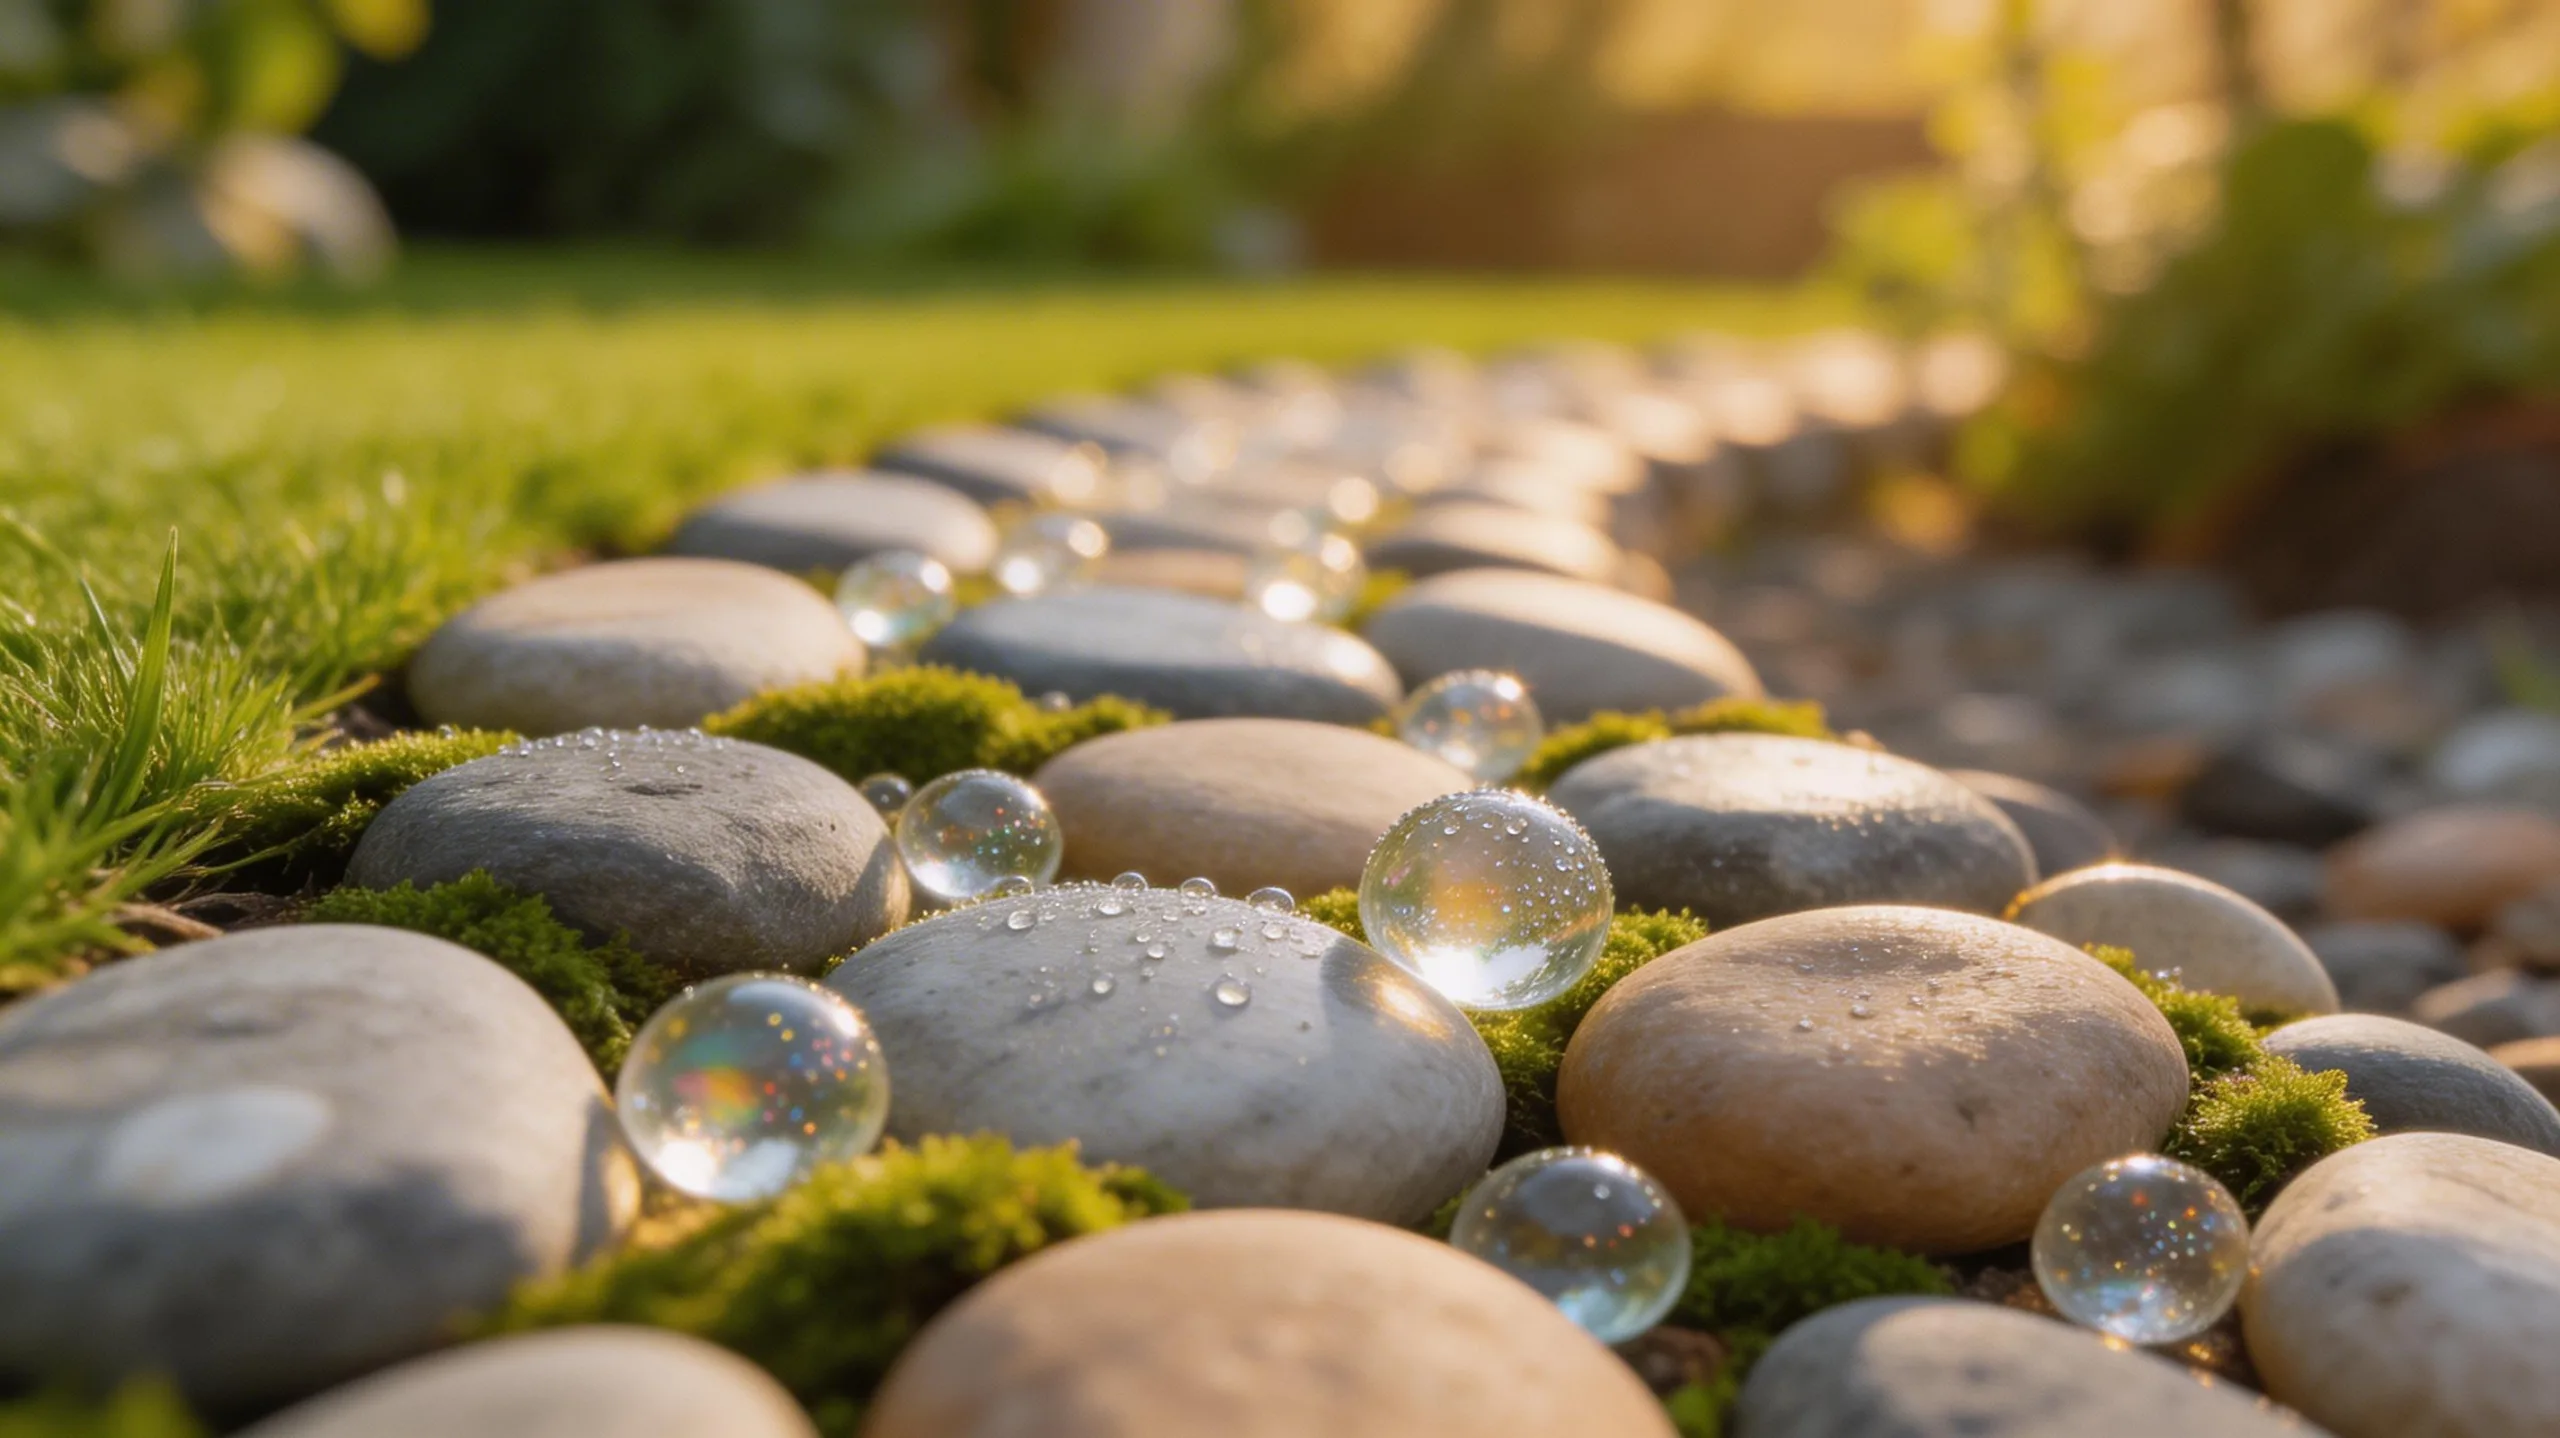
For a crisp, clean finish to your flower beds, crafting a decorative stone or glass border is a straightforward weekend project. It neatly separates your lawn from planting areas while adding a polished look. You’ll need just a few materials and some simple elbow grease to create a durable edge that suppresses grass and weeds.
- Dig a narrow trench along your bed’s edge, about 4 inches deep and wide enough for your chosen material.
- Line the trench with landscape fabric to prevent weeds from growing through your border.
- Fill the trench tightly with your stones, recycled glass pieces, or river rocks, ensuring they sit slightly above the soil line.
- Tamp everything down firmly with your foot for a stable, level finish that will last for seasons.
Build a Vertical Garden From a Wooden Pallet
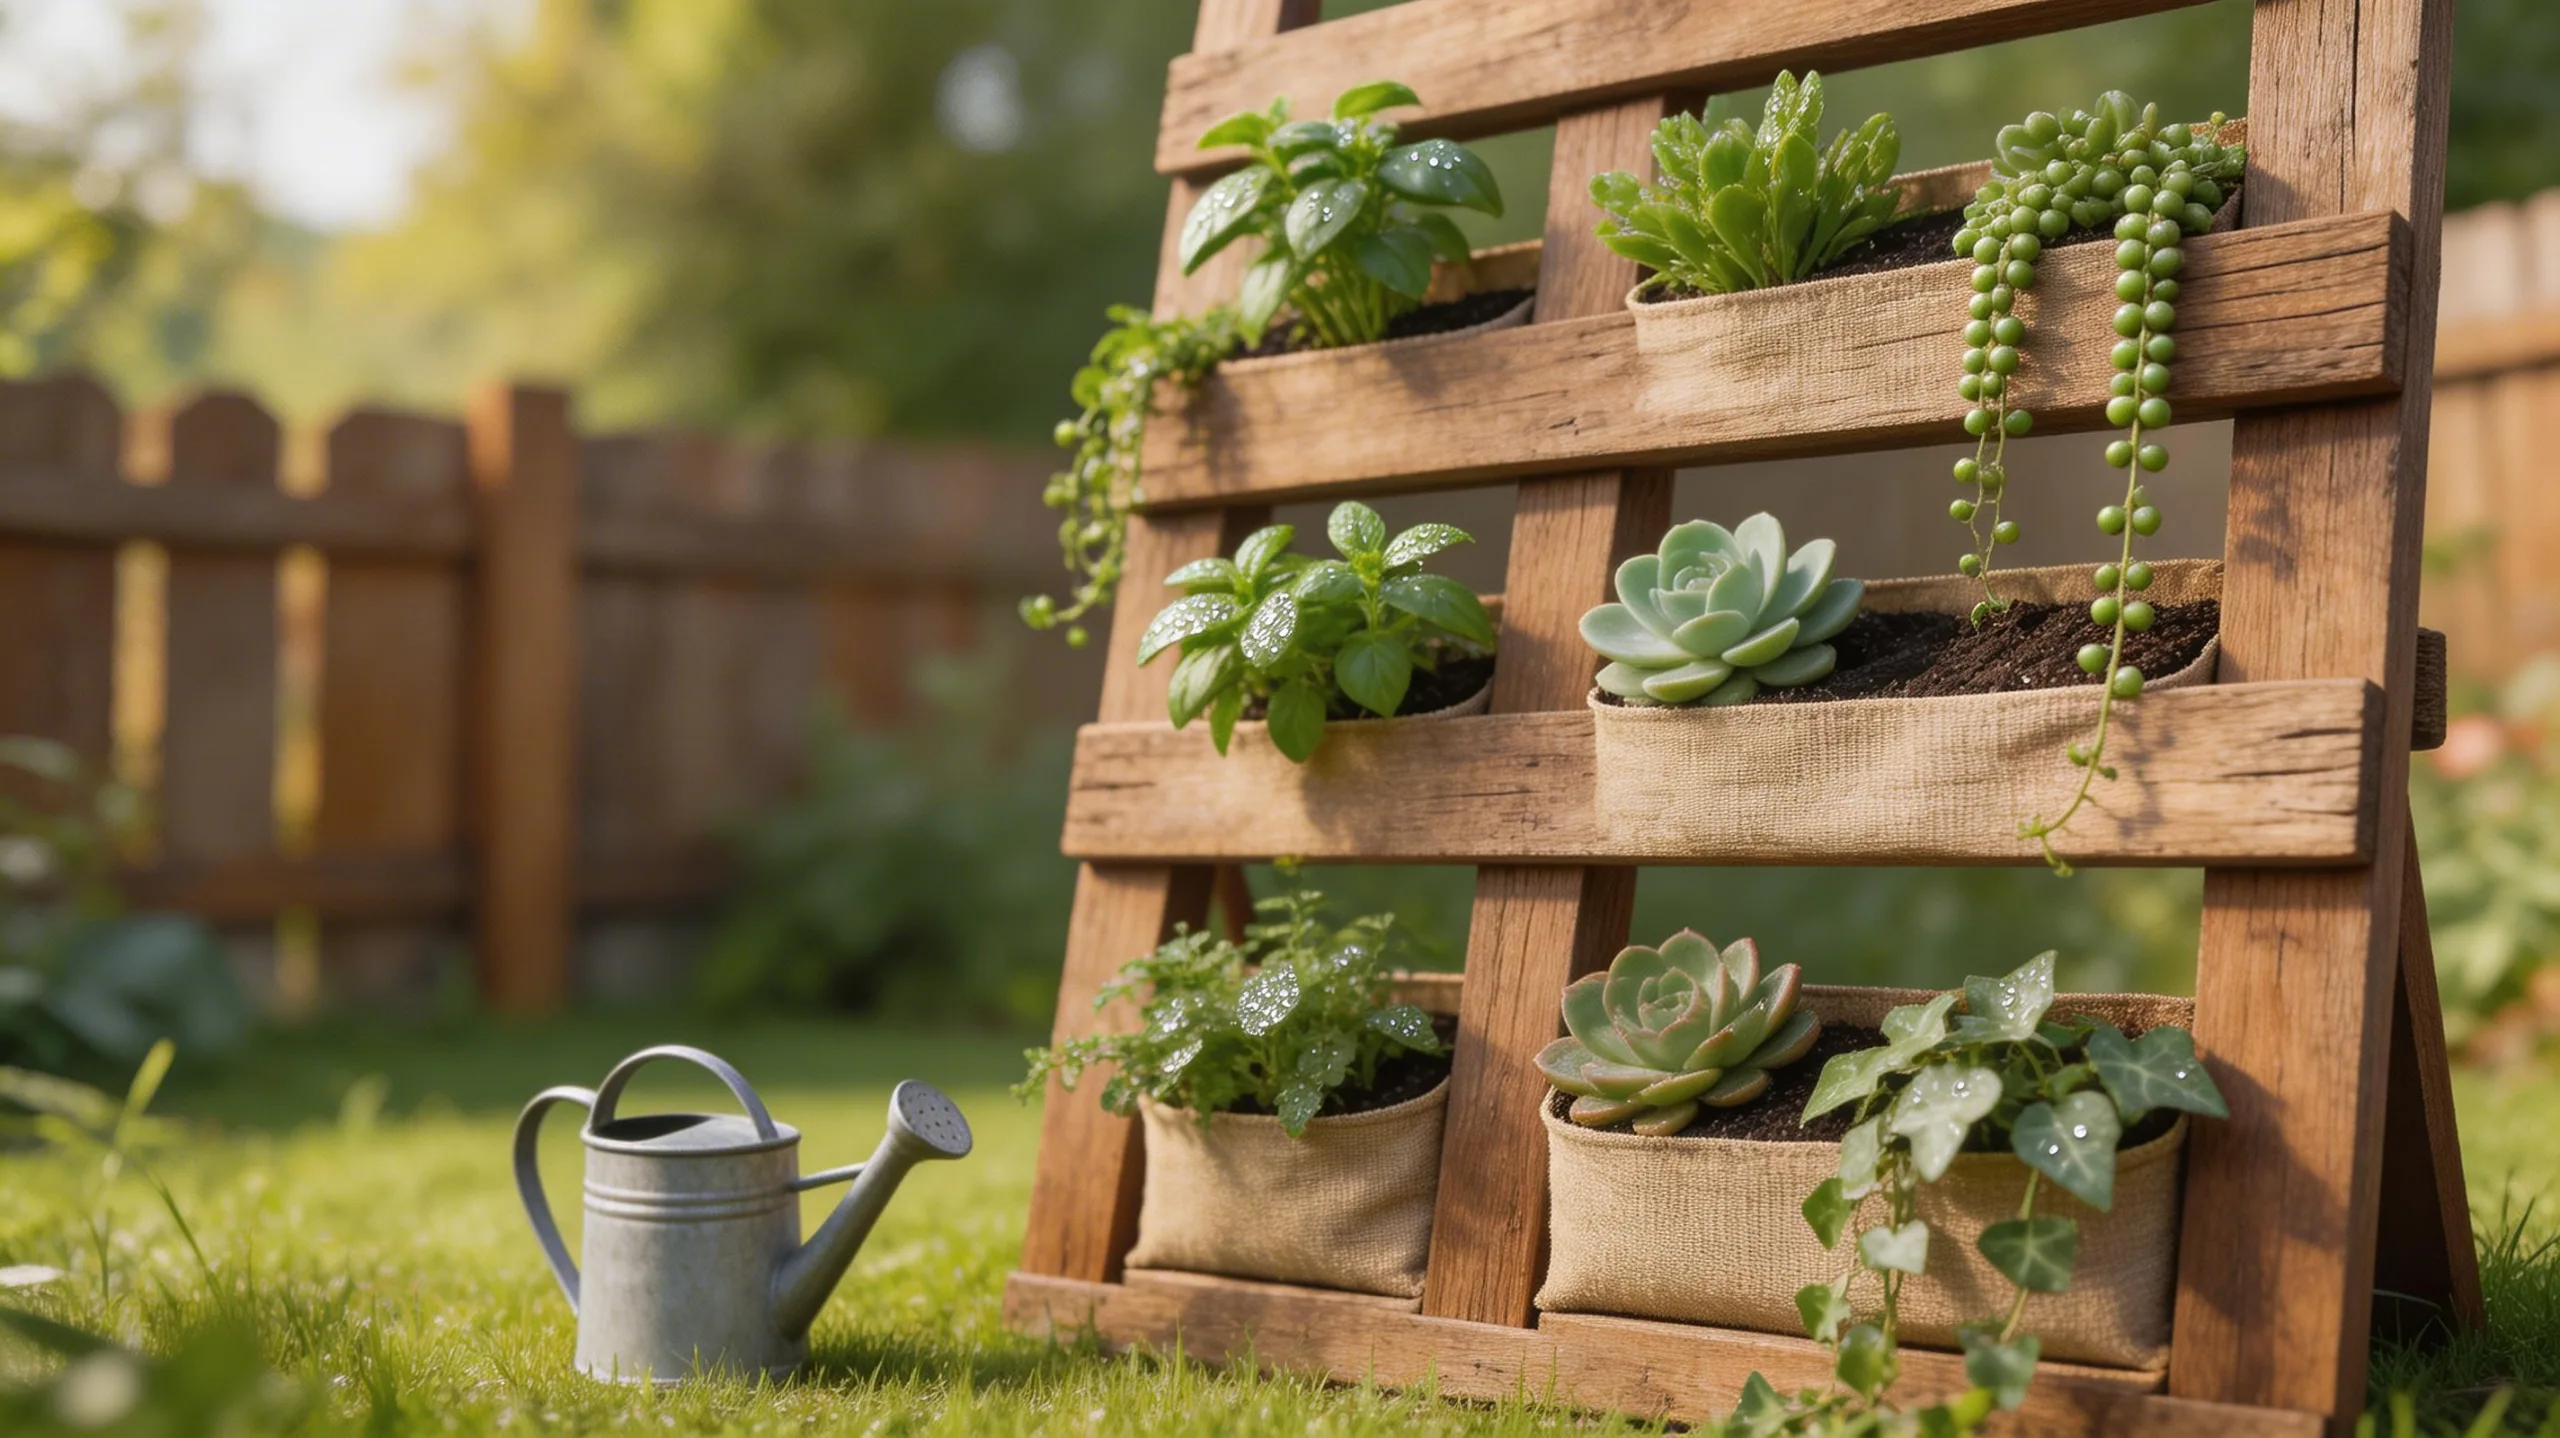
Transform a simple wooden pallet into a lush vertical garden, a perfect solution for growing herbs, flowers, or succulents in even the smallest spaces.
Start by sourcing an untreated pallet. Use a staple gun to secure landscape fabric to the back and sides, leaving the slatted front open. Line the bottom slats and interior with the fabric to create pockets for soil.
Fill these pockets with a lightweight potting mix, packing it firmly. Now, plant your chosen greenery by gently inserting roots between the slats.
Water thoroughly until it drains from the bottom. Lean your creation securely against a sunny wall or fence, using brackets for stability. You’ll have a beautiful, space-saving garden in no time.
Make Your Own Bamboo or Branch Plant Supports
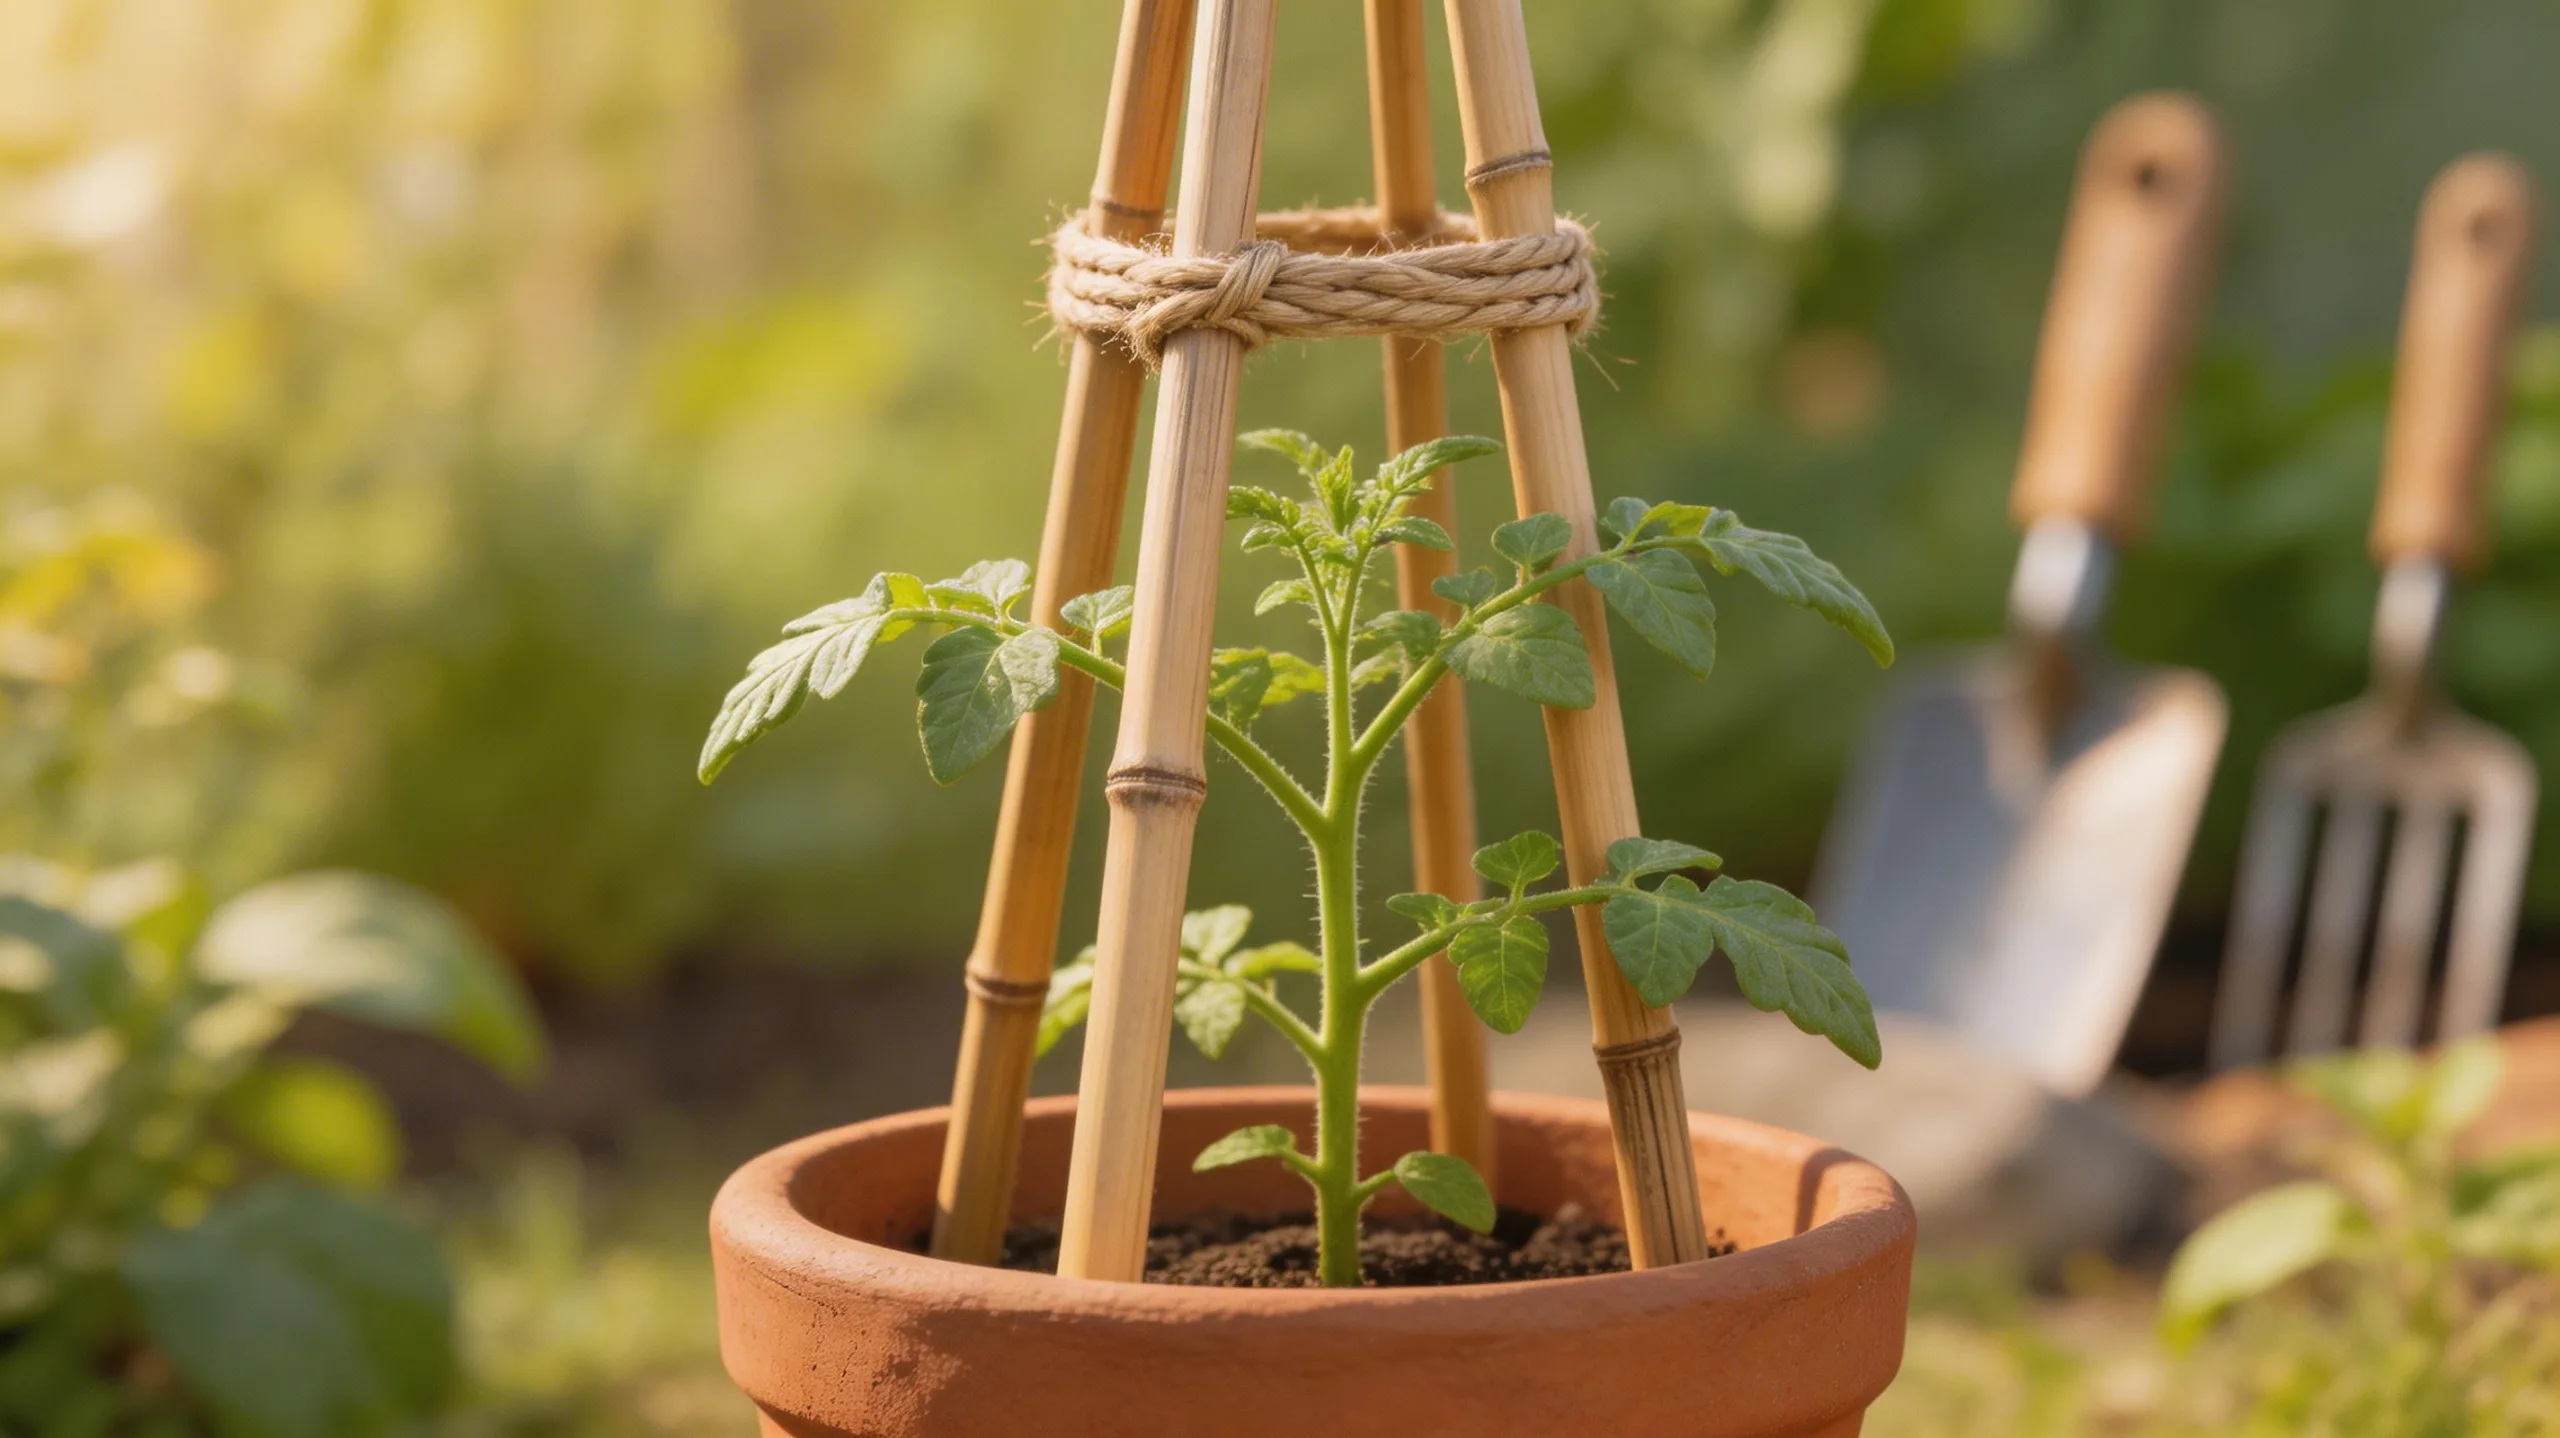
To keep tall or floppy plants standing proudly in your garden, you can craft sturdy and attractive supports from natural materials like bamboo or fallen branches. This simple project repurposes what you have, saving money and adding rustic charm.
- Gather Your Materials: Collect straight, sturdy bamboo canes or fallen branches. You’ll also need natural twine or flexible willow stems for tying.
- Build the Frame: For a teepee, push three or four poles deep into the soil around your plant, angling them inward. Tie them firmly together at the top.
- Add Horizontal Braces: Secure horizontal poles between the uprights at different heights using tight knots to create a stronger, grid-like structure for climbing plants.
- Tie in Your Plants: Gently use twine to attach plant stems to the supports, allowing room for growth while providing immediate stability.
Construct a Basic Bird Feeder From a Milk Carton

While bird feeders can be expensive, you can easily make a functional one by repurposing an empty milk or juice carton.
First, thoroughly wash and dry the carton. Use scissors to cut a large opening on two opposite sides, leaving a few inches at the bottom to hold seed.
Poke a small hole just below each opening and insert a wooden dowel or sturdy stick to create a perch. Make a small hole in the top of the carton to thread a string or wire for hanging.
Decorate the outside with non-toxic paint if you wish. Fill the bottom with birdseed, hang it from a tree branch, and watch your garden visitors arrive.
It’s a simple, rewarding project.
Install a DIY Drip Irrigation System With a Bottle
Pierce several small holes in the cap of a clean plastic bottle using a nail or drill bit, and unscrew the cap slightly to let water seep out slowly. This transforms the bottle into a simple, slow-drip water source for your plants.
To install it, follow these steps.
- Cut the bottom off your bottle to create an open reservoir.
- Dig a hole next to your plant and bury the bottle upside-down, with the cap near the roots.
- Fill the reservoir with water; it’ll gradually drain through the adjusted cap.
- Refill every few days for consistent, deep watering that encourages strong root growth.
This method saves water and time, ensuring your plants thrive even when you’re away for a weekend.
Build a Quick Compost Bin From a Bucket
Turn an ordinary bucket into a simple compost bin that quickly recycles kitchen scraps into nutrient-rich fertilizer.
First, drill a dozen small holes in the lid and around the bucket’s sides for aeration. Place a shallow tray underneath to catch any drips.
Start your compost with a base of shredded newspaper or dry leaves. Regularly add your kitchen scraps—like fruit peels, coffee grounds, and vegetable trimmings—but avoid meats and dairy.
Keep the contents moist, like a wrung-out sponge, by occasionally adding water. Stir the mixture every few days with a stick to speed up decomposition.
In just a few weeks, you’ll create “black gold” for your garden, enriching your soil effortlessly.
Put Together a Rain Barrel From a Trash Can
You can capture rainwater to nourish your plants for free by converting a sturdy plastic trash can into a basic rain barrel.
First, choose a dark-colored can to inhibit algae growth. You’ll drill a hole near the bottom to install a spigot for filling watering cans, and another hole near the top for an overflow hose. Always use a sealant on the fittings to prevent leaks.
- Drill a 15/16-inch hole near the barrel’s bottom and securely screw in a standard faucet or spigot with rubber washers.
- Create an overflow outlet near the top using a bulkhead fitting or a simple hose adapter.
- Cut a large opening in the lid to collect water, covering it tightly with window screen to keep out debris and mosquitoes.
- Elevate the finished barrel on cinder blocks for better water pressure and easier access to the spigot.
Build a Bug Hotel for Natural Pest Control
Attract beneficial insects like ladybugs and lacewings to your garden by constructing a simple bug hotel from natural materials. You’ll provide shelter for these helpful predators that control aphids and other pests. First, find an old wooden box, a section of hollow bamboo, or a simple terracotta pot. Fill it with various natural, dry materials that create different sized nooks and cavities. Place your finished hotel in a sheltered, sunny spot near your plants.
| Material to Use | Attracts These Helpers |
|---|---|
| Hollow bamboo canes | Solitary bees for pollination |
| Pine cones & dry leaves | Ladybugs for aphid control |
| Corrugated cardboard rolls | Lacewings for pest eggs |
| Drilled wood blocks | Various beneficial beetles |
You’ll create a thriving ecosystem that manages pests naturally.
Make a Citronella Candle in a Pot to Repel Mosquitoes
While beneficial insects manage pests on plants, citronella can help protect the gardener. Making your own citronella candle in a pot combines functionality with charm, providing hours of mosquito-free enjoyment in your outdoor space. It’s a simple weekend project.
- Select a heat-resistant container, like a ceramic pot, and ensure it’s clean and dry.
- Insert a pre-made candle wick into the bottom, securing it with a dab of hot glue.
- Fill the pot with citronella wax flakes, leaving the wick upright and exposed.
- Carefully melt the flakes with a double boiler method, then let the wax cool completely before lighting.
Your homemade candle will effectively repel insects while adding a lovely, natural ambiance to your garden evenings.
Create a Cozy Garden Fire Pit Area With Pavers
Transform your outdoor evenings by crafting a cozy garden fire pit area with pavers, a project that builds a warm, inviting gathering space.
First, choose a safe, level spot away from structures and overhanging branches. Outline your pit’s shape, then excavate about six inches of soil. Fill this base with a few inches of gravel for drainage and tamp it down firmly.
Next, lay your pavers in a circle on a bed of sand, ensuring they’re level and tightly fitted. You can use a metal fire ring for safety inside the circle.
Finally, arrange comfortable seating like benches or Adirondack chairs around it. You’ll soon enjoy a perfect spot for roasting marshmallows and sharing stories under the stars.
Make Mosaic Garden Decor From Broken Plates or Tiles
Just as a fire pit becomes a focal point for evening gatherings, mosaic artwork can bring daytime color and character to your garden spaces.
You can transform broken ceramic plates, tiles, or glass into stunning, durable decorations for stepping stones, plant pots, or wall art.
This project creatively recycles materials and personalizes your outdoor area.
- Gather Materials: Collect your broken pieces, outdoor-rated tile adhesive, grout, a sealant, and a base like a concrete stepping stone or terracotta pot.
- Design and Break: Sketch your design on the base, then use tile nippers to shape your fragments, wearing safety glasses.
- Adhere the Pieces: Apply adhesive to the back of each piece and press it firmly onto your base, leaving small gaps for grout.
- Grout and Seal: After the adhesive dries, spread grout over the mosaic, wipe off the excess, and apply a waterproof sealant once cured.
Plant a Living Succulent Wreath for Your Door
If you’re looking for a unique way to welcome guests, a living succulent wreath offers lasting, low-maintenance charm for your entryway.
Start by soaking a pre-made moss wreath frame until it’s damp. Select small, hardy succulents like sedum or echeveria. Using a chopstick, poke holes in the moss and insert the succulent stems, securing them with floral pins if needed.
Let the wreath lie flat indoors for two weeks so roots establish, misting lightly every few days.
Then, hang it on your door in a spot with bright, indirect light. Water it sparingly—just a thorough misting every two weeks is enough. Your living wreath will thrive for months with minimal care, growing into a beautiful green welcome.
Frequently Asked Questions
What Plants Grow Best in Fabric Grow Bags?
You can grow vegetables like tomatoes, peppers, and greens in fabric bags. Choose compact root crops too, such as radishes. Ensure you use quality potting mix and water regularly, as they’ll dry out faster.
How Do I Keep My Rain Barrel From Breeding Mosquitoes?
You can cover the barrel’s openings with fine mesh screens, add a few tablespoons of vegetable oil, or use a mosquito dunk; these block entry and kill larvae without harming your garden water.
What Type of Wood Is Safe for a Raised Vegetable Bed?
Choose rot-resistant woods like cedar or redwood. You can also use pressure-treated lumber rated for ground contact. Just line the bed’s interior with heavy-duty plastic to prevent soil contact with any chemicals.
How Do I Clean a Used Plastic Bottle for Planting?
First, remove any labels and residual glue. Then, rinse the bottle thoroughly with warm water and soap. For a deeper clean, use a diluted bleach solution or vinegar rinse, scrubbing the inside before letting it air dry completely.
Where Should I Place a Bug Hotel in My Garden?
Pick a sheltered spot facing south or east for maximum sun. Secure your bug hotel on a fence, wall, or post. Just ensure it’s off the ground and away from direct wind or rain.
Conclusion
So, pick your favorite idea and just start. You’ll be amazed by what you can build, upcycle, and grow in just a weekend. These projects instantly add charm and function to your space. Grab your tools, dig in, and transform your garden into a personalized retreat you’ll love spending time in. Your perfect outdoor space is waiting—you’ve got this
The Only Tools You Need for a Thriving Garden 🌱
Whether you're a weekend gardener or growing daily — these hand-picked tools make every session faster, easier, and more satisfying.