You’ll start with cardboard to suppress grass over five months while building soil underneath. Scavenge free stones for edging, stack dollar-store pots on rebar for vertical planting, and propagate cuttings to multiply your plants. Upcycled pallets become trellises, and mason jars strung overhead create rustic lighting. Test your soil annually, mulch generously, and water at the base only. With strategic planning and salvaged materials, you’re looking at under $50 to launch a thriving garden—though the real magic unfolds once you dig deeper into site-specific techniques and seasonal maintenance rhythms.
Key Takeaways
- Use cardboard and free mulch to suppress grass and build soil over 5–8 months before planting.
- Repurpose pallets, ladders, crates, and buckets as trellises, planters, and vertical garden structures.
- Source free fieldstones and salvaged wood for budget-friendly edging and structural framework.
- Plant self-seeding varieties like poppies and sedums to reduce ongoing propagation and purchase costs.
- Invest $50 in supplies to generate $1,250+ annual produce value through well-maintained vegetable gardens.
Why Budget Gardening Works (and How to Start)

Why does a $50 investment in gardening supplies return $1,250 worth of produce annually?
You’re leveraging nature’s productivity while cutting store costs dramatically.
The National Gardening Association confirms $500 average annual returns per well-maintained vegetable garden—realistic, achievable figures.
Start small.
You don’t need vast acreage; even balcony tomatoes deliver savings and stress relief.
Track your actual expenses: seeds, soil, tools.
Calculate labor honestly against your harvest value.
One 2023 analysis showed $2,098 CDN savings versus store purchases for 1,056 kg of produce.
Begin by growing what you eat regularly.
This eliminates waste and maximizes your return.
You’ll develop skills progressively, reduce grocery bills immediately, and build momentum toward expanding your garden’s scope and profitability. Gardens also slow runoff and reduce erosion, protecting your local soil and water systems while you grow food.
Map Your Garden Layout With Poles and Stakes
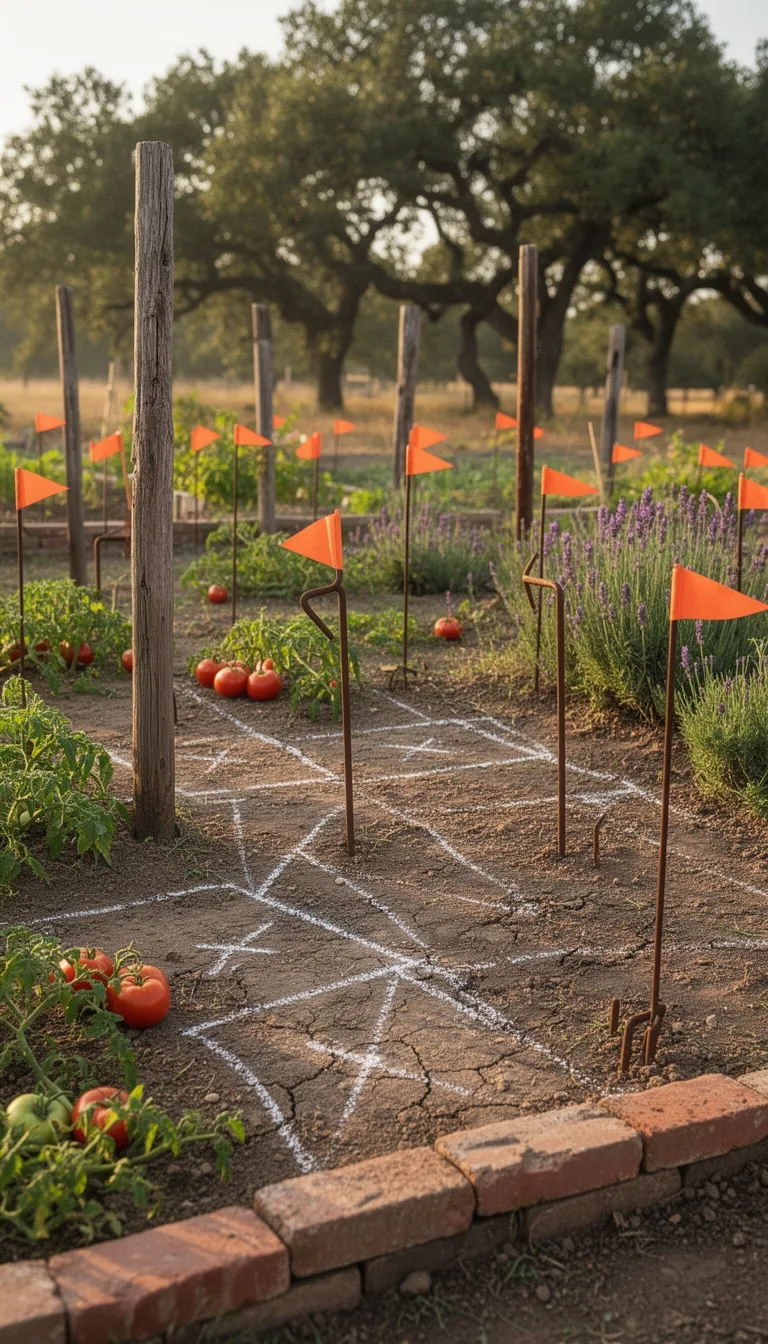
Once you’ve committed to growing what you eat, you’ll quickly discover that plants need support structures—and that’s where strategic layout planning begins. You’ll map your garden using affordable poles and stakes that define plant positions before digging.
| Material | Cost | Durability | Best Use |
|---|---|---|---|
| Bamboo canes | Low | 2-3 years | Climbing beans |
| Cut branches | Free | 1-2 years | Archway bracing |
| Steel rods | Medium | 10+ years | Border posts |
| Wooden stakes | Low | 3-4 years | Individual plants |
You’ll space posts 2-3 meters apart for tall borders, burying them six inches minimum. For archways, dig snug-fit holes 1-2 feet apart. You’ll secure everything with garden twine, allowing gentle sway while preventing stem damage. Cross-brace with hazel pieces for stability. Bean poles create vertical layers of biodiversity that maximize your growing space while enriching the soil through nitrogen fixation. This groundwork prevents costly replanting mistakes later.
Mark Zones and Pathways Using Wood Chips
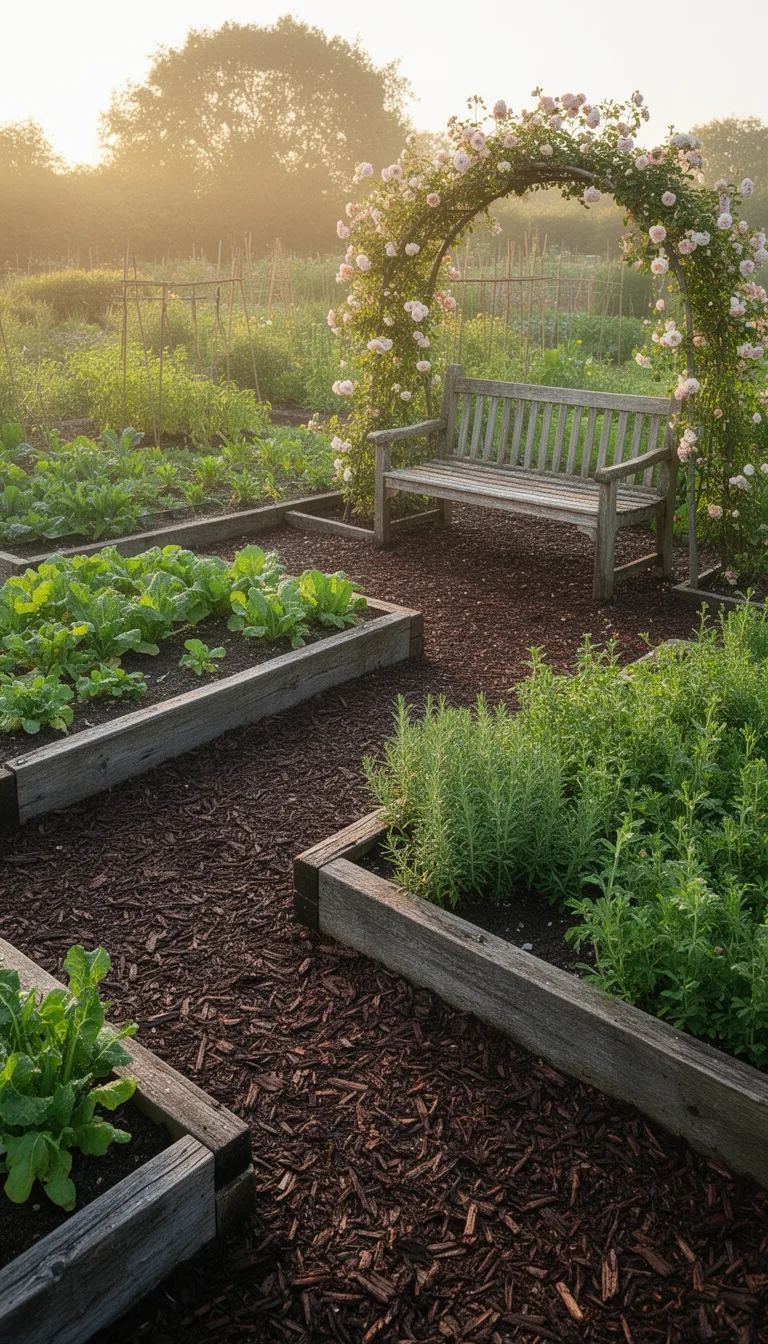
How do you transform bare soil into defined garden zones?
Wood chips do the heavy lifting.
Start by clearing weeds and stones from your pathway areas, then measure to ensure they’re at least 18 inches wide for wheelbarrow access.
Rake the soil flat and lay down cardboard in double layers as a natural weed barrier.
Secure it with earth staples.
Next, install 8-inch pound-in edging along both sides using a rubber mallet.
This containment system blocks weeds and keeps chips in place.
Finally, spread wood chips evenly across your pathways, aiming for 3–4 inches deep.
This depth suppresses weeds effectively while retaining moisture in adjacent beds and reducing water loss. Leave 2–3 inches of space around plants to prevent damage.
Top up annually with fresh chips to maintain definition and weed control.
Kill Grass With Cardboard Over Five Months
Cut your grass as short as possible, then lay down plain brown corrugated cardboard—Amazon boxes and pizza boxes work perfectly.
Dampen the cardboard to speed decomposition and adhesion.
Cover your cardboard with four to six inches of mulch: compost, soil, or free city mulch giveaways.
This dual-purpose layer blocks additional light and enriches your soil with organic materials. Ensure the barrier fully covers your target area with slight overlap at the edges to eliminate gaps where weeds might emerge.
Over five to eight months, sunlight deprivation starves the grass while microorganisms, insects, and worms decompose everything simultaneously.
Carbon reintroduces into your soil as the cardboard breaks down.
You’ll develop nutrient-rich earth ready for planting—no chemicals or plastic needed.
Edge Beds With Free Scavenged Stone
Where do you find affordable edging that’ll outlast your garden for decades?
You’ll source free fieldstones from your property or nearby areas.
These rustic stones create authentic borders requiring zero maintenance while saving you purchase costs.
Start by marking your layout with a hose, then call 811 to check for utilities.
Dig a trench twice the block width and 6 inches deep.
Wet the ground and use a flat-nose shovel to maintain consistent depth along a string line.
Add a 4-inch packed gravel base in 2-inch layers, tamping each layer damp.
The leveling sand enables adjustment and fine-tuning of stone placement for optimal results.
Lay your first row level side-to-side and front-to-back, burying stones 2 inches deep.
Stagger seams on the second row using your string line as a guide.
Backfill firmly to lock everything stable.
Upcycle Furniture Into Trellises and Structures
You’ve edged your beds with stone—now it’s time to add vertical dimension. Transform discarded furniture into stunning trellises that cost nothing but creativity.
| Material | Best Use |
|---|---|
| Ladders | Climbing roses, jasmine, clematis |
| Pallets | Cucumbers, nasturtiums support |
| Chair frames | Freestanding flower trellises |
| Doors | Central focal point structures |
| Deck scraps | Snap peas, mixed-material designs |
Disassemble old wooden ladders and secure them freestanding for climbing vines. Paint them rustic or leave natural—they’ll support heavy growth beautifully. Repurpose broken chair backs as elegant standalone trellises. Upcycle pallets into grid structures by rearranging slats. Mount weathered window frames on walls for vertical greenery. When selecting materials, ensure your support structure matches vine weight to prevent collapse under mature plant growth. Combine repurposed deck lattice with scrap metal for durability. Source materials free from garbage or yard sales, then position strategically throughout your garden for both function and charm.
Build Containers From Wood Crates and Tin Cans
How can you turn free wooden crates into durable planters that’ll outlast a season or two?
Start by lining the interior with landscape fabric, securing it with clothespins.
Cut drainage holes in the bottom barrier, then cover the wide sides with additional fabric strips.
Fill your lined crate with soil to two-thirds capacity, tucking the barrier as you go.
Dig holes for your plants and press soil firmly around the roots.
For longevity, apply exterior wood varnish or UV-resistant paint inside and out, priming first with Zinsser Bulls Eye. Consider selecting seasonal herbs or other plants suited to container gardening that will thrive in your new planter box.
Add legs from 4×4 scraps to elevate the planter off ground, preventing rot.
Staple chicken wire for extra reinforcement.
You’ve created a sturdy, budget-friendly container that’ll serve your garden for years.
Repurpose Buckets, Stumps, and Galvanized Finds
What’s hiding in your garage or shed right now? Buckets and galvanized finds become garden gold when you repurpose them thoughtfully. Start by punching drainage holes in bucket bottoms, then layer pebbles for drainage efficiency. Fill with potting mix and you’ve got instant planters. Paint buckets with weather-resistant acrylic in farmhouse colors, or embrace galvanized metal’s rustic charm. For added versatility, consider drilling multiple holes across the bucket surface to create oxygen flow that transforms ordinary containers into functional indoor compost bins alongside your decorative planters.
| Project Type | Materials Needed | Result |
|---|---|---|
| Garden Planter | Bucket, drainage holes, pebbles, potting mix | Functional container garden |
| Umbrella Stand | Bucket, PVC pipe, quick-set concrete, pea gravel | Patio shade solution |
| Water Feature | Bucket, pump system, PVC elbow fittings | Cascading garden ambiance |
| Storage System | Bucket, wooden frame, soil | Vertical tower planting |
| Decorative Accent | Bucket, yarn, stencils, dried flowers | Rustic arrangement display |
Stack multiple buckets vertically to maximize limited space while creating tiered plantings.
Build Vertical Gardens With Free Pallets
Free pallets transform into stunning vertical gardens that’ll double your planting space without breaking the bank.
You’ll start by preparing a heat-treated pallet in good condition, sanding rough edges and removing stray nails.
Here’s your building process:
- Line the pallet with landscape fabric, stapling it tightly across the back, bottom, and sides
- Add scrap wood supports to the open back for stability
- Fill the pallet with potting soil, pressing firmly through the slats
- Plant shallow-rooted varieties like oyster plants, working from bottom to top
Once planted, water thoroughly and keep your pallet horizontal for 1-2 weeks while roots establish.
Then prop it against a wall or secure it with mounting brackets for permanent installation.
Monitor soil settling and maintain consistent moisture for a thriving vertical display that maximizes your garden’s potential. For added security and stability, consider using metal wire at the top, middle, and bottom points to ensure your garden remains firmly anchored.
Stack Pots Into Budget Plant Towers
Why stack individual planters when you can cluster them into a single vertical tower that multiplies your growing space without multiplying your costs?
Dollar store plastic pots at $1.25–$1.50 each make towers affordable.
You’ll need a metal stake or rebar measured to accommodate your pot height plus 24 inches for ground stability.
Drill holes in pot bases slightly larger than your rod’s diameter, then stack pots overlapping on at least two sides for level stacking.
Landscape fabric retains soil while overlapping pots create natural drainage between levels.
A single tower produces 30 planting spaces in minimal footprint.
Fill with potting soil, add fertilizer, and you’re ready to plant strawberries, herbs, lettuce, or flowers for under $15 total investment. This vertical approach reduces horizontal footprint while maximizing your garden’s productivity in confined spaces like patios or balconies.
Propagate Plants and Divide Perennials Free
How can you multiply your garden without spending a dime? You’ll expand your rustic garden by propagating existing plants through several proven methods:
- Stem cuttings – Take 4-6 inch cuttings below nodes, dip in rooting hormone, and place in perlite or sand
- Leaf cuttings – Cut leaves with stem portions from succulents and plant in soil-less mix
- Root cuttings – Dig up healthy plants, cut 2-3 inch root sections horizontally into sanitized medium
- Perennial division – Separate established perennials into sections with roots and shoots, then replant immediately
Each method costs virtually nothing while producing multiple new plants.
You’ll maintain proper moisture without overwatering to prevent rot.
Sanitize your tools beforehand to avoid disease transmission.
Share divisions with fellow gardeners, creating community while maximizing your budget-friendly garden growth.
Choose Self-Seeding Plants That Spread Alone
After you’ve propagated your initial plants, you’ll want to introduce self-seeding varieties that’ll multiply themselves year after year without your intervention.
Poppies are your ultimate low-maintenance choice—they’ll return annually and spread prolifically without becoming aggressive.
Nigella thrives in cold climates, dropping dozens of seeds from delicate pods; just leave plants standing through winter.
Columbine self-sows readily across full sun to part shade, feeding early pollinators like hummingbirds.
Alliums expand dramatically over years—one Allium Christophii can grow into 80-100 plants in 15 years.
Sedums self-seed freely in gravel and brick paving, their seedlings thriving in shade.
These plants handle the work for you, transforming bare spaces into established garden patches while you focus elsewhere.
Layer Ornamental Grasses for Cottage Style
Ornamental grasses’ll fill those spaces your self-seeding perennials don’t cover, creating the layered, informal look that defines a true cottage garden.
You’ll achieve visual impact and texture by following these strategic planting techniques:
- Plant grasses in odd-numbered groupings (3, 5, or 7) to establish focal points throughout your borders
- Position tall varieties like giant feather grass at the back, medium heights in the middle, and short tufted types along edges
- Combine two or three grass varieties in masses for informal charm and depth
- Repeat similar colors across different grass types for cohesive visual flow
This layering approach maximizes your budget since ornamental grasses require minimal maintenance.
Leave them unpruned through winter for texture and wildlife habitat, then cut back in early spring.
You’ll cover expansive garden areas affordably while creating that authentically rustic aesthetic.
Design Rock Gardens With Succulents
Why struggle with high-maintenance garden beds when you can create a striking rock garden with succulents that’ll thrive on neglect? Start by selecting hardy species like Sempervivum and Sedum varieties in contrasting colors—blues, reds, and silvers—for visual depth.
Arrange your largest rocks first against structures for stability, then layer smaller stones downward, creating spirals or terraced levels. This layering makes compact spaces feel expansive while establishing natural drainage channels.
Fill gaps with pebbly, organic soil mixed with cactus compost. Top-dress everything with gravel and shells to suppress weeds and regulate soil temperature.
Your succulents demand minimal water, full sun, and excellent drainage. Maintain your garden by weeding regularly, rotating container plants for even growth, and refreshing gravel annually.
Build a Rustic Cabin From Reclaimed Materials
Moving beyond the ground-level beauty of rock gardens, you’re ready to tackle a bigger rustic project—building your own cabin from reclaimed materials.
You’ll source locally harvested logs at least 12 inches in diameter for sill logs, supplementing with eucalyptus for easy peeling.
Your foundation requires stone piers extending 18 inches above ground with sheet metal tops to deter termites.
Here’s your construction sequence:
- Hew flat sill log tops with an adze, then carve saddle notches for fitting
- Raise notched logs via ramp using rope pulley systems with two people
- Install hew-flat joist rounds notched into side sills for floor support
- Install triple-layer cedar shakes with 8-inch exposure for hundred-year durability
You’ll chink wall cracks with cement-sand mix and plank floors with salvaged 2-by-8 lumber.
This approach yields a complete 8×8 cabin for roughly $300.
Light Your Garden With Mason Jars and String Lights
Once you’ve built your rustic cabin, it’s time to illuminate the surrounding garden with charming, budget-friendly lighting that transforms outdoor spaces after dark. You’ll start by washing and drying mason jars.
Then drill a 1 5/8‑inch hole through each lid.
Push pre‑wired lamp sockets through the holes and secure them with nuts and threaded rings.
Add sand to jar bottoms for weight and light reflection.
Thread fairy lights inside, then screw the lids back on.
You can hang these fixtures from trees, patios, or wires using twine.
For power, you’ll either plug extension cords into household outlets, use solar stake lights affixed to lids, or install battery‑operated fairy lights. This simple setup creates instant rustic ambiance without breaking your budget.
Maintain Soil and Manage Pests Year-Round
With your garden now glowing beautifully after sunset, you’ll want to shift focus underground to build the foundation that’ll keep your plants thriving.
Healthy soil creates resilient plants that naturally resist pests and diseases.
Start by implementing these year-round practices:
- Test soil pH and nutrients annually, then amend with 1-3 inches of organic matter each fall
- Apply 2-4 inches of organic mulch in mid-spring to retain moisture and suppress weeds
- Water soil directly at the base instead of overhead to minimize fungal problems
- Remove diseased plants promptly and pull weeds before they spread
You’ll also want to grow green manure crops that fix nitrogen while improving soil structure.
Skip deep tilling—instead, layer compost directly onto beds and let worms do the work. This no-dig approach preserves soil structure while building the rich, living foundation your rustic garden deserves.
Conclusion
You’ve now got all the tools to build your rustic garden without breaking the bank. Remember, “Rome wasn’t built in a day”—your garden’ll develop character over time as you layer in scavenged stone, reclaimed wood, and established plantings. You’ll find that working with nature’s pace, not against it, actually saves you money and effort. Start small, observe your space through seasons, and expand gradually. That’s how you create something truly authentic.
The Only Tools You Need for a Thriving Garden 🌱
Whether you're a weekend gardener or growing daily — these hand-picked tools make every session faster, easier, and more satisfying.