You’ve got a backyard that could become a year‑round adventure zone without breaking the bank. By mixing low‑cost DIY projects—like a rope bridge, a sandpit with hidden treasures, or a solar‑lit reading nook—you’ll give kids both active play and quiet corners. The key is to choose ideas that fit your space, stay safe, and invite imagination. Ready to see how each of these 20 concepts can transform your yard into a vibrant play hub?
Key Takeaways
- Combine modular swing sets with adjustable-height features to fit tight yards while allowing future expansion.
- Add low‑profile adventure elements like rope bridges, zip lines, and balance beams for physical challenges and coordination.
- Create sensory and art stations using weather‑proof easels, chalk‑hopscotch grids, and water tables for creative play.
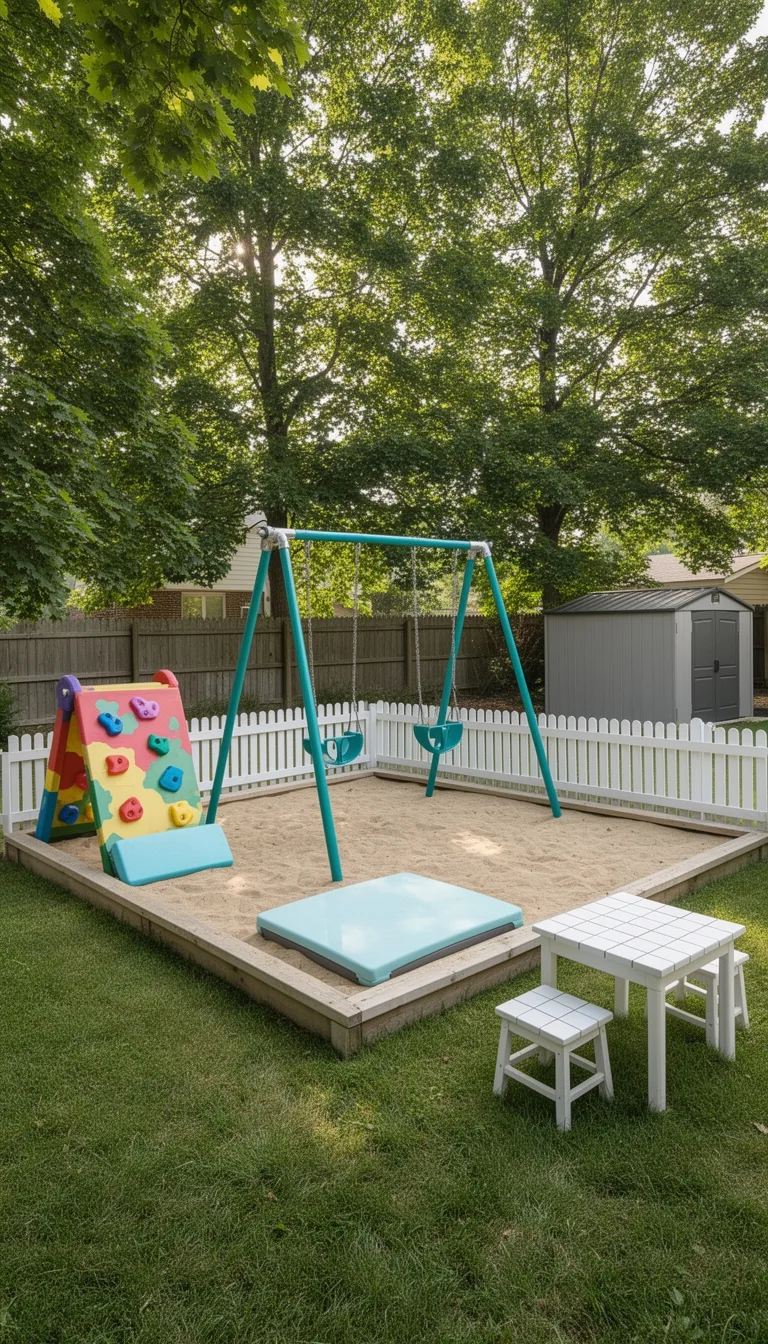
- Install a versatile sandpit with drainage fabric and hidden treasure boxes to encourage gross‑motor and exploratory activities.
- Use solar‑powered fairy‑light canopies and pop‑up tent villages to provide safe, illuminated spaces for evening and imaginative play.
Assess Your Yard Space and Set a Budget
Start by measuring your yard and figuring out how much you can spend. Walk the perimeter with a tape, note any slopes, trees, or fences, and sketch a quick layout.
Then list your priorities—swings, a sandpit, or a shade structure—so you can allocate funds wisely. Compare prices online, check local hardware sales, and factor in installation costs or tools you’ll need.
Set a realistic ceiling, leaving a buffer for unexpected expenses like ground prep or safety surfacing. Keep the budget visible on a whiteboard or spreadsheet; update it as you find deals or decide to add features.
This disciplined approach helps you stay on track, avoids overspending, and ensures the play area fits comfortably within your space and finances.
Build a DIY Rope Bridge for Mini‑Adventure Walks
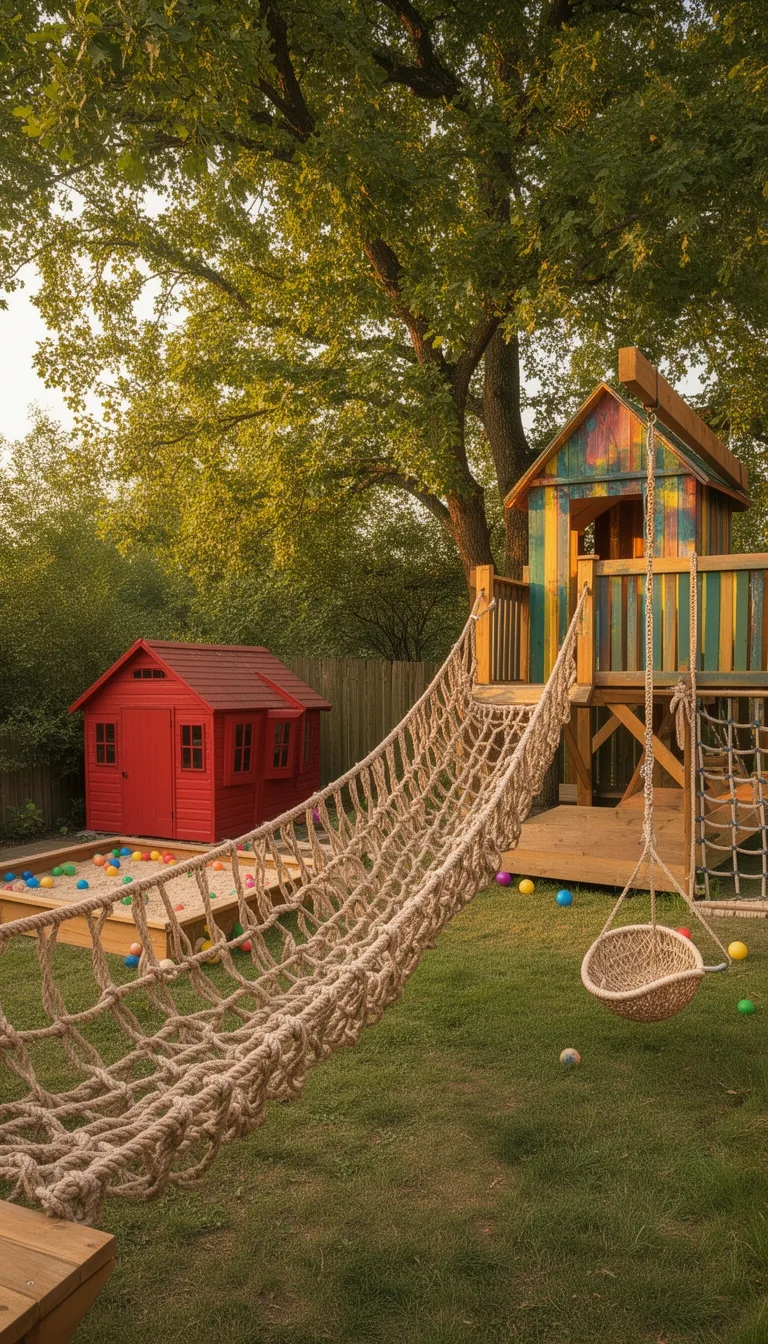
First, map out where the bridge will span, marking anchor points on sturdy posts or trees and measuring the distance to determine rope length and tension.
Choose a low‑height, flat area to keep the walk safe.
Cut two 1‑inch synthetic ropes a few inches longer than the span, then loop each around the anchors and secure with sturdy knots or carabiners.
Add a third, slightly shorter rope as the “handrail” midway between the main ropes, attaching it with slip‑knots for easy adjustment.
Test the sag by stepping onto the bridge; tighten or loosen until it feels firm but gives a little under weight.
Pad the landing zones with mulch or rubber tiles, and supervise kids as they explore their mini‑adventure walkway.
Paint a Chalk‑Line Hopscotch Grid With Custom Rules
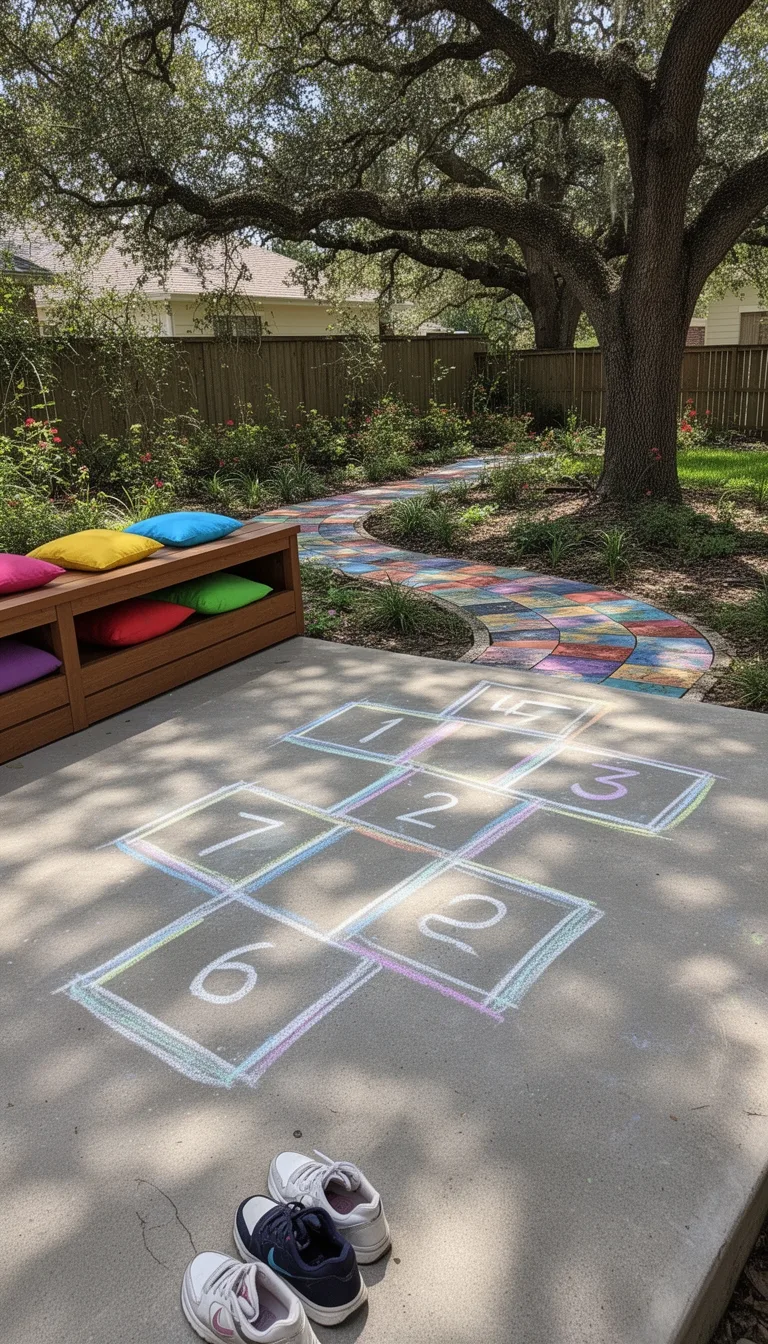
After setting up the rope bridge, you can keep the outdoor fun flowing by painting a chalk‑line hopscotch grid that lets kids create their own rules. Choose a smooth, flat surface and use a non‑toxic, water‑based chalk.
Draw a classic “T” shape, then expand with extra squares for variations. Let the kids suggest twists—like hopping on one foot, adding a math challenge, or timing each round. The grid stays visible until rain washes it away, encouraging spontaneous play and easy reset.
- Use bright colors to differentiate zones for different rule sets.
- Mark a “start” and “finish” line for racing variations.
- Add a small “penalty” square that requires a silly task.
- Include a “bonus” square that awards extra points or a free turn.
Set Up a Portable Mini Soccer Goal for Quick Games
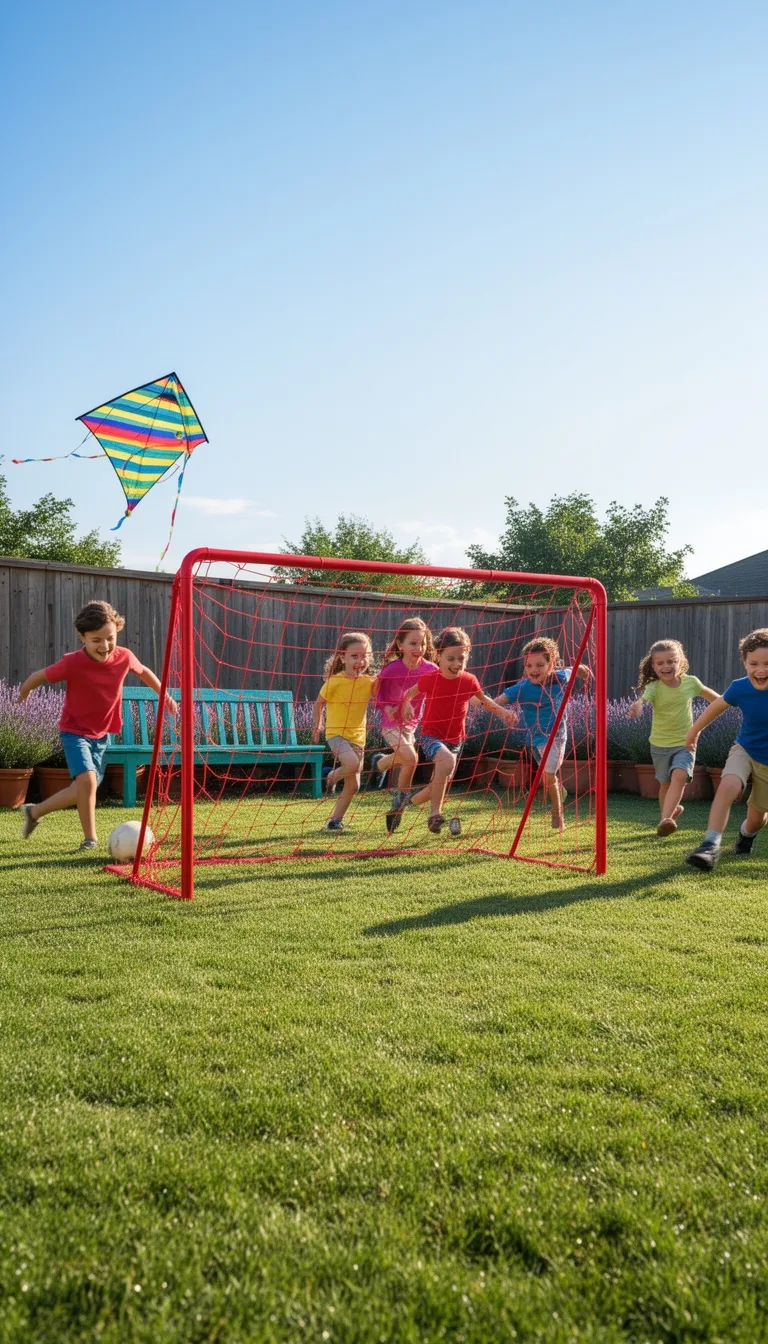
Set up a portable mini soccer goal in minutes by anchoring a lightweight frame to a sturdy base, then securing the net with adjustable straps. You’ll love how quickly it transforms a grassy patch into a lively arena. Choose a frame with rubber‑coated feet to protect the lawn, and use quick‑release buckles for easy storage. Position the goal where sunlight isn’t harsh, and keep a ball‑return net handy for nonstop play. Check the tension weekly; a snug net prevents sagging and keeps shots on target. Encourage kids to practice dribbling, shooting, and teamwork while you supervise safely.
| Feature | Why It Matters | Quick Tip |
|---|---|---|
| Lightweight frame | Easy to move | Use wheels for rolling |
| Adjustable straps | Secure net tension | Tighten after each game |
| Rubber feet | Lawn protection | Clean after rain |
| Quick‑release buckles | Fast setup | Practice one‑handed |
| Ball‑return net | Keeps ball nearby | Hang at waist height |
Construct a Backyard Fort From Recycled Pallets
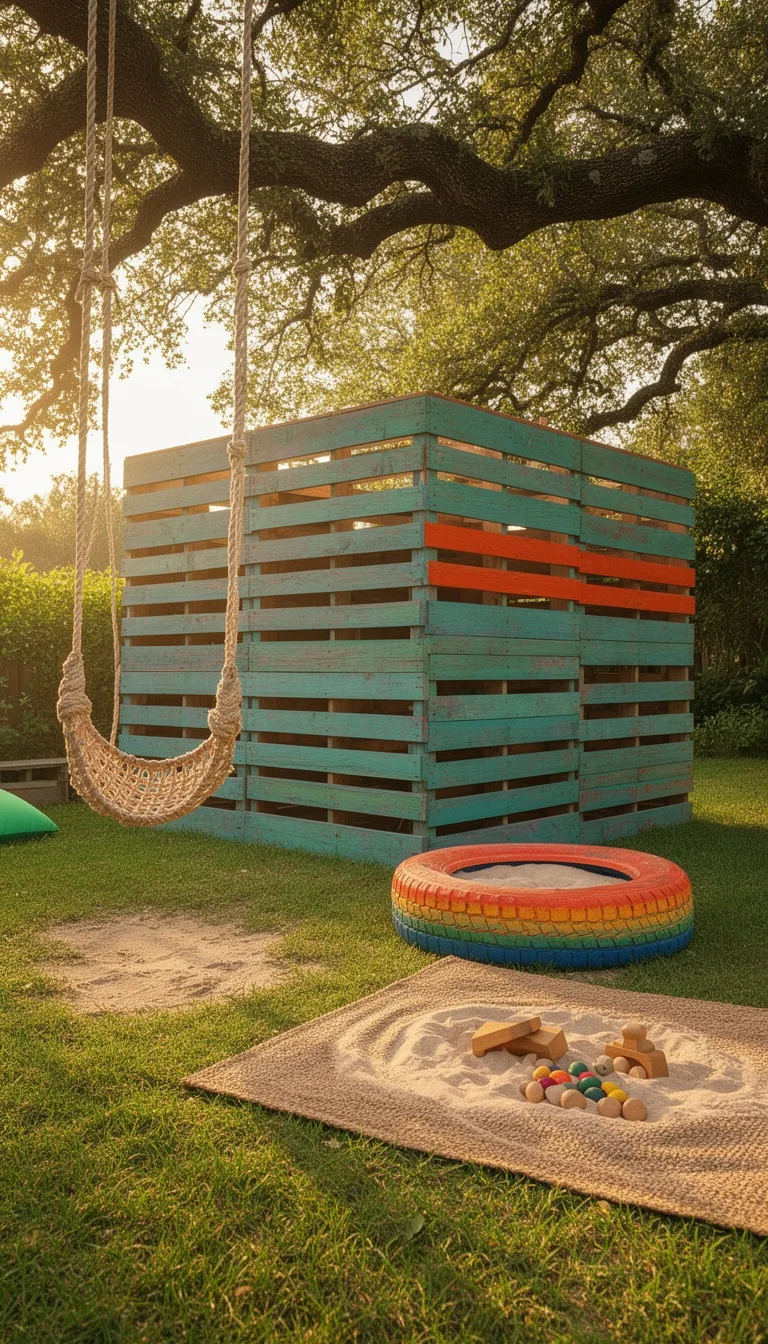
Gather a few sturdy pallets and turn them into a whimsical backyard fort in under an hour.
First, clear a level spot, then arrange pallets in a “U” shape for walls, leaving an opening for a door. Secure joints with screws and reinforce corners with metal brackets.
Add a simple roof by laying a flat pallet on top and covering it with a waterproof tarp. Paint the exterior bright colors and attach a chalkboard panel for creative play.
Finally, scatter cushions and a few string lights for cozy ambiance.
- Use sandpaper to smooth rough edges before assembling.
- Include a hinged pallet door for easy access.
- Attach a rope ladder to the side for climbing fun.
- Add a small shelf inside for books and toys.
Lay a Sensory Garden Path With Textured Stones
A winding path of textured stones invites curious footsteps and gentle exploration, turning a simple garden into a sensory playground.
You’ll start by measuring a safe route that avoids steep drops and keeps the surface even.
Lay a weed‑blocking fabric, then arrange stones of varied shapes, sizes, and textures—smooth river rocks, rough flagstones, and spiky pavers.
Secure each piece with sand or gravel to prevent shifting, and add a thin border of low‑grow mulch for visual contrast.
Encourage kids to feel, hear, and even smell the stones as they walk, noticing the crunch underfoot and the coolness of shaded spots.
Keep the path clear of debris, and periodically check for loose stones to maintain safety while nurturing tactile curiosity.
Install an Adjustable‑Height Swing Set for All Ages
Elevate your backyard fun by installing an adjustable‑height swing set that grows with your kids. You’ll create a safe, engaging hub where toddlers and teens alike can swing, climb, and imagine.
Choose a sturdy frame, secure anchoring, and a simple height‑adjustment mechanism so you can raise the seat as children grow, keeping the experience challenging yet safe. Regularly inspect bolts, chains, and padding to prevent wear, and teach kids proper swing etiquette to foster respect and confidence.
- Modular design: interchangeable seats and accessories adapt to ages.
- Safety features: non‑slip grips, rounded edges, and certified weight limits.
- Easy maintenance: rust‑resistant materials and removable cushions.
- Space efficiency: compact footprint fits tight yards while allowing expansion.
Create a Water Table With Interactive Toy Accessories
While the swing set grows with your kids, a water table can add a splash of sensory fun right beside it. Choose a sturdy, UV‑resistant table with a shallow basin that holds 5–10 gallons. Fill it with water and sprinkle in floating toys, scoops, and squeeze bottles. Add a set of interchangeable accessories—rubber ducks, gear‑shaped spinners, and color‑coded cups—to encourage sorting, pouring, and cause‑and‑effect play. Anchor the table with sandbags or a ground‑spike to prevent tipping.
Position it on a level, shaded spot to keep water cool and limit evaporation. Supervise while kids splash, but let them experiment with water flow, temperature, and texture. This simple setup nurtures curiosity, fine‑motor skills, and cooperative play without costly equipment.
Add a Miniature Zip Line for Thrill‑Seekers
Install a sturdy, low‑profile zip line between two anchor points—like a sturdy tree or a reinforced playset post—to give kids a safe, exhilarating ride that sparks imagination.
Choose a commercial kit with a weight‑rated cable, harness, and braking system, then follow the manufacturer’s instructions for tension and clearance.
Keep the landing zone clear of obstacles and add a soft mulch or rubber tiles for extra protection.
Regularly inspect the hardware for wear, and teach kids how to attach and detach the harness correctly.
This simple addition turns a backyard into a mini‑adventure park while encouraging confidence and coordination.
- Select a zip line rated for at least 150 lb total load.
- Install anchors at a height of 4–6 ft for younger children.
- Use a 30‑ft cable to fit most medium‑sized yards.
- Add a padded “stop‑board” at the end to gently halt the rider.
Set up an Outdoor Art Station With a Weather‑Proof Easel
A sturdy, weather‑proof easel perched under a shady tree becomes the centerpiece of your backyard art studio, inviting kids to paint, draw, and experiment without worrying about rain or sun. Choose a rust‑resistant metal frame and a sealed tabletop that holds supplies dry. Add a rolling cart for paints, brushes, and sketchpads, and provide a waterproof tarp for extra protection. Keep the area organized with labeled bins so children can find what they need quickly. Encourage free expression by rotating themes weekly and displaying finished pieces on a nearby fence.
| Item | Feature | Why it matters |
|---|---|---|
| Easel | UV‑coated wood | Prevents warping |
| Cart | Lockable wheels | Keeps supplies stable |
| Tarp | Heavy‑duty | Shields from drizzle |
| Bins | Color‑coded | Simplifies cleanup |
| Fence | Clip‑on display | Shows pride in work |
Design a Nature‑Themed Scavenger Hunt Zone
If you weave a winding trail of natural clues through your yard, kids will instantly feel like explorers on a mission.
Choose sturdy, weather‑proof markers—rocks, pine cones, or painted wooden signs—to anchor each hint. Arrange the clues in a logical sequence that gradually expands the search area, encouraging kids to observe textures, colors, and sounds.
Keep the difficulty level flexible: start with obvious items, then introduce subtle variations like “find a leaf with three points.” End the hunt with a small treasure chest of nature‑themed prizes, reinforcing curiosity and confidence.
- Use a laminated map with icons for each clue location.
- Include sensory prompts (e.g., “listen for a bird’s call”).
- Rotate clue sets seasonally to maintain novelty.
- Provide a simple checklist for kids to mark completed finds.
Build a DIY Balance Beam Using 2×4s and Foam Padding
After the scavenger hunt, kids will love a new challenge that tests their balance and confidence. Grab two 2×4s, cut them to a three‑foot length, and sand the edges smooth.
Lay the boards side‑by‑side on a flat surface, then secure them with exterior‑grade screws and brackets to prevent wobble. Cut a foam pad to the same length, cover it with outdoor‑grade vinyl, and attach it with strong adhesive or zip ties for extra cushioning.
Position the beam on a grassy patch or a low‑profile deck, ensuring it’s level. Invite children to walk forward, backward, and sideways, encouraging them to reach for a hand‑hold at each end.
Adjust height or length as they grow, and celebrate every successful step.
Assemble a Bug‑Hotel Corner for Curious Explorers
Gather some natural materials—bamboo stakes, pine cones, bark, and reclaimed wood—and set them up in a corner of your garden to create a bug‑hotel that invites pollinators and beneficial insects.
You’ll guide kids to layer the items, forming tunnels and crevices where ladybugs, bees, and beetles can rest.
Keep the structure low enough for them to reach, and position it near flowers for easy access.
As they observe, they’ll learn about ecosystems and develop stewardship.
- Use bamboo for sturdy, vertical stems that act as tunnels.
- Fill gaps with pine cones and bark to provide shelter.
- Insert reclaimed wood blocks for nesting cavities.
- Add a shallow water dish nearby for hydration.
Arrange a Pop‑Up Tent Village for Role‑Play Adventures
Often the most exciting part of backyard play is a tiny village of pop‑up tents where kids can dive into endless role‑play adventures.
Choose lightweight, weather‑resistant tents that open in seconds and arrange them in a circle or semi‑circle for easy access. Anchor each tent with ground stakes or sandbags to prevent blowing away. Add a rope‑line “street” between tents and lay down a soft rug or foam tiles for comfort.
Supply a few themed props—cooking utensils, explorer hats, or a cardboard cash register—to spark imagination. Keep a basket of dress‑up clothes nearby so children can switch roles instantly.
Rotate tent locations weekly to keep the village fresh, and store tents in a dry bin when not in use. This setup encourages creativity, social play, and independent problem‑solving.
Construct a Backyard Bowling Alley With Plastic Pins
Set up a backyard bowling alley by laying a smooth, level surface—like a wooden board or a compacted lawn strip—and anchoring a set of lightweight plastic pins at one end.
Choose a material that stays firm under play, then mark a clear lane with chalk or rope.
Use a soft, rubber ball that won’t damage the ground, and give kids simple scoring cards.
Keep the area free of obstacles, and store the pins in a sturdy bucket when not in use.
- Secure the pins with sandbags or garden stakes for stability.
- Paint the lane edges in bright colors to guide throws.
- Add a scoreboard on a nearby fence for friendly competition.
- Rotate the pins occasionally to keep the game fresh.
Craft a Low‑Cost Mini Golf Course From Recycled Materials
Transform everyday waste into a backyard mini‑golf adventure by repurposing items like cardboard tubes, plastic bottles, and reclaimed wood into holes, ramps, and obstacles.
First, gather sturdy cardboard tubes and cut them to length; these become tunnels or windmills when painted bright. Use plastic bottles as bumpers—fill them with sand for stability, then slice the tops off and attach them to a wooden base.
Cut reclaimed wood into planks for fairways; sand the edges for safety. Arrange the pieces in a winding course, leaving space for a putter and ball.
Secure each element with garden stakes or zip ties, ensuring they stay put during play. Finally, test the flow, adjust angles, and let kids enjoy a low‑cost, eco‑friendly mini‑golf experience.
Hang a Solar‑Powered Fairy‑Light Canopy for Evening Play
After the mini‑golf course is set up, you can extend the fun into dusk with a solar‑powered fairy‑light canopy. Choose a lightweight frame, attach solar panels, and drape LED strings to create a gentle glow that feels safe and magical.
The canopy not only lights the space but also signals bedtime routines, so kids transition smoothly from play to calm.
- Panel placement: Mount panels where they catch afternoon sun, angled 45° for optimal charge.
- Battery storage: Use a small rechargeable pack to keep lights on for 4‑6 hours after sunset.
- String layout: Space LEDs 12‑18 inches apart for even illumination without glare.
- Safety checks: Secure all cords, ensure waterproof rating, and test the system before evening use.
You’ll see kids linger longer, feeling protected and enchanted under the soft, eco‑friendly light.
Dig a DIY Sandpit With Hidden Treasure Boxes
Dig a DIY sandpit and hide treasure boxes beneath the surface to spark endless curiosity. Choose a sunny spot, mark a 6‑foot square, and dig to a depth of about 12 inches. Line the pit with landscape fabric, then fill it with coarse sand that drains well.
Before covering, bury waterproof, lock‑able boxes at varying depths, each holding small toys, coins, or clues for a treasure hunt. Camouflage the boxes with a thin layer of sand so they’re discoverable only when kids dig.
Add a low‑profile border of reclaimed wood to keep sand in place and to give the pit a tidy edge. Encourage regular inspection for broken toys, and refill sand as needed to keep the play area safe and inviting.
Create an Outdoor Reading Nook With Weather‑Resistant Cushions
Installing a pocket‑size, weather‑resistant cushion set under a shady pergola instantly makes a backyard corner feel like a cozy library.
You’ll pick a spot that gets dappled light, then lay a waterproof mat to protect the ground. Choose cushions with UV‑blocking fabric and quick‑dry foam so rain won’t ruin them. Add a low‑profile bookshelf or hanging bins for books, and string solar‑powered fairy lights for evening reads. Keep a small side table for a cup of cocoa or a magnifying glass.
- Cushion material: marine‑grade polyester, mildew‑resistant, UV‑protected.
- Seating layout: modular tiles that you can rearrange as kids grow.
- Weather shield: retractable canopy or clear polycarbonate roof.
- Storage solution: waterproof tote for blankets and spare cushions.
Build an Interactive Sound Wall From Recycled Drums
Transform a collection of old drum shells into a vibrant, tactile sound wall that invites kids to explore rhythm and texture. First, gather 4‑6 drum shells, sand them, and mount them on a weather‑proof board with sturdy brackets. Drill a hole in each shell’s center, thread a durable rope, and tie a small wooden mallet at the end.
Secure the board to a fence or free‑standing frame at child height, ensuring it’s level. Add rubber pads behind the shells to reduce vibration on the ground. Encourage kids to tap, roll, or strike the mallets, creating varied pitches and beats. Rotate the mallets or attach colored stickers to spark curiosity. This DIY wall blends recycling, music, and outdoor play, fostering creativity and fine‑motor skills.
Conclusion
You’ve got the tools, space, and imagination—now turn those ideas into a backyard that sparks joy and confidence. By mixing sturdy, safe structures with creative, low‑cost projects, you’ll keep kids active, curious, and engaged day after day. Keep the area tidy, check the equipment regularly, and let the kids help shape the fun. A vibrant, ever‑evolving play hub is just a few simple steps away.
The Only Tools You Need for a Thriving Garden 🌱
Whether you're a weekend gardener or growing daily — these hand-picked tools make every session faster, easier, and more satisfying.