You’ll transform your yard by matching a layout to your space: border gardens maximize narrow edges, twin beds suit deeper yards, and four-garden classics work for square spaces. Formal potagers need larger enclosures with geometric paths. For 4×8 beds, choose between grocery or family layouts based on your priorities. Add vertical trellises with pole beans, cucumbers, or ornamental vines to boost yields. Each configuration reduces weeds, extends harvests, and teaches valuable growing skills that’ll evolve as you discover what thrives in your specific garden.
Key Takeaways
- Map sun exposure and define crop groups before designing layouts to maximize productivity and minimize shading issues.
- Border beds (1.5–2 ft wide) along edges keep central yard open while maximizing square footage for herbs and root vegetables.
- Twin 8′×4′ beds with 2-ft pathways and arch trellises enable intensive planting, reduce weeds, and extend harvest seasons.
- Four 4′×4′ beds in grid patterns with T-shaped pathways create formal potagers; position tall plants north to prevent shading.
- Intensive planting with vertical trellises for pole beans, cucumbers, and peas frees ground space and boosts yields in limited areas.
How to Choose Your Raised Bed Layout by Space and Goals
Before you design your raised bed garden, you’ll need to measure your space and understand how it works.
Start by mapping your yard’s total area and noting permanent fixtures like trees, sheds, and fences.
Identify your sunniest spot and sketch a sun map showing how light moves throughout the day.
Next, clarify your gardening goals.
Will you grow leafy greens, root vegetables, herbs, or flowers?
Dedicate separate beds to each plant type for easier management.
Consider your accessibility needs—U-shaped or H-shaped layouts let you reach plants without stepping into beds.
Plan pathway placement with mulch or stepping stones to prevent soil compaction.
Finally, draw a scale sketch on graph paper testing different configurations against your space constraints and sunlight patterns.
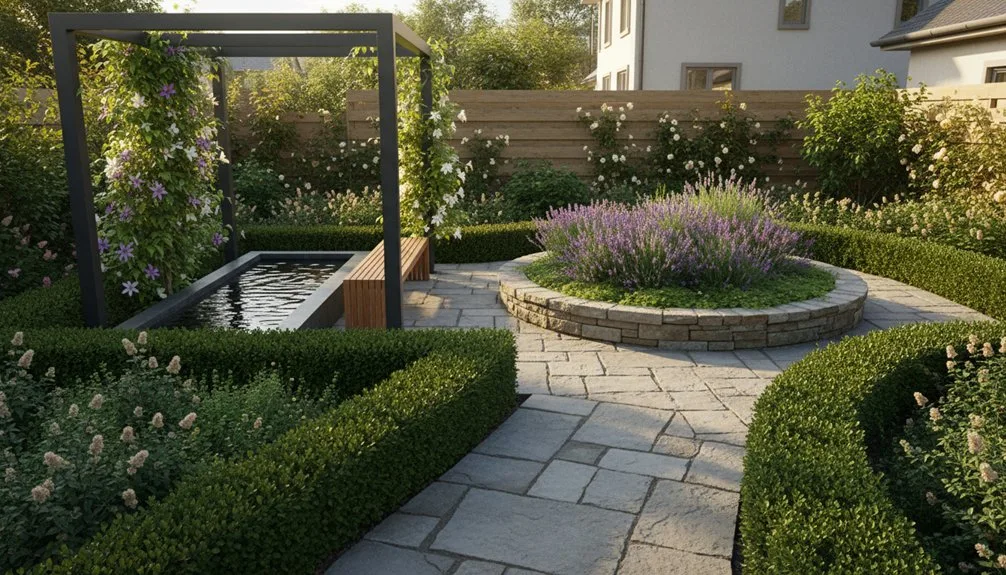
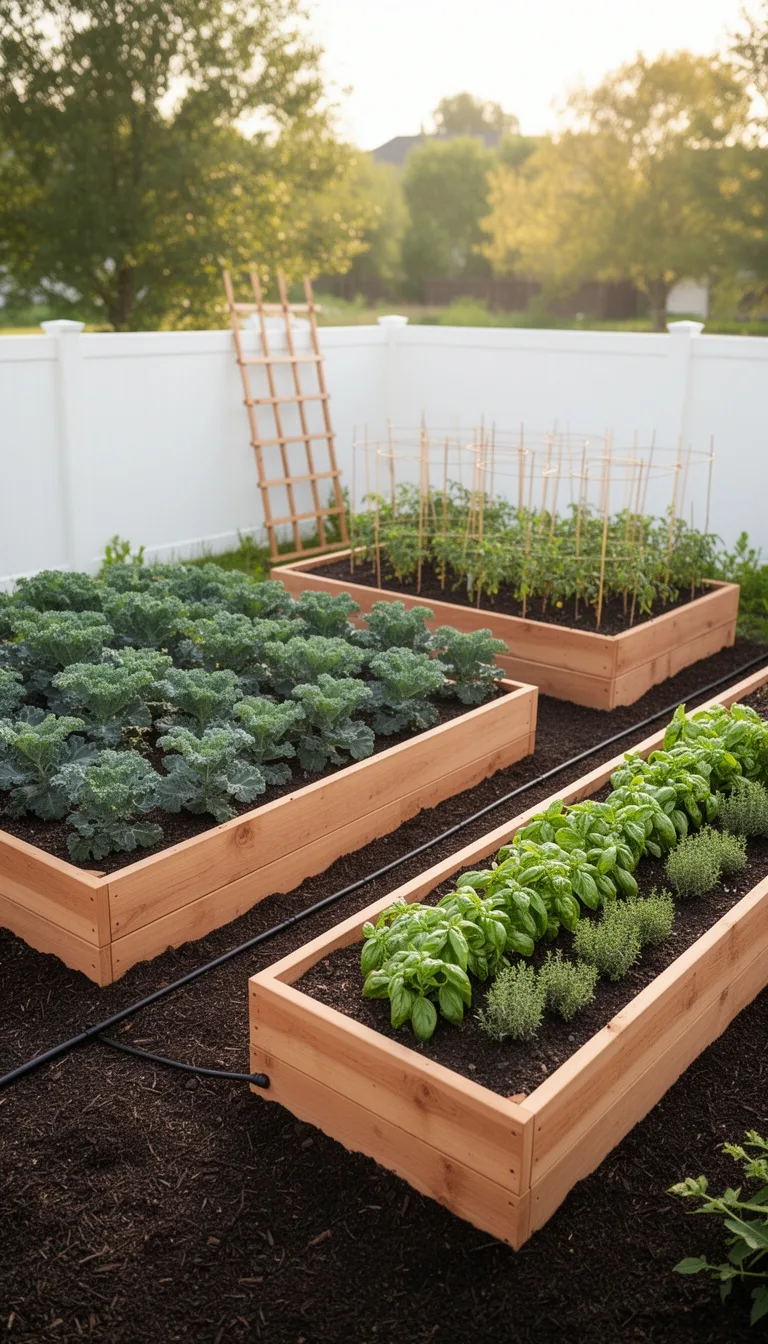
Border Gardens for Narrow Spaces

How can you transform underused edges and tight strips into productive growing zones? Border gardens solve this perfectly. You’ll position narrow beds—1.5 to 2 feet wide—along fences, driveways, and property lines where space goes wasted. These designs keep your central yard open while maximizing every inch.
| Configuration | Best For |
|---|---|
| Single-line borders | Fence lines and driveways |
| U-shaped beds | High yield with central access |
| L-shaped corners | Maximizing wasted corner space |
| Double-sided alleys | Between structures or seating |
| 4–5 foot strips | Skinny spaces between buildings |
Stock untreated cedar, use weed barriers over grass, and maintain 6–12 inch depth. Plant herbs, root vegetables, and trellised crops. Vertical growing amplifies yields in confined areas while improving drainage and preventing walkway encroachment.
Twin Gardens for Deeper Yards
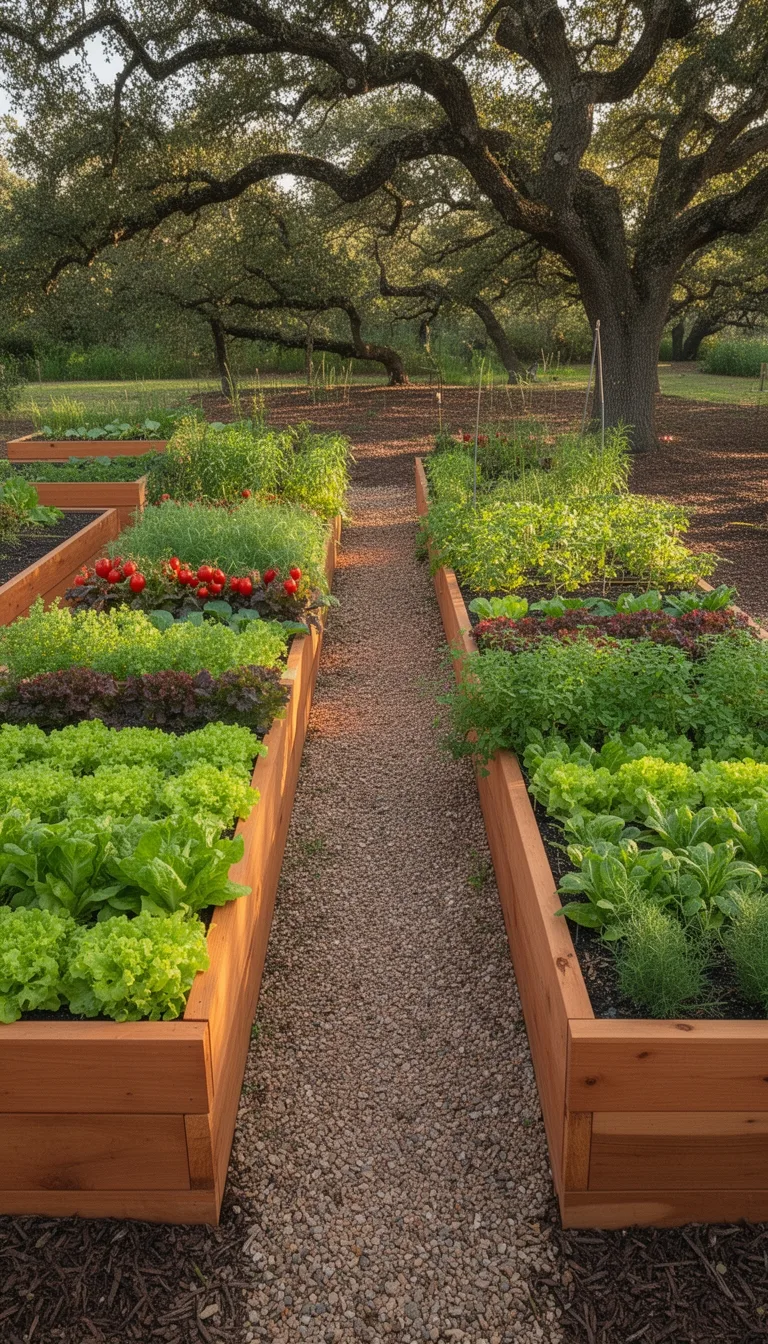
Twin raised beds create an ideal solution when your yard stretches deep or wide with substantial central lawn space.
You’ll maximize your growing area while maintaining a symmetrical, visually balanced layout that enhances your backyard’s appeal.
Set up two 8’x4′ cedar beds totaling 64 square feet of growing space—plenty for diverse family vegetables.
Position them with two-foot-wide paver pathways between them for comfortable access and maintenance.
Connect the beds with mirror-image arch trellises to expand your vertical growing capacity for climbing plants.
This configuration reduces weeds and watering needs through intensive planting while allowing compact varieties to cascade over edges.
You’ll harvest daily through October with minimal bending, supplementing meals effortlessly from a professionally designed garden that requires low maintenance.
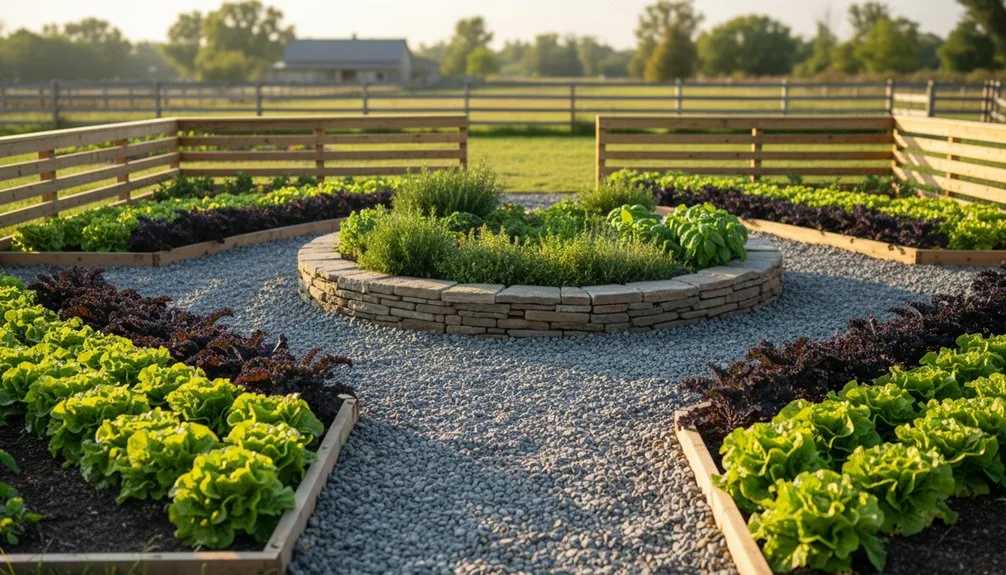
Four-Garden Classic for Square Spaces
The four-garden layout—a timeless design rooted in 12th-century English cottage gardens—offers you a symmetrical, organized approach perfect for square or nearly square yards of at least 15 feet wide.
You’ll arrange four raised beds in a grid pattern with intersecting T-shaped pathways creating a central focal point.
Each bed typically measures 4×4 feet, allowing you easy access from multiple sides without stepping on soil.
Use gravel or pavers for your walkways, and consider leaving one square open for a terrace or ornamental feature.
This balanced design promotes visual harmony while enabling clockwise crop rotation annually.
Position taller plants northward to prevent shading shorter specimens, maximizing your garden’s productivity and aesthetic appeal.
Formal Potager for Large Enclosures
For larger properties where you’re ready to expand your gardening ambitions beyond the classic four-bed layout, a formal potager garden delivers sophisticated beauty with practical productivity.
You’ll arrange geometric beds—diamonds, squares, and rectangles—within a roughly 40’x40′ enclosure, creating symmetrical patterns inspired by French Renaissance design.
Wide brick pathways separate each bed, while boxwood hedges or low lavender define borders.
Position tall plants like artichokes at the back for optimal light.
Incorporate vertical accents such as bean tepees and cordon fruit trees to add height and structure.
Install trellises for climbing fruits and vegetables, and repeat plant groupings at intervals to confuse pests while maintaining visual rhythm throughout your space.
Pathway Width and Materials for Easy Movement
Once you’ve designed your formal potager layout, you’ll need to determine pathway widths that balance accessibility with growing space.
For backyard gardens, aim for 2–3 feet, which accommodates wheelbarrows, tillers, and comfortable side-by-side work.
If you’re tight on space, 24 inches works for kneeling access and single wheelbarrow passage, though turning becomes challenging.
Avoid narrower than 18 inches unless you’re harvesting frequently—these paths require intensive weeding management.
Choose gravel for 2–3 foot pathways; it’s practical and budget-friendly.
Wider paths demand more mulch to suppress weeds, so consider whether extra growing space justifies the maintenance burden.
The sweet spot? Three feet provides unobstructed movement while maximizing your bed area without sacrificing functionality.
Trellis Heights and Spacing for Vertical Growing
Vertical growing transforms your raised beds into productive three-dimensional spaces, but you’ll need properly sized trellises to maximize that potential.
You’ll achieve the best results by following these essential guidelines:
- Maintain 6-foot minimum heights across panel, arch, and obelisk designs to support full plant growth and proper walkway clearance
- Choose panel trellises (2 feet wide minimum) for narrow beds against walls, positioned along the back for optimal access
- Install arch trellises (4-foot opening minimum) to connect adjacent beds and create vertical tunnels for comfortable passage
- Use obelisk trellises (12-inch base maximum) centered in 5-foot wide beds to preserve planting space while supporting vining varieties
When spacing plants on your trellises, position cucumbers 4-6 inches apart, pole beans 2-3 inches apart, and tomatoes 12-24 inches apart depending on variety.
Keep everything 6 inches from the trellis edge for proper planting depth and root establishment.
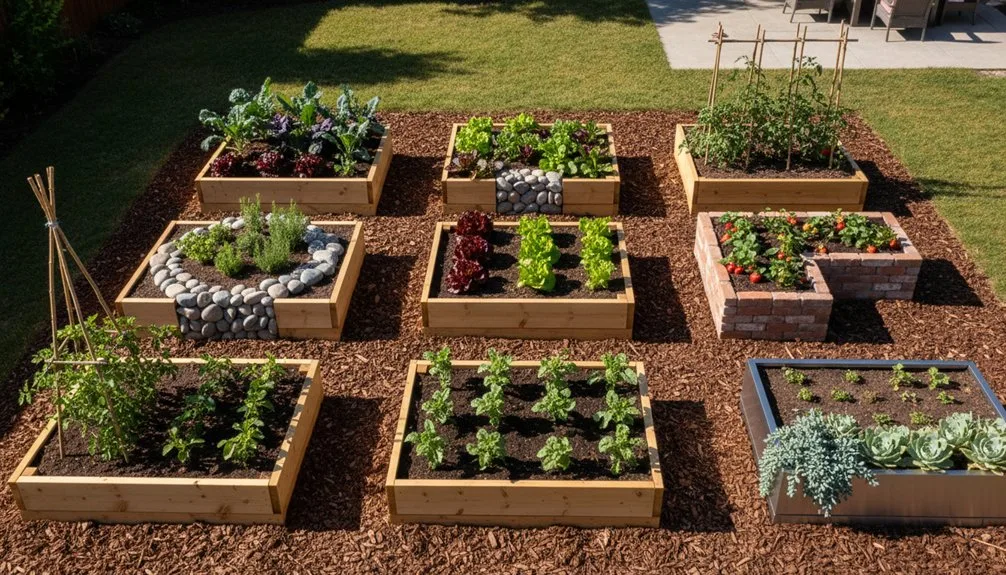
The 4×8 Grocery Layout: What to Plant and Where
A 4×8 raised bed gives you 32 square feet of prime growing real estate—plenty of room to build a productive kitchen garden that supplies your household with fresh vegetables year-round.
Organize your space into eight rows using the square foot gardening method.
Plant two rows of onions along one edge, then dedicate one row to two tomatoes with columnar basil nestled between them.
Allocate another row for three peppers—hot, snack, and bell varieties.
Use one row for kale, spinach, or Swiss chard, depending on your season.
Reserve two rows for patio cucumbers in cages or trellises.
Finally, fill remaining rows with root vegetables like carrots and radishes from seed.
This layout maximizes your harvest while minimizing wasted space.
The 4×8 Family Layout: Kid-Friendly Crop Ideas
How can you transform your 4×8 raised bed into an engaging garden that gets your kids excited about growing food?
Start by positioning your tallest crops strategically. Place trellised peas or beans at the north end to prevent shading other plants. This double row setup makes picking easy and fun for children.
Next, arrange your remaining plants strategically:
- Cherry tomatoes and snack peppers in central rows with cages for convenient harvesting
- Snack cucumbers on bed edges where they’ll sprawl without crowding neighbors
- Dwarf squash varieties like Burpee’s Lemon Drop along the perimeter
- Double rows of carrots sown densely from seed for thinning practice
Use square-foot gardening spacing to maximize yields while minimizing weeds. This intensive layout keeps your kids engaged through harvest season while teaching valuable growing skills.
Best Climbing Plants for Raised Bed Trellises
Why settle for ground-level gardening when you can maximize your raised bed’s potential by growing upward? Climbing plants transform your trellis into a productive vertical garden while freeing up valuable ground space.
| Plant Type | Best For | Growth Rate |
|---|---|---|
| Pole beans | High yields, warm climates | Quick climbing |
| Cucumbers | Warm areas, 50-70 days | Fast production |
| Clematis | Spring-fall blooms, ornamental | Moderate to vigorous |
| Trumpet vine | Hummingbirds, full sun | Vigorous growth |
| Snow peas | Cool seasons, 60-70 days | Moderate climbing |
Choose edible climbers like pole beans and cucumbers for food production, or select flowering varieties like clematis and trumpet vine for pollinator attraction. Ensure your trellis supports adequate sunlight and matches your climate zone. Install sturdy structures before planting to handle mature vine weight successfully.
Conclusion
You’ve got the foundation to create a thriving raised bed garden that fits your unique space and needs. By matching your layout to your yard’s dimensions and selecting plants strategically, you’ll maximize every inch of growing room. So why not start with one design that resonates with you, then adjust it as you learn what works best? Your garden’ll evolve into something perfectly tailored to your family’s harvest goals.
The Only Tools You Need for a Thriving Garden 🌱
Whether you're a weekend gardener or growing daily — these hand-picked tools make every session faster, easier, and more satisfying.