Start with a manageable 10×10 ft plot to avoid overwhelm. Sketch your space on graph paper, marking sun exposure and existing structures. Arrange beds in proven patterns—three parallel rows or a five-bed layout—keeping widths to 3–4 ft for easy reach. Space plants at half their mature width using the formula 144 ÷ spacing = quantity needed. Group plants in threes or fives for visual rhythm, placing taller varieties north to prevent shading. This simple structure transforms garden management from chaotic to straightforward, and there’s much more strategic detail ahead.
Key Takeaways
- 10 × 10 ft garden plots reduce overwhelm, prevent overcrowding, and provide proven success before expanding.
- Classic bed arrangements—duo/trio layouts with central walkways or four-square designs—simplify management and crop rotation.
- Main pathways at 3–4 ft width accommodate wheelbarrows and two-person traffic for efficient garden access.
- Raised beds at 4 × 8 ft with 17 in height minimize bending strain and ensure consistent maintenance.
- North-to-south bed orientation prevents taller plants from shading shorter ones, maximizing sunlight exposure.
Start Small: Why a 10×10 Garden Beats Overwhelm

When you’re tempted to design a sprawling garden that covers your entire backyard, consider starting with a manageable 10×10 plot instead—you’ll get 100 square feet of growing space without the paralysis that comes with overambition.
This size prevents overwhelm by letting you focus on essentials rather than stuffing your space with every plant you’d like to grow.
You’ll maintain healthier crops by avoiding overcrowding, which compromises harvests and creates unnecessary stress.
Your 100 square feet accommodates diverse options: two pumpkin plants, 300 carrots, or up to 100 basil plants with proper spacing.
You’ll also fit basic tools and seasonal equipment efficiently.
This contained scale transforms gardening from daunting to manageable, letting you succeed before expanding your garden ambitions.
Map Your Space on Paper Before You Build

Now that you’ve decided on your 10×10 plot, grab a tape measure and sketch your garden on paper before breaking ground.
This planning stage prevents costly mistakes and ensures efficient use of your space.
Measure your boundaries carefully, noting any existing trees, structures, or slopes.
Transfer these dimensions onto graph paper using a 1-foot-per-square scale for accuracy.
- Mark north direction to track sunlight exposure throughout the day
- Identify full-sun zones (6+ hours) versus shaded areas
- Design paths wide enough for two people to walk comfortably
- Divide your plot into functional zones by light requirements
- Label fixed features and planned plant locations
Your sketch becomes a blueprint guiding construction, plant placement, and maintenance access points.
Choose Bed Sizes You Can Actually Maintain

Because your garden’s success depends on consistent maintenance, you’ll want to size your beds so they’re comfortable to work with throughout the season.
A 4×8-foot bed strikes the ideal balance, offering ample growing space while staying manageable.
Keep your bed’s width at 3-4 feet maximum—this lets you reach the center from both sides without stepping inside and compacting soil.
For length, aim for 6-12 feet depending on your available space and energy level.
Height matters too: 17 inches works well for most plants while reducing daily bending strain.
Oversized beds often lead to neglect and poor productivity.
Choose dimensions that match your physical capabilities and schedule, ensuring you’ll actually maintain your garden consistently.
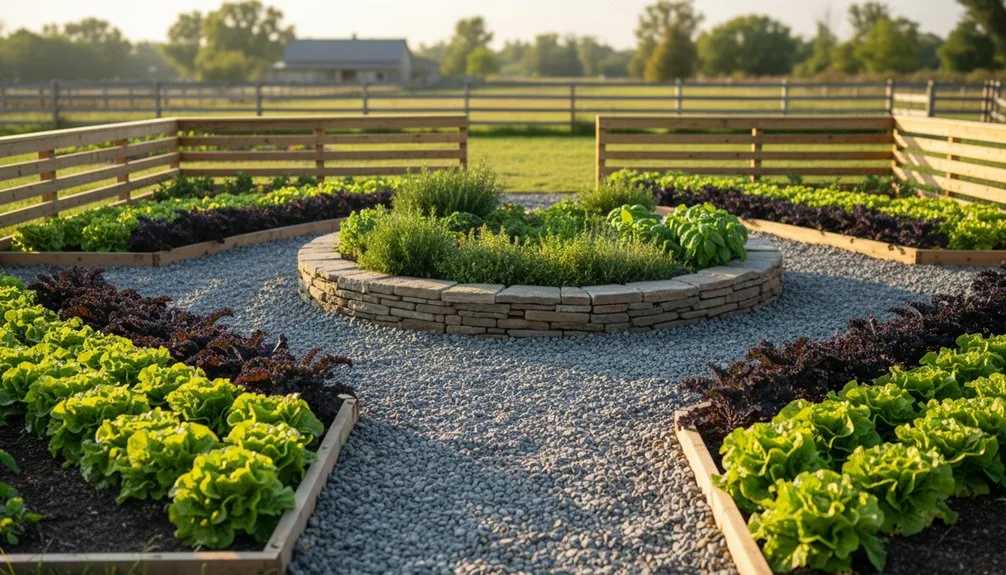
How to Arrange Beds: Three, Five, or Seven Plant Groupings
Once you’ve settled on your bed dimensions, you’ll want to think strategically about how many beds you’re installing and how you’ll position them across your garden space.
The number of beds you choose significantly impacts your garden’s visual balance and functionality.
Consider these popular arrangements:
- Classic Duo or Trio: Two or three matching beds create intention and frame a central walkway beautifully
- Five-Plant Arrangement: Position plants in two parallel rows (three in one, two in the other) for visual harmony
- Four-Square Design: Divide space into equal beds with pathways for formal symmetry and organized crop rotation
- U-Shaped or H-Shaped Layout: Maximize growing area while maintaining accessibility from a central standing position
- North-to-South Orientation: Align beds this direction to prevent taller beds from shading shorter ones throughout the day
Each arrangement balances aesthetics with practical maintenance.
Calculate Spacing for Your Bed Width and Shape
After you’ve chosen your bed arrangement, you’ll need to calculate how many plants fit within your space based on their specific spacing requirements.
Start by identifying your vegetable’s spacing—beans need 3-4 inches, carrots need 2-3 inches, and broccoli needs 15-18 inches.
Use the formula: divide 144 by your spacing in inches squared to get your multiplier.
For irregular bed shapes, divide the area into manageable sections like squares and rectangles, calculate each, then sum the totals.
If you’re using triangular spacing, add 15% more plants than grid spacing requires.
Finally, multiply your plants per square foot by your total bed area to determine exactly how many seedlings you’ll need to plant.
Three Plants Create Perfect Balance in Any Space
The magic of grouping plants in threes lies in its simplicity—it’s the foundation of professional garden design that’ll transform any space into a visually cohesive landscape.
When you arrange three plants together, you create natural rhythm and balance. Larger groupings can’t achieve the same effect. This approach works everywhere—under trees with hostas, in sunny beds with roses, or along borders with shrubs.
Here’s how you’ll implement the Rule of Three:
- Position taller plants at the back with smaller specimens in front for depth
- Select three cultivars with varying hues to ensure visual pop and cohesion
- Arrange in triangular, arc, or layered formations around garden features
- Use odd-numbered groupings at corners and pathways to guide your eye
- Repeat the same plant as a connecting thread throughout your garden
This strategy creates professional-looking designs without complexity.
Four Plants Fill Corners Without Awkward Gaps
Why do garden corners so often feel empty and awkward? Strategic plant selection transforms these challenging spaces into cohesive garden features. You’ll want to combine plants with complementary heights and growth habits to eliminate gaps.
Start with a vertical element like Purple Pillar® Rose of Sharon or Jolly Good™ clematis to draw the eye upward.
Layer in a narrow shrub such as Sky Pencil Holly or Fine Line® Buckthorn to provide structure.
Add a groundcover like Ajuga or thyme at the base to fill lower spaces and soften hard edges.
Finally, incorporate a tall filler plant like Kangaroo Paws ‘Harmony’ to bridge mid-height gaps.
This four-plant approach creates visual density while respecting your corner’s physical constraints.
Five Plants in Two Rows: The Rectangular Sweet Spot
Rectangular garden beds respond beautifully to a two-row planting scheme that combines structure with visual flow.
This arrangement gives you the flexibility to create rhythm while maintaining organization that works for both formal and casual gardens.
- Front row: Plant shorter specimens (2.5-foot perennials or groundcovers) to frame your bed’s edge
- Back row: Position taller plants (4-foot shrubs or 6-foot trees) to create depth and prevent a flat appearance
- Repetition strategy: Stagger plants using golden ratio groupings of 3, 5, or 8 for visual unity
- Height variation: Alternate taller and shorter plantings to guide the eye naturally along the bed’s length
- Sightline management: Offset back-row plants behind front-row gaps to enhance perceived width
This two-row method maximizes your rectangular space’s potential while eliminating awkward empty zones.
Six Plants Staggered for Visual Strength
While two-row planting establishes foundational structure, staggering six plants across your bed elevates that framework into genuine visual drama.
You’ll create depth by positioning your tallest plants—grasses or shrubs—on the north side, descending to shortest roses facing south.
Space each plant at half its maximum width to prevent crowding while filling gaps evenly.
Mark locations with stakes and string for precision.
This arrangement harnesses varied textures and heights, producing visual strength that transforms ordinary borders.
You’ll enjoy seasonal interest as staggered plants mature at different rates, and you’ll reduce maintenance through strategic spacing.
Include evergreens throughout your stagger to maintain year-round structure and anchor the composition with a single commanding specimen.
Seven or More Plants: When to Mass and How
When does a garden planting shift from structured arrangement to dramatic landscape statement? You’ve hit that threshold at seven plants—the magic minimum for massing.
You’ll want to mass plants when you’re working with:
- Perennials, grasses, shrubs, and groundcovers that share similar water and fertilizer needs
- Low-water, hardy varieties like sedge and liriope that thrive together
- Large voids you need to fill without fussing over companion plant compatibility
- Natural drifts, blocks, or clusters spaced 16-18 inches on center for dense coverage
- Groups anchored by complementary trees or shrubs matching the same cultural requirements
Calculate your quantity by multiplying plants per square foot by bed area.
Start with 5-6 pots grouped together to test your effect before committing to larger residential masses of 100 plants or more.
Design Your Main Entrance Path at 3–4 Feet
Your main entrance path sets the tone for your entire landscape, and getting the width right matters more than you’d think.
A 3–4 foot width accommodates two people walking abreast while fitting your garden’s proportions perfectly.
This dimension also handles wheelbarrows and lawn mowers effortlessly.
Position your path along natural traffic routes from your front door to the sidewalk or driveway.
Choose durable materials like flagstone, which offers permeability and longevity, or gravel for flexibility.
Lay stones 18–24 inches apart between centers for comfortable stepping.
Dig a 6-inch channel, add a sand base, and edge with metal or stone to contain materials.
Consider meandering curves instead of straight lines—they create intrigue and make your yard feel more spacious.
Add plantings like ferns or Cuphea ignea along borders for enhanced appeal.
Connecting Paths: 2.5–3 Feet for Natural Flow
How do you balance accessibility with space conservation in areas that don’t demand the width of your main entrance? Connecting paths at 2.5–3 feet wide offer the perfect solution.
They meet ADA’s 36-inch minimum while conserving valuable garden space. You’ll guide visitors naturally through vegetable beds and toward benches without overwhelming your landscape.
- Curves create exploration — gentle bends invite movement and discovery through your garden
- Low plantings frame routes — surrounding greenery promotes safe, ambient passage
- Materials affect perception — decomposed granite reads wider than edged brick, influencing visual flow
- Drainage improves naturally — gravel and brick encourage water runoff in narrower widths
- Wheelbarrow access works — connecting routes support practical garden maintenance and harvesting
These thoughtful paths prevent soil compaction, reduce erosion, and maintain visual proportion throughout your garden layout.
Narrow Individual Paths at 1–2.5 Feet for Scale
As your garden layout becomes more intimate and compact, narrower paths at 1–2.5 feet serve as precise conduits through small-scale spaces without sacrificing usability or aesthetics.
You’ll find these dimensions efficiently guide single walkers while preventing lawn shortcuts and muddy patches.
Choose durable materials like South Bay Quartzite or tumbled bluestone to maximize longevity with minimal maintenance.
Natural stone reduces upkeep costs by 35% and resists freeze-thaw damage effectively.
You’ll appreciate how narrow paths blend seamlessly into compact gardens without overwhelming limited spaces.
Their slip‑resistant surfaces minimize fall risks, while excellent drainage promotes soil health.
You’re also enhancing curb appeal and property value through organized, intentional layouts that distinguish your garden as thoughtfully designed.
Taper Paths Where They Meet for Smooth Transitions
When straight path runs meet curved sections, tapered transitions create seamless visual flow while eliminating the abrupt stops that disrupt garden aesthetics.
You’ll narrow your paths by 20-30% at junctions, gradually reducing width from 3 feet to 1.5 feet over a 10-foot span.
This approach prevents tripping hazards and guides foot traffic intuitively through converging areas.
- Compact base layers 4-8 inches deep before tapering to maintain even support
- Install interlocking stones with 1-2 inch overlaps at narrowing points for stability
- Anchor tapered ends with stakes on slopes to resist shifting
- Use permeable grid pavers that flex with ground movement
- Edge transitions with brick or low plants to define lines
Test walkability during installation by simulating foot traffic on tapered sections.
This strategy reduces erosion by 35% while improving accessibility throughout your garden.
Use Simple Lines and Curves Over Irregular Distractions
Why do so many gardens feel visually chaotic?
You’re likely using too many irregular lines and small, wiggly curves that create visual confusion and practical problems.
Instead, embrace simplicity by incorporating big, sweeping arcs that feel intentional and restful.
Avoid acute angles in your bed borders—they cause concrete cracking, unusable lawn spots, and mowing difficulties.
Design your layout with fewer, larger curves using circles or ellipses as guides.
Lay garden hose on the ground to visualize your lines before committing.
Combine curvilinear designs with strategic straight lines for balance.
Single plant types like daylilies emphasize curved edges beautifully.
This approach reduces visual clutter, makes maintenance easier, and creates functional spaces that guide exploration naturally throughout your garden.
Build Retention Walls to Tier Your Flowerbeds
Before you break ground, you’ll need a clear plan.
Tiered flowerbeds create visual interest while improving drainage and soil stability on sloped yards.
You’ll start by measuring your space with stakes and string, then sketch your design at the proper height and length.
Your foundation sets everything.
Dig a trench wider than your blocks, going 6 inches deeper than one block height plus 6 inches for gravel.
Compact the subgrade thoroughly and add 4-6 inches of crushed stone, leveling it perfectly.
Key steps for success:
- Place first-row blocks on compacted gravel, checking level in all directions
- Stagger joints in running bond pattern for structural strength
- Install perforated drain pipe behind the wall at the third level
- Backfill behind each course with gravel, then compacted soil in layers
- Use geogrid mesh between rows for walls over 3-4 feet
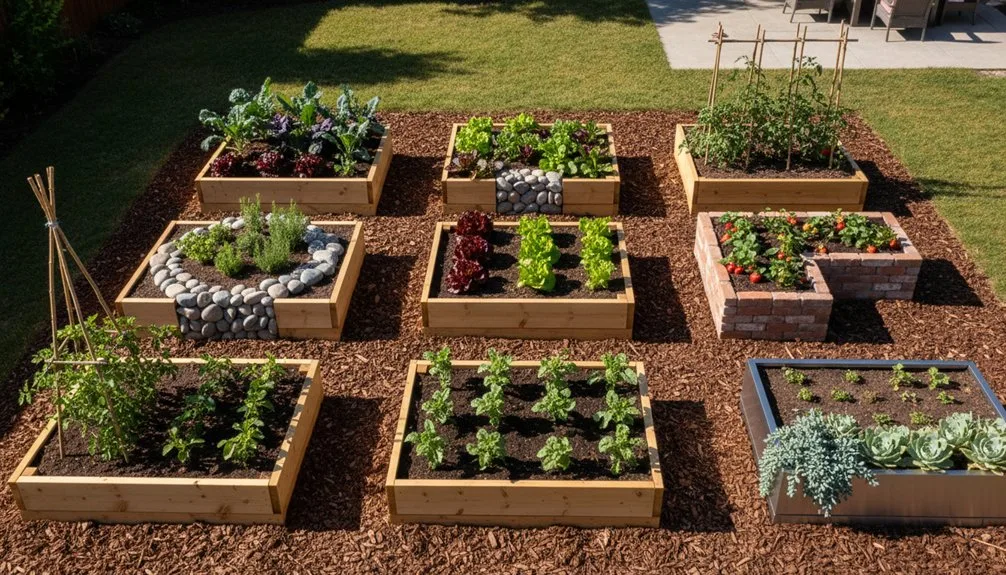
Raised Beds at 3 Feet Wide With 3-Foot Aisles
How do you maximize both productivity and comfort in your vegetable garden? Build raised beds that are exactly 3 feet wide with 3-foot aisles between them.
This configuration lets you reach the center of each bed without stepping into growing areas, protecting your soil from compaction.
The 3-foot aisles provide enough space for wheelbarrow movement and safe passage with mobility devices.
Pair these dimensions with a 36-inch depth for optimal root development and drainage.
You’ll experience reduced bending during maintenance tasks, while your plants benefit from higher planting density and improved water circulation.
The narrow bed width also simplifies installing trellises, frost protection, and pest netting.
This proven layout balances accessibility with productivity, making gardening easier on your body and more rewarding in your harvest.
Repeat Plant Groups to Build Visual Rhythm
When you’re designing your garden beds, repeating plant groups creates visual coherence that transforms scattered plantings into a unified landscape.
Grouping plants strategically strengthens your garden’s overall design while simplifying maintenance.
You’ll find that tight clusters of 5 plants outperform scattered specimens, and repeating these groups at opposite ends or focal points establishes rhythm throughout your space.
Consider these practical techniques:
- Use odd numbers like 3 or 5 for natural-looking clusters
- Repeat the same plant or similar features across beds
- Group plants sharing similar water and light needs
- Combine overlapping bloom times within each grouping
- Echo hardscape colors through repeated foliage choices
This approach mimics nature’s repetition found in prairies and forests, creating calm visual flow.
You’ll reduce design chaos while ensuring reliable plant performance through your seasonal garden.
Balance Plant Mass Against Your Hardscape Structures
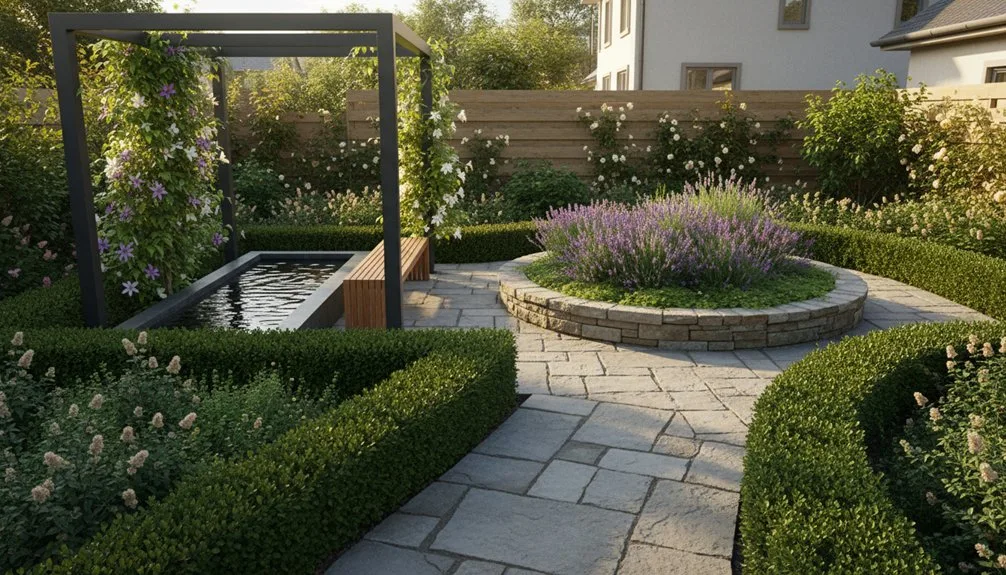
Your garden’s visual success hinges on how well you balance the weight of your plantings against your hardscape—the paths, patios, arbors, and pergolas that form your landscape’s skeleton. Large hardscape structures demand substantial plant mass to avoid appearing stark or isolated.
Position tall trees near patios to anchor the space and create enclosure. Use mid-level shrubs as transitional elements between towering trees and lower perennials, creating visual flow. Dense plantings like Colorado blue spruce carry more weight than open forms despite equal size, so adjust accordingly.
Distribute visual weight evenly across your garden by combining plants, hardscaping, and features like fountains. This equilibrium prevents overwhelming or flat designs while creating the depth and interest your garden deserves.
Pick Plants That Fit Your Yard: Don’t Dwarf Them
Why do so many gardeners end up with plants that look lost or cramped in their yards? You’re likely overlooking mature size requirements before planting.
To avoid dwarfing your garden, you’ll need to:
- Check plant tags for mature height, width, and spread measurements
- Assess your yard’s dimensions and scale to match appropriate plant sizes
- Verify light conditions your space provides: full sun, partial shade, or full shade
- Consider growth habits—clumping, spreading, trailing, or upright—to plan spacing accurately
- Select plants suited to your growing zone with realistic expectations for their development
You’ll prevent overcrowding or undersizing by understanding these factors upfront.
Measure your yard carefully, read labels thoroughly, and choose plants that’ll grow into your space proportionally rather than getting swallowed or bursting through boundaries.
Redistribute Plants to Achieve Consistent Coverage
How can you transform sparse, uneven garden beds into lush, consistently covered spaces? Plant division offers an economical solution. You’ll rejuvenate older clumps while creating additional plants for free.
Start by dividing perennials like asters, bee balm, coneflowers, and daylilies every few years. Early spring or fall provides ideal conditions for root establishment before extreme weather arrives.
Divide clump-forming plants by hand or with a spade, ensuring each section contains roots and shoots.
Cut divisions to approximately one-quarter of the original root ball for quick reestablishment. Space rhizome divisions 10-12 inches apart to allow expansion. Replant at original depth, water thoroughly, and apply organic mulch.
This strategy fills garden gaps, prevents overcrowding, and promotes vigorous growth throughout your landscape.
Conclusion
You’ve mapped your space, you’ve sized your beds, and you’ve spaced your plants—now you’re ready to garden with confidence. You’ll maintain your layout, you’ll enjoy your layout, and you’ll refine your layout as seasons pass. Start small, stay consistent, and watch your garden transform from overwhelming project into manageable, beautiful reality. Your simpler design works harder, grows stronger, and rewards you continuously.
The Only Tools You Need for a Thriving Garden 🌱
Whether you're a weekend gardener or growing daily — these hand-picked tools make every session faster, easier, and more satisfying.