If you’re short on space, you can transform your backyard into a highly productive garden with thoughtful design. By integrating structured raised beds, vertical planters, and strategic container grouping, you maximize every square inch. The real secret, however, lies in the precise systems you put in place to manage water, soil health, and planting schedules. You need to see how these elements connect to truly unlock your garden’s full potential.
Key Takeaways
- Subdivide planting beds into one-foot squares using the square foot gardening method for precise, high-yield planting.
- Build vertical structures like trellises and arbors for climbing plants to free up valuable ground-level space.
- Use raised beds with defined edges to prevent soil compaction and create an organized, space-efficient layout.
- Integrate edible plants into landscape borders and replace ornamental shrubs with compact, fruiting varieties.
- Grow in containers of appropriate sizes on patios, walls, and railings to utilize every available surface.
First, Map Out Your Garden Plan
Before you put a single plant in the ground, grab a notebook and sketch your space, because a rough plan saves you from costly mistakes and wasted effort later.
Walk your yard at different times of day, noting where sunlight falls and where shadows linger. You need at least six hours of direct sun for most vegetables.
Mark existing features like patios, trees, and fences that you can’t move. Measure everything and draw your plot to scale; graph paper helps.
Then, outline your planting beds, keeping paths wide enough for you to walk and kneel. You’re not just drawing boxes; you’re planning access for watering, weeding, and harvesting.
This sketch becomes your essential guide, preventing overcrowding and ensuring you use every inch effectively.
Pick the Best Plants for a Small Garden Layout
Now that you’ve mapped your space, zero in on plants that deliver high yields without demanding too much room. Prioritize compact, prolific varieties over sprawling ones.
Think vertically with climbers like pole beans and indeterminate tomatoes, and fill ground level with leafy greens you can harvest repeatedly. Your choices should reflect your kitchen’s needs to avoid waste.
- Choose determinate habits: Opt for bush-type (determinate) tomatoes, cucumbers, and summer squash that grow in a contained mound rather than rambling endlessly.
- Emphasize cut-and-come-again crops: Plants like kale, Swiss chard, and loose-leaf lettuces provide multiple harvests from a single plant’s footprint.
- Select high-value edibles: Grow expensive or flavor-sensitive items like herbs, cherry tomatoes, and specialty peppers that offer the biggest return on your investment and space.
Build a Thriving Raised Bed Garden for a Small Layout
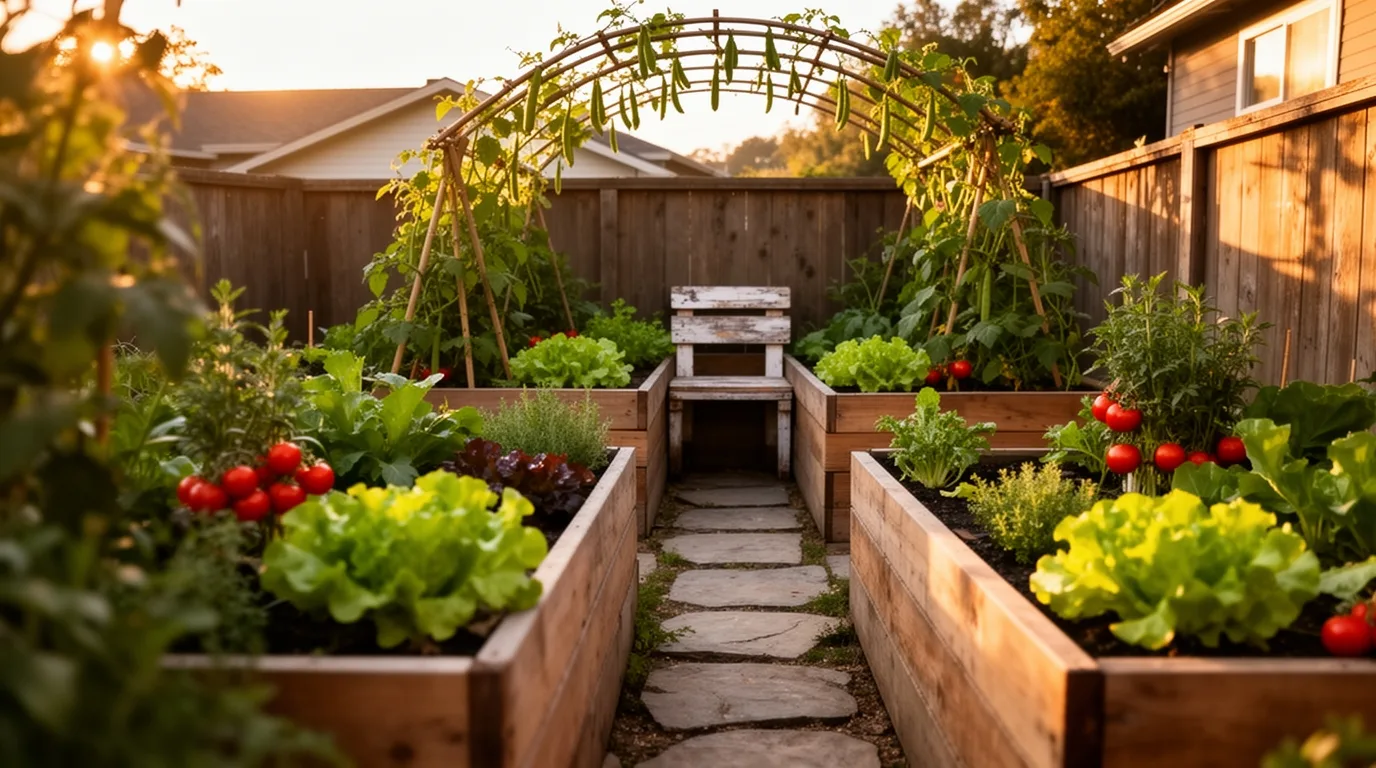
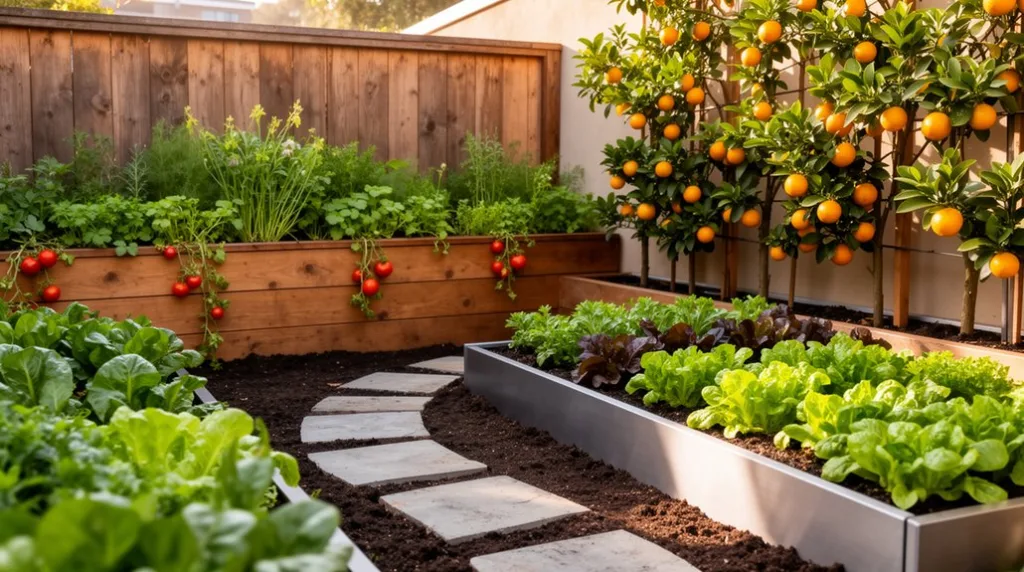
Elevate your small garden’s potential by constructing raised beds, a move that enhances soil control, improves drainage, and simplifies maintenance.
Choose a sunny location and build your frame from rot-resistant lumber, cedar, or composite boards. A depth of 12 to 18 inches is ideal for most vegetables.
Fill it with a high-quality mix of topsoil, compost, and aged manure. You’ll create a deep, fertile, and well-aerated root zone that warms faster in spring, extending your growing season.
The defined edges prevent soil compaction from foot traffic, and the elevated height makes planting, weeding, and harvesting easier on your back. This contained system also helps manage invasive weeds and pests more effectively than traditional in-ground plots.
Plant Your Raised Beds Using Square Foot Gardening
Maximize every inch of your raised bed by adopting the square foot gardening method, a system that organizes your planting into a dense, efficient grid.
You’ll subdivide your bed into one-foot squares, assigning a specific crop to each.
This isn’t just neat; it’s strategic.
You’ll plant more in less space, reduce weeds, and simplify your harvest.
- Precision Planting: Each square gets a predetermined number of seeds or plants, like one tomato or sixteen radishes, eliminating guesswork.
- Intensive Harvest: Close spacing means you’ll get a larger yield from a compact area, maximizing your return.
- Simplified Maintenance: A clear grid makes watering, weeding, and crop rotation straightforward and efficient.
Grow More in Containers and Pots
Don’t let limited space hold you back—you can grow a surprising bounty in containers and pots. Prioritize deep pots for root crops like carrots, and ensure all containers have drainage holes. You’ll need to water and fertilize more frequently than in garden beds, as soil in pots dries out faster and nutrients leach quickly. Group pots by watering needs to simplify maintenance. For maximum yield, choose compact, high-producing varieties often labeled as suitable for containers.
| Plant Type | Minimum Pot Size |
|---|---|
| Leafy Greens & Herbs | 6-8 inches deep |
| Tomatoes & Peppers | 5-gallon volume |
| Bush Beans & Cucumbers | 3-gallon volume |
| Root Vegetables (Carrots) | 12 inches deep |
| Strawberries | 8-12 inches wide |
Embrace Vertical Gardening for More Growing Space
Look to your walls, fences, and railings—they’re valuable real estate waiting to be planted. Vertical gardening dramatically increases your yield without sacrificing square footage.
You’ll train plants to climb, hang containers from sturdy hooks, or mount modular planting systems directly onto surfaces. This method improves air circulation, reduces soil-borne diseases, and makes harvesting a breeze. Focus on lightweight structures and proper anchoring to support plant weight, especially when wet.
For true spatial efficiency, consider these principles:
- Think in Layers: Utilize every vertical level, from ground covers to towering climbers, creating a productive ecosystem.
- Match Plants to Plan: Grow vigorous climbers like beans on tall supports and compact herbs in wall pockets for a tailored fit.
- Maximize Exposure: Position structures to ensure all plants, not just the top ones, receive adequate sunlight throughout the day.
Create a Simple and Effective Trellis System
While vertical gardening opens up new growing space, you’ll need a sturdy framework to support those climbing plants. Start with materials you have, like wooden stakes or cattle panels, ensuring they’re anchored firmly into the soil. Train your peas, beans, or cucumbers onto the structure early by gently tying their stems with soft twine. This directs growth upward, freeing precious ground area.
| Trellis Type | Best For |
|---|---|
| A-Frame Wooden | Peas & Beans |
| Wire Cattle Panel | Tomatoes & Cucumbers |
| Simple Bamboo Grid | Morning Glories & Clematis |
A good trellis system lets you harvest easily and improves air circulation, reducing disease. Install it before planting to avoid disturbing roots later.
Use Companion Planting in Your Small Garden Layout
Although you’re short on space, you can boost your garden’s health and yield by strategically pairing certain plants together. This practice, called companion planting, lets your plants work as a team to save room and deter pests naturally. You’ll fit more in your beds while reducing the need for chemicals.
Focus on proven partnerships for your key crops to make every square inch productive.
- Plant basil with your tomatoes to improve their flavor and help repel flies and mosquitoes.
- Interplant quick-growing lettuce around slower brassicas like broccoli; you’ll harvest the lettuce before the brassicas need the space.
- Grow tall corn with sprawling squash and climbing beans—the classic “Three Sisters”—where each plant supports the others.
Boost Your Harvest With Succession Planting
To extend your garden’s productivity, you can implement succession planting—a method where you sow new crops immediately after harvesting others. This keeps your beds productive all season.
Start by mapping your garden calendar. After pulling early spring radishes, for instance, transplant heat-loving basil seedlings into that same space. Follow fast-maturing summer squash with a fall planting of cool-season kale. You’ll need to prepare seedlings in advance while your current crops are maturing. Keep your soil fertile with compost between plantings to support this rapid turnover.
Focus on quick growers like lettuce, beans, and beets for multiple harvests. Succession planting maximizes every square foot, turning a single plot into a continuous source of fresh produce.
Incorporate Edible Plants Into Your Landscape
Integrating edible plants into your landscape merges beauty with bounty, allowing you to harvest food from ornamental spaces. You’ll maximize every square foot by designing edible features directly into your flower beds and borders. Start by replacing purely decorative shrubs with fruiting varieties like blueberry or currant bushes, which offer brilliant fall color.
Tuck leaf lettuce, Swiss chard, or colorful kale among your perennials for dynamic texture.
- Think Multi-Layer: Train edible vines like scarlet runner beans or hardy kiwi on trellises and arbors to add vertical interest and privacy.
- Prioritize Pollinators: Interplant flowers like calendula and borage with your vegetables to attract beneficial insects that boost overall yields.
- Embrace Multi-Season Interest: Choose edibles like artichokes for their striking architectural foliage, ensuring your garden looks lush from spring through fall.
Add a Compact Herb Spiral to Your Design
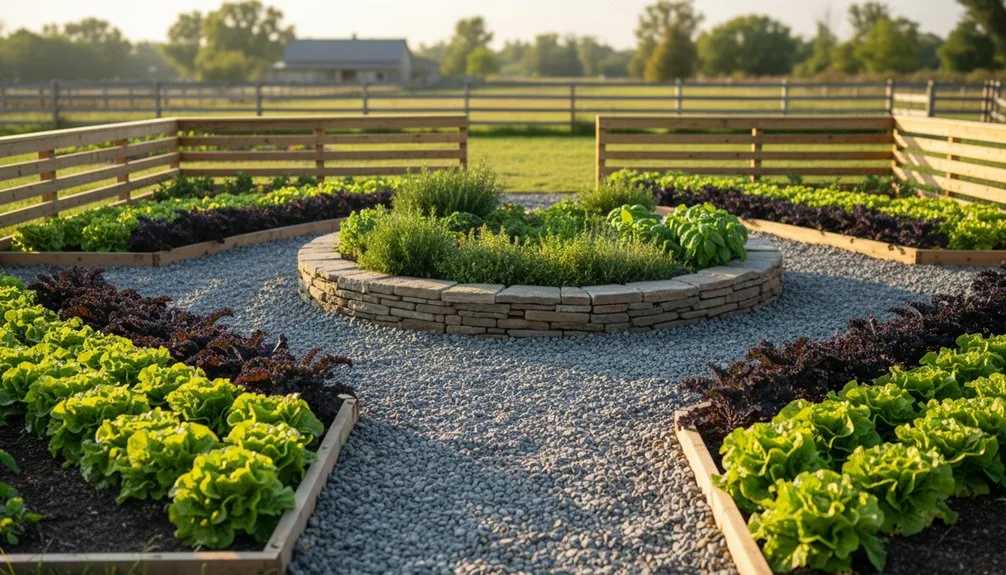
An herb spiral often becomes the most efficient focal point in a small garden, neatly solving the challenge of growing herbs with different needs in a single compact structure. You build a conical mound, spiraling a path upwards with stones or bricks for structure. Its elevation creates diverse microclimates. Place sun-loving rosemary or thyme at the top, where drainage is best. Mid-level spots suit basil or parsley, while moisture-retaining lower sections are perfect for mint or chives. You’ll maximize vertical space and create a stunning, functional feature. Use this simple guide to position your herbs strategically.
| Herb Placement | Ideal Herbs |
|---|---|
| Top (Dry & Sunny) | Rosemary, Thyme |
| Middle (Moderate) | Basil, Parsley |
| Bottom (Moist) | Mint, Chives |
Brighten Shady Corners With Container Plants
For those shaded spots where sun-loving plants struggle, container gardening offers a brilliant solution. You’ll transform dim areas with pots of shade-tolerant foliage.
Start with hostas for their architectural leaves, then add impatiens for continuous color. A fern’s texture completes the vignette. Use lightweight containers you can easily reposition to test light levels.
Remember, shade isn’t uniform; some areas get bright indirect light, others deep gloom. Match plants accordingly. Your maintenance is simpler too—you control the soil and watering precisely, avoiding competition with tree roots.
- Adaptability: Move containers seasonally to chase changing light patterns.
- Soil Control: Tailor potting mix to each plant’s moisture needs.
- Instant Impact: Create mature, layered displays immediately, bypassing slow ground establishment.
Install a Space-Saving Drip Irrigation System
To give your plants targeted hydration without wasting space, a compact drip irrigation system is a gardener’s efficient ally.
You’ll connect flexible, low-profile tubing directly to your outdoor faucet. Then you run this mainline along the edges of beds or beneath containers, keeping it discreet. Use a punch tool to insert emitters at precise points near each plant’s root zone. This method delivers water slowly and directly, minimizing evaporation and runoff. You’ll conserve both water and the area needed for sprinklers. Adjustable emitters allow you to customize flow for different plants.
A simple timer automates the watering schedule, saving you time. You can easily reconfigure the tubing if you change your garden layout.
Store Your Tools in a Compact Garden Corner
You’ll want to reclaim your shed or carve out a dedicated corner to store tools so they’re always within easy reach but never in the way.
A well-organized nook stops you from wasting time hunting for a trowel or tripping over a hose.
Start by installing sturdy wall hooks and a pegboard for hanging long-handled tools like rakes and shovels vertically.
Use a small, lidded bench for soil amendments and a rack for pot storage underneath.
- Vertical Hanging: It clears floor space instantly and prevents blade damage from ground moisture.
- Designated Containers: Use old buckets or caddies to corral hand tools, gloves, and twine, keeping everything mobile.
- Protective Storage: A simple, waterproof cover shields your mower or tiller from rust, extending its life for seasons to come.
Keep Your Small Garden Thriving With Easy Maintenance Tips
Once your tools are organized, a simple approach makes garden care efficient without overwhelming your schedule.
Water deeply in the early morning, focusing on roots rather than leaves to conserve water and prevent disease.
Apply a balanced, slow-release fertilizer monthly to nourish plants without spurring excessive, leggy growth.
Prune spent blooms and yellowing leaves weekly; this “deadheading” encourages continuous flowering and keeps plants healthy.
Check for pests like aphids during your regular watering, removing them by hand or with a mild soap spray before they multiply.
Lay down a fresh inch of mulch around plants every few months to suppress weeds and retain soil moisture.
This consistent, minimal routine protects your garden’s vitality with little daily effort.
Frequently Asked Questions
How Do I Protect My Garden From Pests Naturally?
Companion planting is key. Grow marigolds to repel nematodes or basil near tomatoes. Use a soapy water spray to knock aphids off. Introduce ladybugs for aphid control and apply neem oil for tougher pests.
What Is the Best Soil Mix for Raised Beds?
For raised beds, you’ll want a well-draining mix. Combine one-third peat moss or coco coir, one-third vermiculite, and one-third blended compost. This “Mel’s Mix” provides nutrients, aeration, and moisture retention for healthy roots.
How Much Sunlight Do Most Vegetables Need?
Most vegetables need at least 6-8 hours of direct sun daily. You’ll see the best growth and harvests in full sun. Leafy greens can manage with a bit less, but fruiting crops like tomatoes demand it.
When Should I Start Planting for My Climate?
You’ll check your local last frost date. Then you’ll start your seeds indoors 6-8 weeks before that date, and transplant your seedlings outdoors only after all danger of frost has passed.
How Do I Test and Amend My Garden’s Soil pH?
First test your soil pH with a kit from a garden store. You’ll add lime to raise a low pH or sulfur to lower a high one. Then just mix amendments thoroughly into your existing soil.
Conclusion
With your layout perfected, remember that success hinges on consistent, simple care. Stick to your irrigation timer and succession schedule. Refresh compost each season and group pots for efficient watering. Keep your tools organized in that dedicated corner. This practical rhythm, not just the initial design, will ensure your space keeps producing bountiful harvests year after year.
The Only Tools You Need for a Thriving Garden 🌱
Whether you're a weekend gardener or growing daily — these hand-picked tools make every session faster, easier, and more satisfying.