You might think your yard isn’t suited for a great garden, but DIY raised beds can change that. They’ll bring order and boost your harvest with smart construction and rich soil. However, getting started requires some key decisions about location and materials that many beginners overlook. Let’s explore how to build your foundation for a tidier, more productive space.
Key Takeaways
- Choose a sunny, accessible location and keep width under 4 feet for easy reach.
- Build a sturdy frame using rot-resistant lumber and secure it with exterior screws.
- Fill with a balanced soil mix of topsoil, compost, and sand for fertility and drainage.
- Group plants by height and water needs for efficient irrigation and sunlight.
- Control weeds and enrich soil by applying mulch and adding compost seasonally.
Why Should You Build a DIY Raised Garden Bed?
Building a DIY raised garden bed sets you up for a better gardening experience right from the start. You gain total control over your soil’s quality, mixing the perfect blend for your plants without fighting your yard’s native, often poor, dirt. This improved drainage and aeration prevents waterlogging, giving roots the oxygen they need.
You’ll find the elevated height is a back-saver; it eliminates constant bending, making weeding and harvesting far easier. It also helps you organize your space efficiently, allowing for tighter planting and better crop rotation. By containing your garden, you naturally suppress invasive grasses and weeds. You’re creating a defined, manageable ecosystem that warms faster in spring, letting you plant earlier and extend your growing season.
Essential Tools and Materials for Your Raised Bed
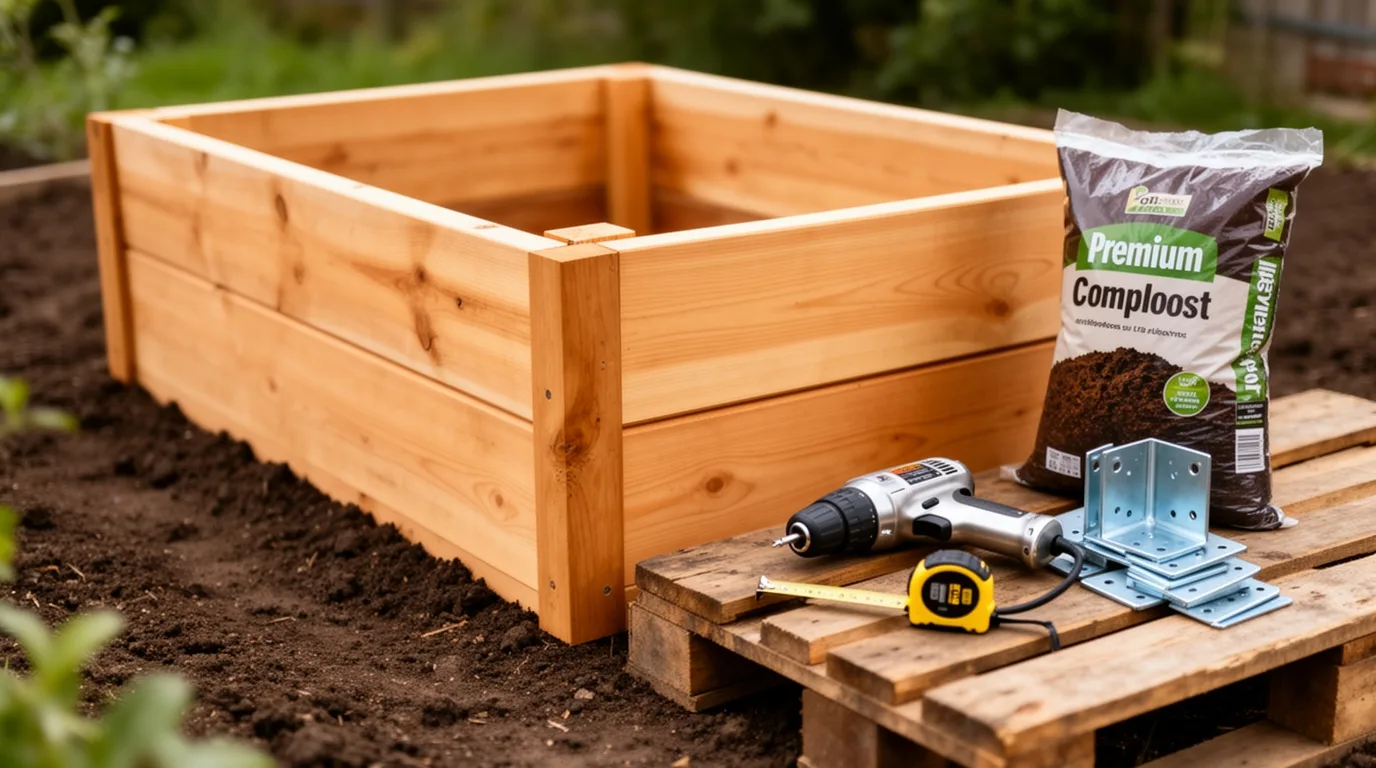
Before you begin, gathering the right tools and materials streamlines the whole process. Having everything at hand lets you focus on building a sturdy, long-lasting bed.
You’ll need lumber, like rot-resistant cedar or standard pine, cut to your planned dimensions. Don’t forget the hardware for a secure frame.
Your essential toolkit should include:
- Circular Saw or Handsaw: For accurate board cutting.
- Power Drill/Driver: Crucial for pre-drilling holes and driving screws.
- Carpenter’s Square: Ensures your corners are perfectly 90 degrees.
- Measuring Tape: For precise layouts and consistent board lengths.
- Safety Gear: Always wear protective glasses and work gloves.
You’ll also need exterior-grade wood screws, a level for installation, and a quality topsoil/compost mix for filling.
Step-by-Step Instructions to Build Your Raised Bed Frame
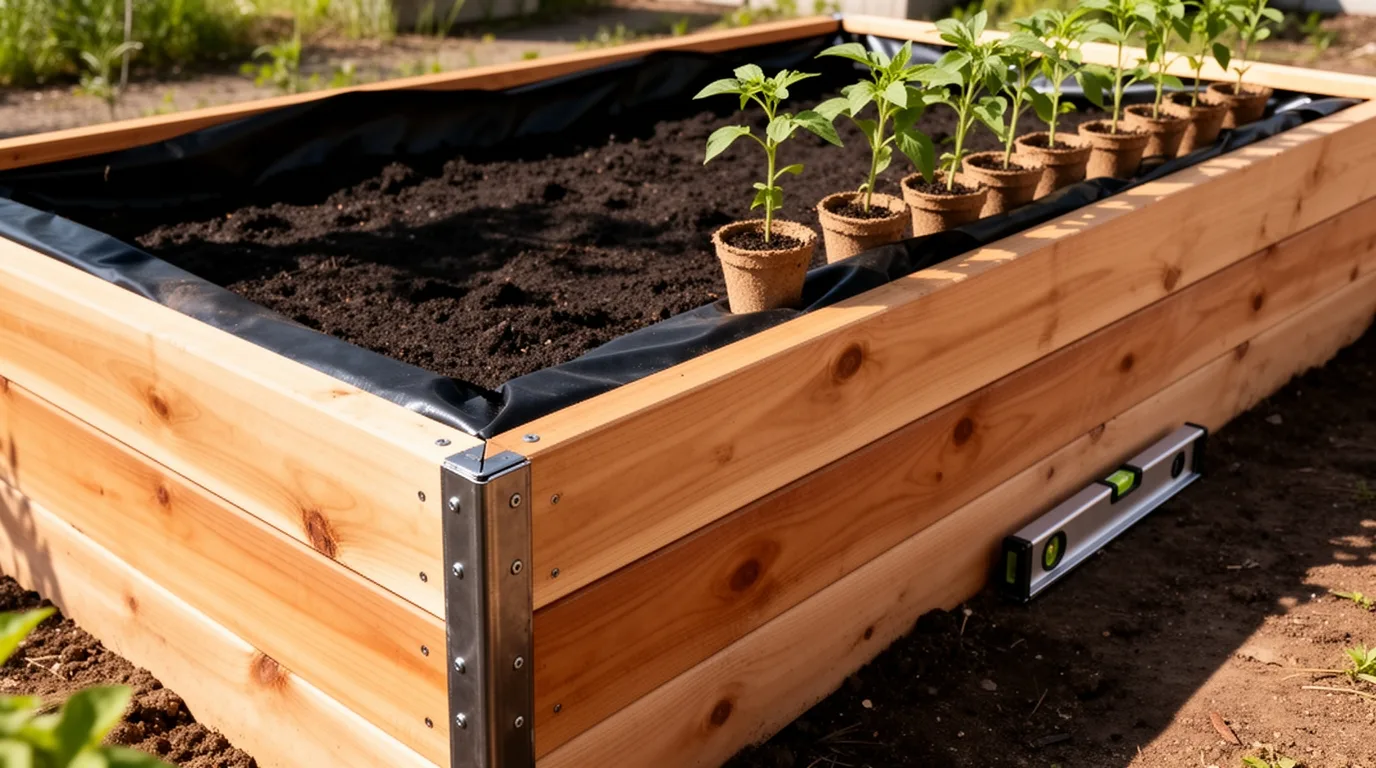
To start your raised bed, lay out all your cut lumber on a flat surface in the shape of your final frame. Align your corner posts inside the ends of your side boards, checking that everything is square. Pre-drill your holes to prevent the wood from splitting, then drive in your galvanized lag screws or deck screws to firmly attach each side to a post. Work your way around all four corners, keeping the frame flat and squared.
| Corner Post | Side Board | Connection |
|---|---|---|
| Inside the corner | Butts flush to post | Pre-drill, then screw |
| Ensures stability | Forms the wall | Use 3-4 screws |
| Check for 90° angle | Keep edges aligned | Tighten securely |
Double-check your diagonals for squareness before moving the assembled frame to its final garden location.
How to Choose the Perfect Location and Dimensions
Even if you’re eager to fill your bed with soil, taking time to pick the ideal spot and size is critical for your garden’s long-term success. You’ll ensure plants thrive by considering sunlight, accessibility, and drainage.
For dimensions, a bed’s width and depth directly impact what you can grow and how easy it’ll be to maintain.
- Sunlight: Choose a location receiving at least 6-8 hours of direct sun daily for most vegetables.
- Access: Place your bed where you can easily reach all sides without stepping into it.
- Width: Keep it under 4 feet wide so you can comfortably reach the center from either side.
- Depth: Aim for a minimum depth of 12 inches to accommodate healthy root growth.
- Length: Customize the length based on your space and planting plans, but ensure it’s manageable.
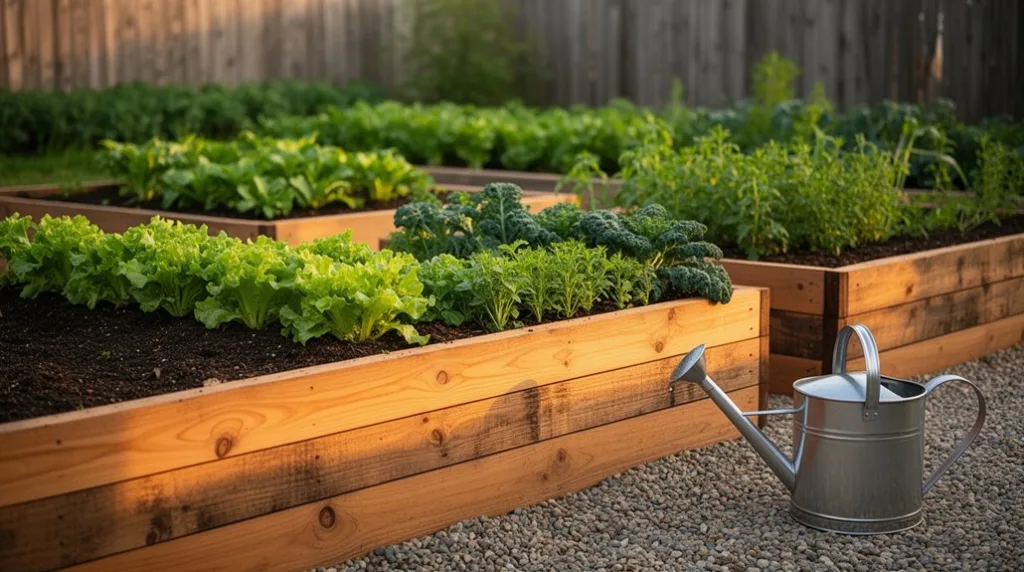
How to Fill Your Raised Garden Bed With the Right Soil
Now that your frame is built and positioned, it’s time to focus on the most important component: the soil that will nourish your plants.
You shouldn’t use dense, compacted soil from your yard. Instead, create a balanced mix.
A popular “lasagna” method starts with a layer of cardboard or newspaper at the bottom to smother weeds. Then, add coarse materials like small branches for drainage.
Fill the bulk of the bed with a blend of roughly 60% topsoil, 30% high-quality compost for nutrients, and 10% coarse sand or perlite for aeration. Mix these components thoroughly within the bed.
This fluffy, fertile soil ensures excellent drainage and provides a perfect environment for strong root growth.
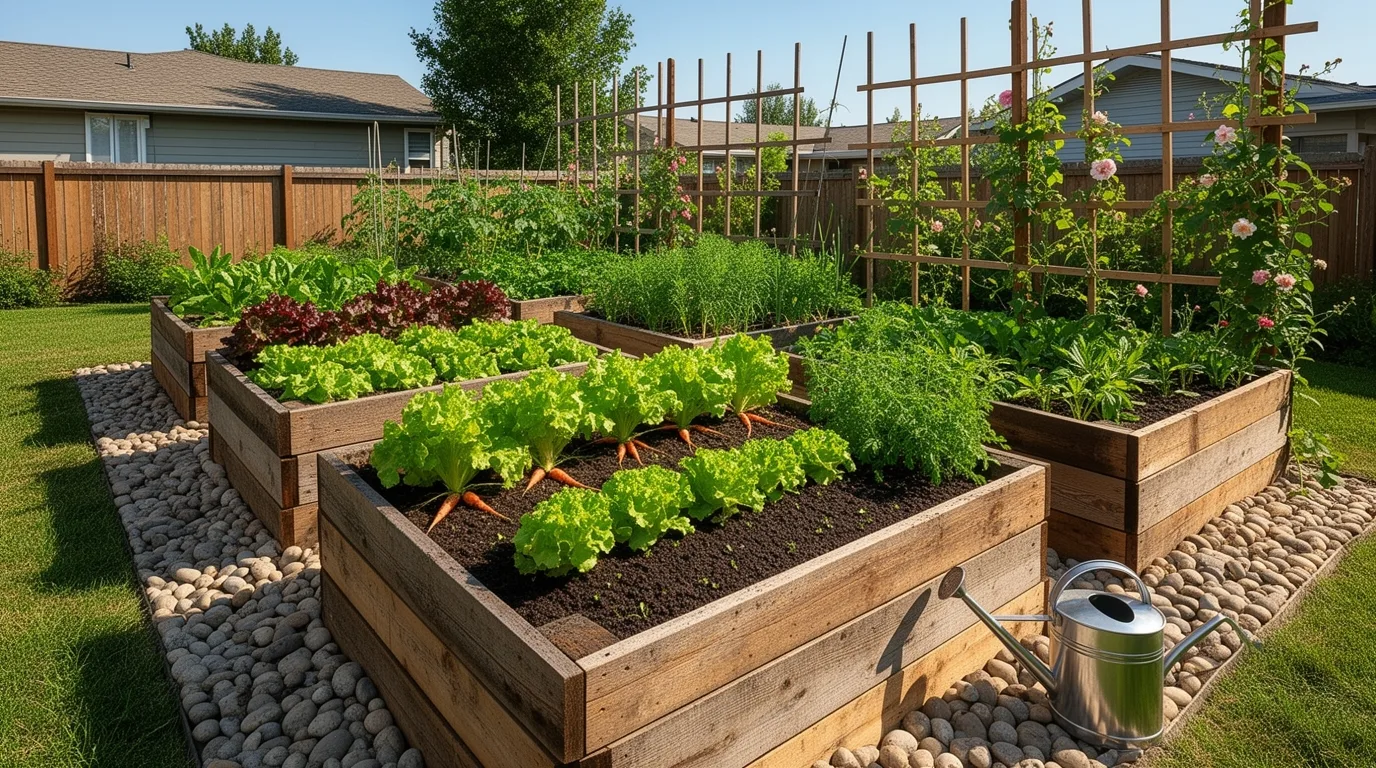
Which Vegetables Thrive Best in a Raised Garden Bed?
With your soil ready, you’re set to select vegetables that will truly flourish in your raised bed. The improved drainage and loose, warm soil create an ideal environment for many crops. Focus on plants that benefit most from these conditions and offer high yields in compact spaces.
- Leafy Greens: Lettuce, spinach, and kale grow quickly and you can harvest them repeatedly.
- Root Vegetables: Carrots and radishes develop straight, unblemished roots in the deep, stone-free soil.
- Vining Plants: Cucumbers and zucchini spread easily over the sides, saving precious bed space.
- Compact Tomatoes: Choose determinate or bush varieties that don’t require extensive staking.
- Aromatic Herbs: Basil, cilantro, and thyme thrive in the well-drained conditions and enhance nearby vegetables.
Smart Layout and Companion Planting Strategies
To maximize your harvest and keep plants healthy, you’ll want to plan your garden bed’s layout carefully.
Consider each plant’s mature size and sunlight needs; place taller plants, like tomatoes, on the north side to avoid shading shorter ones.
Group plants with similar water requirements together for easier care.
Companion planting is a powerful strategy. For example, you can plant basil near tomatoes to deter pests and marigolds throughout to repel nematodes.
Lettuce thrives in the partial shade of taller companions.
Avoid placing plants from the same family, like potatoes and tomatoes, close together, as they compete for nutrients and attract similar pests.
This thoughtful planning creates a supportive, productive garden ecosystem.
How to Efficiently Water Your Raised Garden Beds
Watering your raised beds efficiently will conserve water, save you time, and promote deeper, healthier root growth for your plants. Focus on delivering water directly to the root zone where it’s needed most.
Here are key strategies for effective watering:
- Water deeply and infrequently to encourage roots to grow downward in search of moisture, building drought resilience.
- Use soaker hoses or drip irrigation placed on the soil surface under mulch; they’ll minimize evaporation and prevent leaf diseases.
- Apply a 2-3 inch layer of organic mulch, like straw or wood chips, to significantly reduce water loss from the soil.
- Check soil moisture before watering by sticking your finger an inch into the soil; water only if it feels dry.
- Water early in the morning to reduce evaporation loss and allow foliage to dry quickly, discouraging fungal issues.
Maintaining Your Raised Beds Throughout the Season
Regularly tending your raised beds keeps plants thriving and prevents small issues from becoming big problems.
You should monitor soil moisture daily, using the finger-test method to gauge when deep watering is needed.
As plants grow, thin overcrowded seedlings and provide necessary support, like stakes for tomatoes or trellises for peas.
Check leaves weekly for signs of pests or disease, removing affected foliage promptly to prevent spread.
Replenish nutrients by applying a balanced organic fertilizer or compost tea every few weeks, especially for heavy feeders.
Harvest produce regularly to encourage further production.
At season’s end, remove spent plants, add a layer of compost, and consider planting a cover crop to protect and enrich the soil for next year.
How to Keep Weeds Out of Your Raised Garden Bed
While keeping your plants healthy is a regular task, managing what grows between them is equally important for a bountiful harvest. Weeds compete for water and nutrients, so you’ll want to stop them before they start.
A proactive, layered approach is your best defense for a low-maintenance bed.
- Start with a weed barrier by laying cardboard or several sheets of newspaper at the bottom before adding soil.
- Use clean, bagged soil mixes to avoid introducing weed seeds from your yard.
- Apply a thick layer of mulch, like straw or wood chips, to block light and suppress germination.
- Hand-pull weeds immediately when they’re small, ensuring you remove the entire root.
- Plant densely so your crops shade the soil, leaving little room for weeds to establish.
Natural Pest Control for Your Raised Garden Beds
To keep your plants thriving, you’ll need to tackle pests naturally, without resorting to harsh chemicals. Start by encouraging beneficial insects like ladybugs and lacewings, which devour aphids. You can plant companion flowers such as marigolds and calendula to repel nematodes and beetles. For slugs, create a barrier of crushed eggshells or diatomaceous earth around your beds. Regularly inspect leaves for egg clusters and handpick larger pests. A strong spray of water often dislodges smaller infestations.
| Pest | Natural Solution |
|---|---|
| Aphids | Introduce ladybugs or neem oil spray |
| Slugs/Snails | Diatomaceous earth or beer traps |
| Cabbage Worms | Row covers or handpicking |
| Beetles | Handpick or use kaolin clay |
| Spider Mites | Spray water or release predatory mites |
How to Extend Your Season With a Raised Bed Cover
By adding a simple cover to your raised garden bed, you can significantly extend your growing season and protect plants from unexpected frosts or pests.
You’ll harvest earlier in spring and later into fall. A frame supports the covering material, which you can easily remove on warmer days. Consider these key options for your cover system:
- Use hoops made from flexible PVC or metal conduit bent over the bed.
- Secure a clear plastic sheet for a simple greenhouse effect that warms the soil.
- Choose floating row cover fabric directly on plants for frost protection and insect barriers.
- Employ shade cloth to shield tender seedlings from intense summer sun.
- Anchor your covers securely with clips, weights, or boards to withstand wind.
This simple addition gives you more control over your garden’s climate.
Adding a Trellis for Vertical Growth
Maximize your garden’s growing space by adding a trellis to your raised bed for vertical growth. It’s ideal for vining plants like cucumbers, peas, and pole beans, freeing up valuable soil for other crops.
You can attach a simple A-frame trellis directly to your bed’s sides or secure a sturdy panel against its back. Use materials like bamboo, cattle panels, or sturdy wood, ensuring they’re tall enough for your chosen plants. Secure the structure firmly to withstand wind and weight.
As plants grow, gently train their tendrils onto the support. This method improves air circulation, reduces disease, and makes harvesting easier, giving you a more productive and organized garden layout.
How to Build Tiered Raised Beds for More Space
While trellises make the most of vertical space, tiered raised beds can expand your planting area horizontally and vertically. You’ll build multiple frames that stack securely.
Start by constructing your largest base box from rot-resistant lumber like cedar. A smaller second tier sits centered atop the first; attach it using long exterior screws driven down through the upper frame’s corners into the lower one. This design creates valuable planting ledges.
- Maximize Sun Exposure: Position the tallest tier at the back to prevent shading.
- Ensure Drainage: Drill holes in each tier’s bottom before filling with soil.
- Use a Sturdy Foundation: Level the ground thoroughly for the base box.
- Fill Strategically: Plant deep-rooted crops in the lower, soil-rich base.
- Mix Materials: Combine decorative stone on the top ledge with soil below.
Building an Accessible Raised Bed for Easier Gardening
Take on a new gardening challenge by building a raised bed designed for accessibility and comfort. Prioritize a height that allows you to tend your plants without stooping; aim for 24 to 36 inches. Incorporate wide, stable pathways on all sides for easy wheelchair or walker access. You’ll also want to add a narrow ledge along the top edge to serve as a comfortable perch while you’re working.
| Accessibility Feature | Key Benefit |
|---|---|
| Higher Side Walls (24″-36″) | Reduces bending, easing strain on your back and knees. |
| Ample Pathway Width (min. 36″) | Ensures clear, navigable space for all gardeners. |
| Integrated Sitting Ledge | Provides a convenient spot to rest during longer tasks. |
Construct a sturdy frame, secure it, and fill it with quality soil. Soon you’ll be gardening with newfound ease.
Creative and Budget-Friendly Material Ideas
Several surprising materials can be used to build your raised garden bed without exceeding your budget. Look beyond standard lumber and explore recycled or repurposed items from your home or local community. You’ll create a unique, functional garden while saving money and reducing waste. Focus on materials that are sturdy, non-toxic, and can hold soil securely for a season or more. Check online marketplaces for free or low-cost finds, and don’t hesitate to get creative with your assembly.
- Cinder blocks or bricks: Stack them dry for a simple, durable bed with built-in planting pockets.
- Galvanized stock tanks: These metal troughs offer instant depth and a modern look.
- Reclaimed pallets: Disassemble for wood, ensuring they’re heat-treated (stamped HT) and not chemically treated.
- Logs or fallen branches: Build a rustic, natural border by stacking them log-cabin style.
- Old wine barrels: Cut a barrel in half for two charming, deep planters perfect for root crops.
How to Avoid Common Raised Bed Building Mistakes
Finding creative materials is a great start, but your raised bed’s success depends on building it right.
First, avoid skimping on structural support. Ensure your corners are securely fastened with sturdy brackets or blocks, preventing the sides from bowing out under soil pressure.
You must also plan for drainage; never line the entire bottom with plastic, as this creates a soggy root zone. Instead, just use cardboard to suppress weeds.
Size matters too—don’t build a bed so wide you can’t reach the center. Keep it under four feet across for easy access.
Finally, always use untreated, rot-resistant lumber like cedar to prevent chemicals from leaching into your soil and compromising your plants.
Adapting Your Planting Schedule for Raised Beds
While raised beds warm up faster in spring, you’ll need to adjust your planting dates to take full advantage.
This gives you a longer growing season but requires a tailored schedule.
- Start seeds indoors later for warm-season crops like tomatoes, as you can transplant them outdoors a week or two earlier than in-ground beds.
- Direct-sow cool-weather crops, such as lettuce and spinach, as soon as the soil is workable in early spring.
- Monitor soil temperature closely; use a probe to check if it’s warm enough for seeds like beans or squash.
- Succession plant more frequently in the fast-draining soil to maximize harvests of radishes and greens.
- Push your fall planting dates later, as the soil stays warm longer, allowing for extended autumn harvests.
Embrace this flexibility to grow more food throughout the year.
End-of-Season Care and Preparing for Next Year
Once your final harvest is in, end-of-season care is crucial for ensuring your raised beds remain healthy and productive for next year’s growing season. Start by clearing all spent plants and debris to eliminate pests and diseases. Add a generous layer of finished compost to replenish nutrients, then top with mulch like straw or shredded leaves to protect the soil over winter. Consider planting a cover crop like winter rye to prevent erosion and fix nitrogen.
| Task | Key Benefit |
|---|---|
| Remove plant debris | Disrupts pest/disease cycles |
| Add 2-3″ of compost | Replenishes essential nutrients |
| Apply winter mulch | Insulates soil & retains moisture |
| Test your soil pH | Informs amendments for spring |
| Plan next year’s layout | Prevents soil depletion via rotation |
These simple steps will give you a vibrant, ready-to-plant foundation come spring.
Frequently Asked Questions
How Can I Move a Raised Garden Bed?
You move it by first digging around its sides, then carefully lifting the bed’s base and repositioning it. You’ll need a few helpers for heavy beds and should transplant any plants separately.
Is Treated Wood Safe for Raised Beds?
You should avoid older treated wood with arsenic. Modern pressure-treated lumber uses safer copper compounds, but you can line the bed’s interior with heavy plastic to prevent soil contact for extra peace of mind.
Can I Put a Raised Bed on Concrete?
Yes, you can put a raised bed on concrete. Ensure you’ve got proper drainage by drilling holes into the bottom of your bed frame and lining it with a porous landscape fabric barrier.
Will Raised Beds Attract Termites or Rodents?
You can prevent pests by using barriers like hardware cloth beneath the bed. Termites are rarely drawn to moist wood, but you’ll discourage rodents by keeping the area clean and eliminating food sources.
How Long Will a Wooden Raised Bed Last?
It typically lasts 5-10 years, but you’ll extend its life considerably by using rot-resistant cedar or redwood and applying a protective, food-safe sealant to the lumber.
Conclusion
By building your raised bed, you’ve created a tidy, organized space for plants to thrive. Maintain it by watering deeply, refreshing mulch, and rotating crops yearly. When the season ends, clear spent plants and top-dress with compost to enrich the soil. Stick with these simple steps, and you’ll enjoy an even more productive, low-maintenance garden next spring.
The Only Tools You Need for a Thriving Garden 🌱
Whether you're a weekend gardener or growing daily — these hand-picked tools make every session faster, easier, and more satisfying.