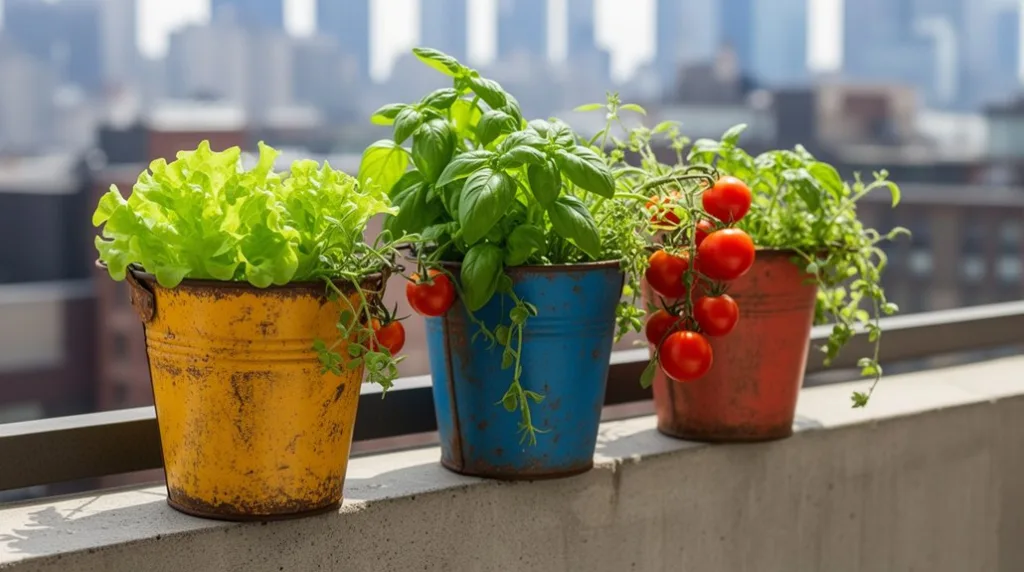
Have you considered turning a few five-gallon buckets into a serious food source? You can harvest crisp lettuce, juicy tomatoes, and fragrant herbs from your patio or balcony with the right setup. The secret lies in choosing compact varieties, preparing your containers properly, and mastering a simple care routine. The most common mistakes happen at the very beginning, and avoiding them ensures your buckets thrive.
Key Takeaways
- Grow compact vegetables like peppers and lettuce in 5-gallon buckets for efficient small-space food production.
- Use vertical space with shelving or hanging buckets for crops like tomatoes and trailing strawberries.
- Select bush bean varieties and single-plant peppers to maximize yield per individual container.
- Arrange buckets in tiers or clusters based on similar sun and water needs for easier care.
- Extend seasons by moving buckets indoors or using protective covers against frost and pests.
What Is Bucket Gardening and Why Does It Work?
Bucket gardening is simply cultivating plants in containers, typically repurposed five-gallon buckets, and it’s an effective method because you’re creating a controlled environment.
You manage the soil mix perfectly, ensuring excellent drainage and nutrient density right from the start.
You also control water and fertilizer delivery directly to the roots, which minimizes waste.
Placing your buckets is completely flexible; you’ll use patios, balconies, or driveways to maximize sun exposure.
This method physically elevates your plants, reducing pest and weed issues significantly.
It’s a highly adaptable system.
You can grow a wide variety of vegetables, herbs, and even small fruits in a confined area, making it an ideal solution when you lack traditional garden space.
How to Choose the Perfect Bucket for Your Garden
Selecting the right container is your first critical step toward a thriving bucket garden. You must consider material, size, and color to ensure plant health. A 5-gallon bucket is the standard for most vegetables, offering ample root space. Always verify your bucket is food-safe if you’re growing edibles.
- Material: Opt for durable, UV-resistant plastic (like HDPE) to prevent cracking. Avoid containers that previously held non-food chemicals.
- Size: Use 5-gallon buckets for tomatoes or peppers. Smaller 2-3 gallon sizes are perfect for herbs or lettuce.
- Color: Light-colored buckets reflect heat, keeping roots cooler in hot climates. Dark colors absorb warmth for cooler seasons.
- Food-Grade: Look for a #2 HDPE recycling symbol and “food-grade” labeling for safety.
- Lid Utility: A matching lid can be used as a saucer or to create a self-watering system.
Preparing Your Bucket: Drainage, Soil, and Planting Steps

Now that you have your bucket, it’s time to transform it into a productive home for your plants by focusing on three essentials: drainage, quality soil, and correct planting.
First, drill several holes in the bottom for drainage, preventing waterlogged roots. You can add a layer of gravel or broken pottery over the holes.
Next, fill the bucket with a high-quality potting mix; don’t use garden soil as it compacts. Potting soil provides the necessary aeration and nutrients.
Finally, for planting, create a hole slightly larger than your seedling’s root ball. Gently place the plant in, backfill with soil, and firm it around the base. Water thoroughly after planting to settle the soil.
The Best Vegetables to Grow in a Bucket Garden
Often, the most successful bucket gardens focus on vegetables with compact growth habits and relatively shallow root systems.
You’ll maximize your yield by choosing prolific producers that thrive in confined spaces.
Ensure your bucket has adequate drainage and use a high-quality potting mix for best results.
- Leafy Greens: Lettuce, spinach, and kale grow quickly. You can harvest outer leaves repeatedly for a continuous supply.
- Radishes: These are perfect for beginners, maturing in as little as 30 days. They don’t require deep soil.
- Bush Beans: Opt for compact ‘bush’ varieties over pole types. They’ll produce a heavy crop in a single bucket.
- Peppers: Both bell and chili peppers perform well. A single plant per bucket is usually sufficient.
- Green Onions: You can regrow them from kitchen scraps. Simply plant the root ends and snip the tops as needed.
Growing Flavorful Herbs in Bucket Containers
If you’re looking to add fresh flavor to your meals, many culinary herbs are ideal for bucket gardening due to their compact size and minimal root depth. Select five-gallon buckets with several drainage holes. Use a high-quality potting mix; avoid dense garden soil.
For Mediterranean herbs like rosemary, thyme, and oregano, ensure the mix is gritty and the bucket receives full sun. You can plant basil, parsley, and cilantro more densely; just keep them well-watered. Position mint in its own container, as it’s invasive.
Place your buckets where you’ll frequently snip herbs, which encourages bushy growth. Fertilize monthly with a balanced, half-strength liquid fertilizer to maintain vigorous, flavorful leaves for your kitchen.
Fruits and Berries That Thrive in Bucket Gardens
While you might think large fruits need sprawling garden space, many smaller varieties can flourish in five-gallon buckets when given the right conditions. Success depends on selecting compact cultivars and ensuring excellent drainage.
You’ll get the best results with consistent watering, high-quality potting mix, and at least six hours of daily sun. For berries and small fruits, dwarf varieties are your best bet.
- Strawberries: Opt for everbearing or day-neutral types, planting multiple plants per bucket for a steady harvest.
- Blueberries: Choose a dwarf variety and use acidic potting soil to meet their specific pH requirements.
- Dwarf Citrus: Look for improved Meyer lemon or calamondin orange trees grafted onto dwarfing rootstock.
- Raspberries & Blackberries: Select thornless, compact summer-bearing or primocane-fruiting varieties for easier management.
- Figs: A dwarf fig tree like ‘Little Miss Figgy’ produces well in a confined container when roots are restricted.
Finding or Building Your Bucket Garden Containers
For your bucket garden, you’ll first need the containers themselves, which you can either find ready-made or build from common materials. Five-gallon food-grade plastic buckets are the classic choice, often available free or cheap from restaurants or bakeries. Thoroughly clean any reclaimed bucket.
If you’re building planters, you can use large plastic storage totes, wooden crates, or even sturdy fabric grow bags. Whatever container you select, drainage is non-negotiable. You must drill several half-inch holes in the bottom. Space them about every three inches to prevent soggy soil and root rot.
If using a tote or crate, you can line it with landscape fabric to contain the soil while still allowing water to drain out freely.
Positioning Buckets for Maximum Sun and Growth
After securing your containers, you need to place them where your plants will thrive. Most vegetables and herbs require at least six to eight hours of direct sunlight daily.
You’ll survey your space to identify the sunniest spots, like a south-facing balcony or patio. Consider these key points for positioning:
- Track the sun’s path over a day or two to avoid deceptive shaded areas.
- Elevate buckets on bricks or pallets to improve drainage and catch more light, especially in crowded spaces.
- Group plants with similar light needs together to simplify your care routine.
- Ensure air circulation by avoiding cramming buckets against walls or each other to prevent disease.
- Plan for mature plant size, leaving room for foliage to expand without casting shade on neighboring buckets.
Proper placement prevents leggy, weak growth and directly impacts your harvest’s success.
Watering and Feeding Your Bucket Garden Properly
Consistent watering and targeted feeding are essential for your bucket garden’s success, as container plants rely entirely on you for their moisture and nutrients. Check soil moisture daily by inserting your finger up to the second knuckle; water thoroughly when the top inch feels dry until it drains from the bottom holes. This deep soaking encourages strong root growth.
For feeding, use a balanced, water-soluble fertilizer every two weeks during the growing season. Always follow the label’s dilution instructions precisely to avoid burning roots. You can also mix a slow-release granular fertilizer into your potting mix at planting for sustained nutrition. Remember, consistent, moderate feeding yields better results than infrequent, heavy doses.
Keeping Pests and Diseases Out of Your Buckets
Vigilant monitoring can effectively keep pests and diseases from ruining your bucket garden. You must inspect your plants’ leaves, stems, and soil surface regularly. Act quickly at the first sign of trouble to prevent a minor issue from spreading.
Your best strategies include:
- Inspect daily: Turn over leaves and look for insects, eggs, or discolored spots.
- Use physical barriers: Cover buckets with fine insect netting to block flying pests.
- Blast pests away: Dislodge aphids and mites with a strong spray of water from a hose.
- Remove infected material: Immediately pick off and dispose of diseased leaves to stop fungal spores.
- Introduce beneficial insects: Add ladybugs or lacewings to naturally control aphid populations.
Creative Arrangements for Small Space Bucket Gardens
You can maximize even the tiniest balcony or patio by thinking vertically and grouping your bucket garden thoughtfully. Use sturdy shelving, wall-mounted racks, or simple rope to hang buckets, creating tiers for sunlight access. Cluster plants with similar water and light needs together to simplify your care routine. Position taller plants, like tomatoes or pole beans, at the back or center, and place trailing crops, such as strawberries or nasturtiums, at the edges to spill over beautifully.
| Arrangement Goal | Method | Example Plants |
|---|---|---|
| Maximize vertical space | Use shelving or hanging | Cherry tomatoes, herbs |
| Create visual interest | Mix heights & textures | Lettuce (low), peppers (mid) |
| Optimize sun exposure | Rotate or tier buckets | Basil, thyme, rosemary |
| Utilize railings | Secure with brackets | Strawberries, trailing flowers |
| Group for efficiency | Cluster by water need | Radishes, carrots, beets |
Year-Round Bucket Gardening: Seasonal Care Tips
To keep your bucket garden productive through every season, you’ll need to adapt your care routine for changing temperatures and daylight. Focus on water, sunlight, and plant protection.
Your success hinges on these simple, seasonal adjustments.
- In spring, start cool-season crops like lettuce and radishes, moving them outside on warm days but bringing them in if frost threatens.
- During summer, water deeply in the early morning to combat heat, and use mulch to conserve moisture and cool roots.
- For fall, transition back to cool-weather vegetables, and use row covers to extend your harvest as nights chill.
- In winter, grow hardy greens in a sunny, sheltered spot or move buckets indoors under grow lights for herbs.
- Year-round, monitor soil nutrients closely, as frequent watering in containers leaches fertilizer quickly.
Frequently Asked Questions
Can I Reuse Soil From Last Year’s Buckets?
Yes, you can reuse it. First, remove old roots. Then, mix in fresh compost or fertilizer, because last year’s plants have probably depleted the soil’s nutrients. This will revitalize it for new growth.
What Do I Do With My Bucket Garden on Vacation?
Before vacation, you’ll move your buckets to shade. Use a DIY drip system with a reservoir bottle or soaker hose. Deeply water plants right before leaving; mulch also helps them retain moisture longer.
Can I Grow a Bucket Garden Without a Balcony?
Absolutely. You can grow it indoors near a sunny window, using grow lights if needed. Choose compact plants like herbs and lettuce. Just ensure your buckets have drainage and you’ll harvest indoors.
Are Food-Safe Buckets Truly Necessary?
Yes, you need food-safe buckets. You’ll avoid chemicals leaching from non-food-grade plastic into your soil and produce. Always look for the NSF symbol or a recycling number “2” on your bucket.
How Do I Winterize My Bucket Garden Plants?
Move frost-sensitive plants indoors. For cold-hardy ones, insulate the bucket with bubble wrap or burlap, then mulch the soil. You can also group buckets together against a sheltered wall for extra wind protection.
Conclusion
Now you’ve got the blueprint. Keep watering deeply, watch for pests, and rotate your buckets for even light. By grouping plants with similar needs and staggering your harvests, you’ll turn that small space into a steady, productive kitchen garden. Just a few buckets can yield a season’s worth of fresh flavor right outside your door.
The Only Tools You Need for a Thriving Garden 🌱
Whether you're a weekend gardener or growing daily — these hand-picked tools make every session faster, easier, and more satisfying.