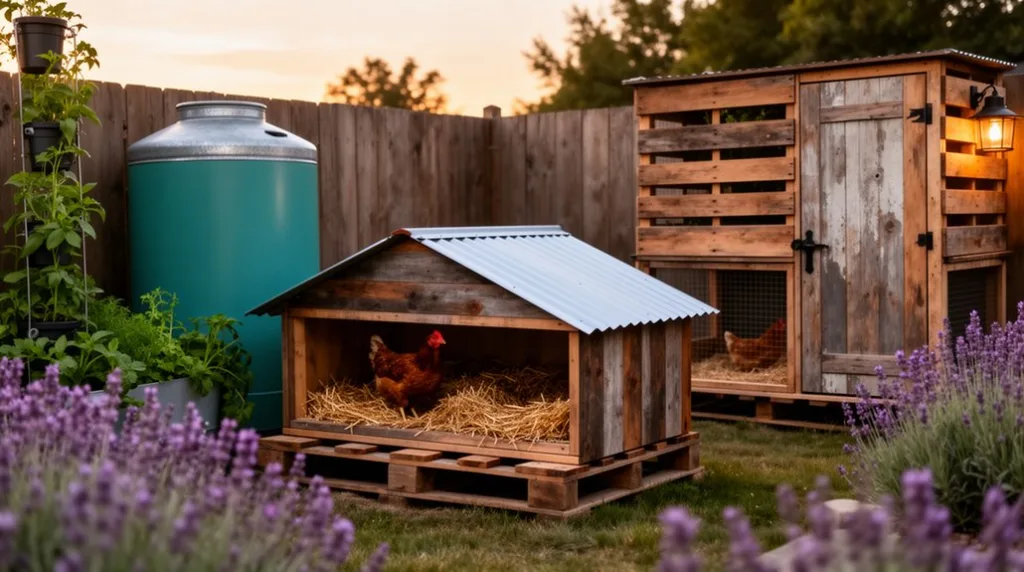
You’ve got a backyard that could become a thriving little farm, and the right coop can make all the difference. Imagine a sturdy pallet‑box that slides onto a cinder‑block base, or an A‑frame built from reclaimed wood that folds away for winter. Picture PVC frames wrapped in predator‑proof mesh, solar‑powered vents humming above insulated walls of recycled bottles. Each design offers hinged doors, sliding nest trays, and removable panels for effortless cleaning and egg collection—so you can start turning ideas into a functional, weather‑proof home for your chickens.
Key Takeaways
- Offer a range of coop styles, from simple pallet‑box and reclaimed‑wood A‑frame to PVC‑frame mesh and compact rooftop stack, to fit various backyard spaces.
- Use affordable, eco‑friendly materials like reclaimed pallets, milk crates, straw bales, and crushed soda bottles for insulation and nesting.
- Build raised floors on cinder‑blocks or gravel pads for drainage, pest deterrence, and easy cleaning with removable trays or sliding nesting boxes.
- Include ventilation features such as roof ridge holes, low‑level slits, and optional solar‑powered fans to control temperature and humidity.
- Provide predator‑proof access with hinged doors, zip‑tied mesh, and lockable sliding panels, plus removable perches and nesting boxes for hassle‑free maintenance.
Simple Pallet‑Box DIY Chicken Coop
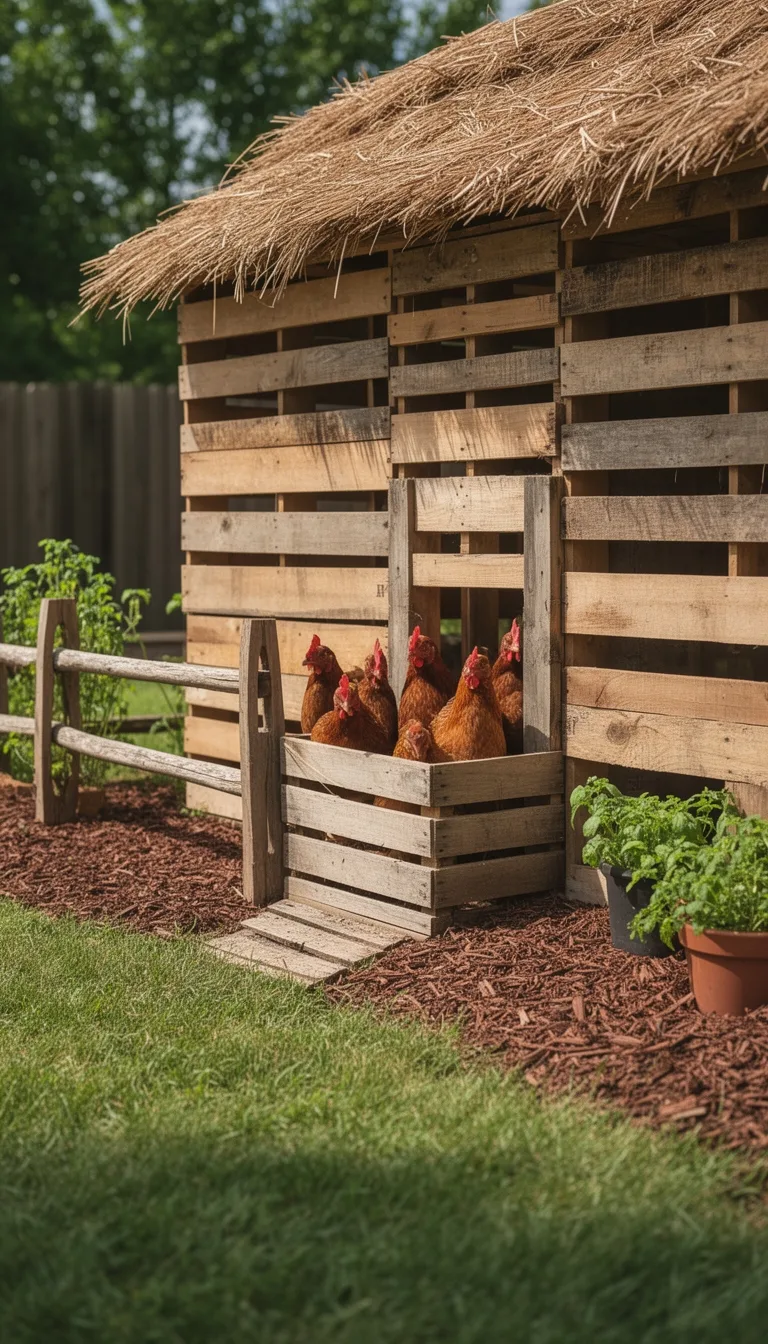
With a few sturdy pallets and a dash of creativity, you can turn a simple pallet‑box into a functional, low‑cost chicken coop that fits snugly in your backyard.
First, stack two pallets side‑by‑side, securing them with screws or brackets to form a rectangular frame. Add a third pallet on top as a roof, angling it slightly for rain runoff. Cut a door opening on one side, then attach a hinged hatch using metal hinges and a latch.
Line the interior with straw or pine shavings for bedding, and place a small feeder and waterer inside. Paint or seal the wood to protect against moisture, and drill ventilation holes near the roof ridge.
The finished coop houses six to eight birds, stays sturdy, and blends seamlessly with garden décor.
Easy Reclaimed‑Wood A‑Frame Coop
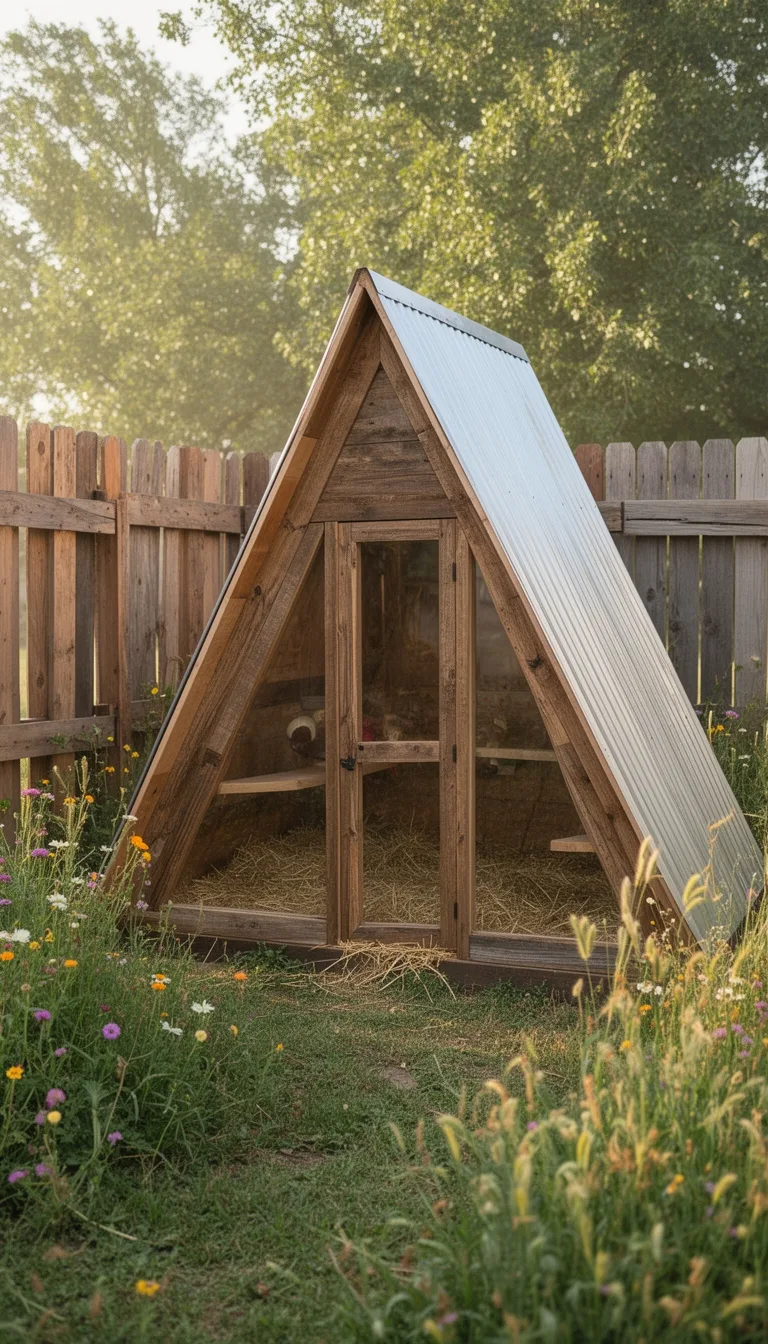
If you loved the low‑cost charm of a pallet‑box, you’ll appreciate how reclaimed wood can give an A‑frame coop a rustic, sturdy look while still keeping the build simple.
Start by sourcing clean, flat boards from old barns or demolition sites; the weathered grain adds character and saves money.
Cut two identical side triangles, then attach a cross‑brace at the apex for stability.
Secure a floor panel of reclaimed plywood, then nail a slatted roof using the same wood, leaving a slight overhang for rain runoff.
Install a hinged door with a reclaimed latch, and line the interior with straw for comfort.
Finish with a clear sealant to protect against moisture, and you’ll have a durable, charming coop that blends seamlessly into any backyard garden.
Portable Garden‑Shed Chicken Coop
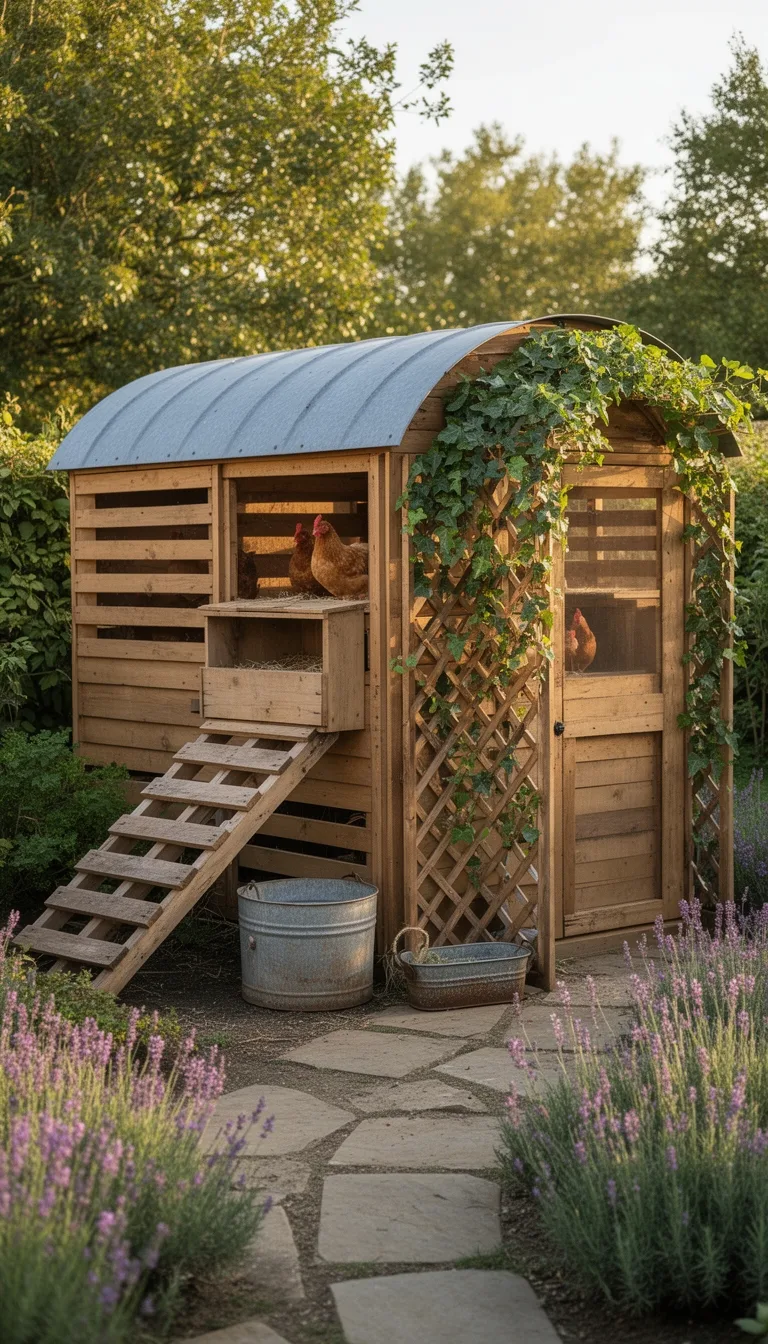
Set up a portable garden‑shed chicken coop by anchoring a lightweight, pre‑fabricated shed on wheels and fitting it with a removable coop kit.
You’ll choose a shed with a sloping roof, a hinged side door, and a sturdy floor panel. Install a nesting box that slides out for cleaning, and attach a secure, predator‑proof latch to the door.
Add a removable perch that folds flat when you need to relocate the unit. Secure the wheels with lockable brakes to keep the coop steady during storms.
Use a breathable fabric screen for ventilation, and line the interior with washable straw. When it’s time to move, simply unlock the brakes, roll the shed to its new spot, and re‑attach the coop kit—fast, flexible, and low‑maintenance.
Pvc‑Frame DIY Chicken Coop With Mesh
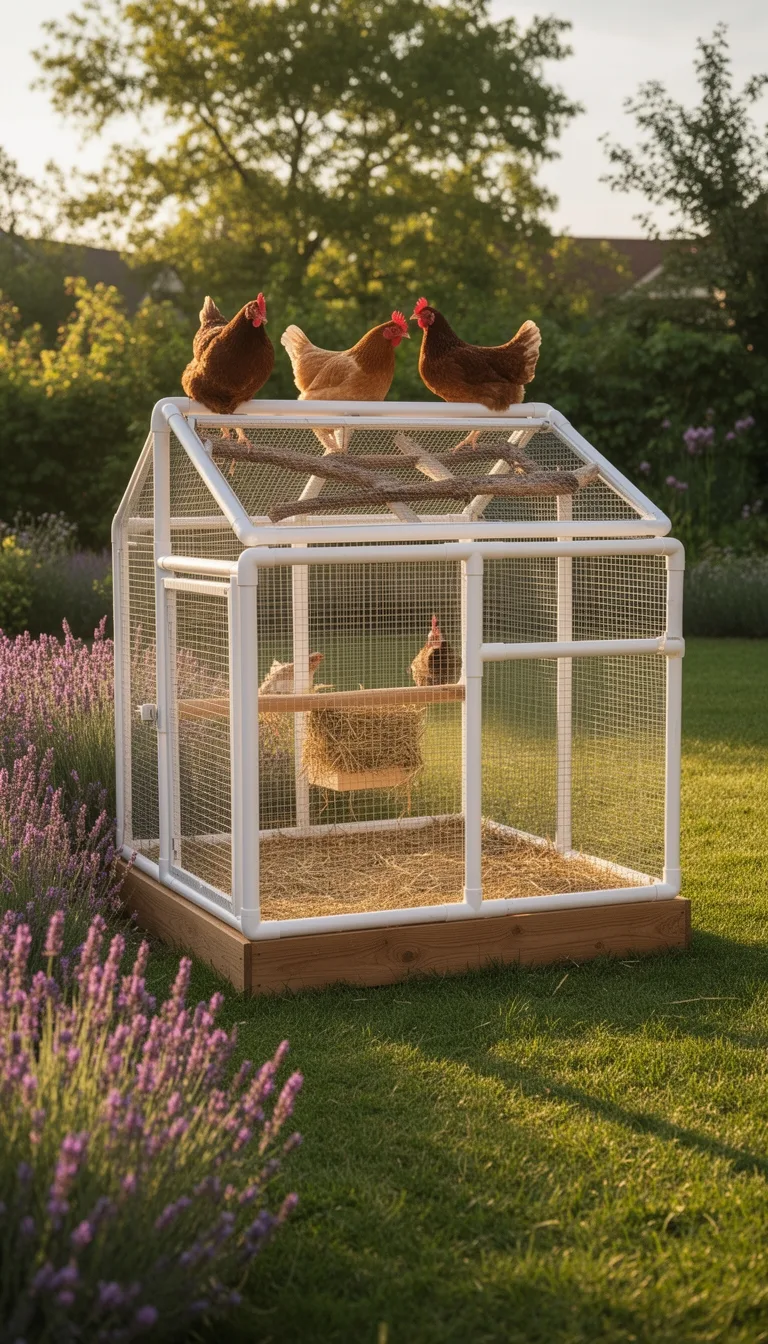
Build a sturdy PVC‑frame coop by cutting ½‑inch pipe into equal lengths, assembling the base, walls, and roof with slip‑on connectors, then draping UV‑protected chicken over the frame and securing it with zip‑ties.
You’ll appreciate the lightweight yet durable structure that resists rust and can be re‑configured as your flock grows.
The mesh panels keep predators out while allowing airflow, and the slip‑on connectors let you replace sections without tools.
Add a simple door latch and a removable floor for easy cleaning, and you’ll have a low‑maintenance haven that looks sleek in any backyard.
- Cut and label all pipe sections for quick assembly.
- Use T‑connectors for corner reinforcement.
- Attach UV‑treated chicken wire with zip‑ties, overlapping edges.
- Install a hinged door with a latch and a removable floor tray.
Milk‑Crate Nesting Boxes & Perches
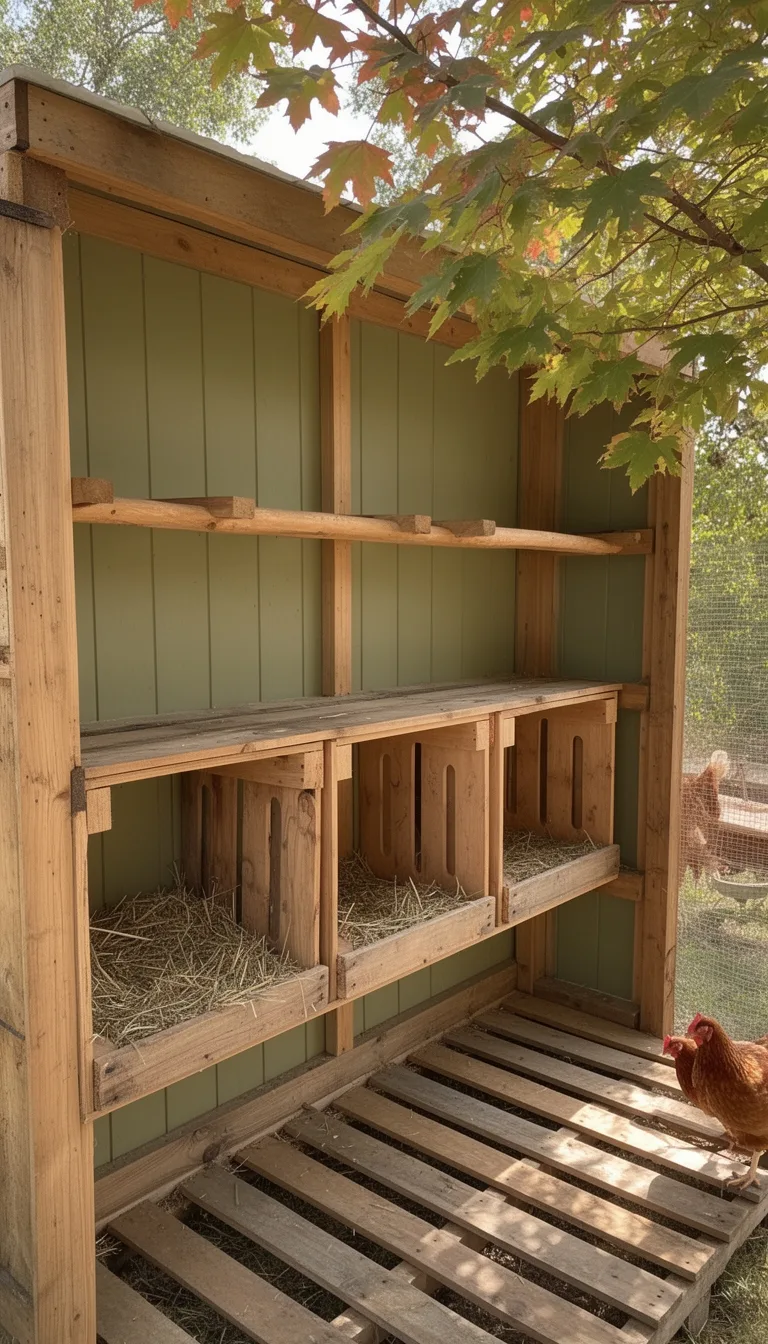
Typically, a few sturdy milk‑crate nesting boxes and a couple of simple perches will give your hens a cozy, organized space while keeping the coop tidy.
Cut each crate in half lengthwise, sand the edges, and line the interior with straw or pine shavings for softness.
Stack the boxes side‑by‑side, securing them with zip ties or small screws, then drill 1‑inch holes near the top of each perch for easy access.
Use 2‑inch dowels or reclaimed branches as perches, spacing them 12‑18 inches apart and mounting them at a slight upward angle to encourage natural roosting.
Position the nesting area away from drafts, and keep the perches low enough for your smallest birds yet high enough to deter predators.
This setup maximizes comfort, hygiene, and egg‑laying efficiency.
Raised‑Floor Coop on Cinder‑Blocks
By lifting the coop off the ground with cinder‑blocks, you create a dry, well‑ventilated floor that protects your hens from moisture and predators.
The blocks act as sturdy stilts, keeping the wooden frame clear of damp soil and allowing air to circulate beneath.
You can level the blocks on gravel or a compacted sand base to prevent settling, then secure the perimeter with a simple metal bracket.
This design simplifies cleaning, deters pests, and provides a stable foundation for a portable coop you can relocate as your yard evolves.
- Choose 4‑inch concrete blocks for height and durability.
- Arrange blocks in a rectangular grid, spacing them evenly.
- Add a breathable plywood floor that rests on the blocks.
- Anchor the coop frame to the blocks with galvanized brackets.
Straw‑Bale Eco‑Friendly Chicken Coop
A handful of straw‑bales can become a warm, breathable shell for your chickens, giving you an eco‑friendly coop that insulates naturally while staying lightweight and easy to assemble.
Stack three to four bales in a rectangular frame, securing them with zip‑tied rebar or wooden stakes.
Cover the exterior with a moisture‑resistant tarp, overlapping seams to keep rain out while allowing airflow.
Add a hinged door made from reclaimed pallet wood, fitted with a simple latch for quick access.
Inside, line the floor with straw or pine shavings for comfortable roosting, and install a small vent near the roof ridge to regulate temperature.
This design minimizes waste, reuses agricultural by‑products, and creates a cozy, sustainable home for your flock.
Corner‑Fit Minimalist Chicken Coop
Corner‑fit minimalist coops turn a spare kitchen nook or garage corner into a sleek, space‑saving home for your hens. You’ll love how the compact frame hugs the wall, freeing floor space while still offering a cozy roost and secure run.
Choose lightweight plywood, reinforce corners with metal brackets, and add a hinged roof for easy cleaning. Keep the design simple, yet functional, with a built‑in perch and a shallow nesting box that slides out for egg collection. The result feels modern, efficient, and surprisingly roomy for a small flock.
- Materials – plywood, metal brackets, hinges, weather‑proof paint.
- Dimensions – 3 ft × 3 ft × 4 ft, fitting most corners.
- Ventilation – slatted windows with mesh covers.
- Access – removable side panel for feeding and cleaning.
Sliding‑Panel Convertible Coop & Run
Ever wondered how a single coop can morph from a cozy night‑time roost into a spacious daytime run without a hassle? You’ll love a sliding‑panel convertible design that lets you pull back a sturdy, weather‑sealed panel to reveal a fenced‑in play area.
Build a rectangular frame, attach a sliding track to the roof side, and mount a lightweight, insulated panel that slides on rollers. When night falls, pull the panel closed; the chickens stay warm and protected.
In the morning, slide it open, and the same space becomes a predator‑proof run with fresh grass and sunlight. The mechanism requires only two hinges, a latch, and a simple handle, keeping construction quick and maintenance minimal while delivering seamless indoor‑outdoor transition.
Rustic Log‑Cabin Style Chicken Coop
After mastering the sliding‑panel concept, you can give your coop a cozy, rustic log‑cabin vibe that blends seamlessly with a farmyard landscape.
Use reclaimed pine logs for walls, notch them together for a tight fit, and seal gaps with natural caulk.
Add a shingled roof of cedar shakes to echo classic cabins, and install a porch‑style entrance with a reclaimed barn door.
Inside, line roosts with straw and hang lantern‑style fixtures for warm light.
- Log selection – choose uniform diameter, dry logs; split half for interior walls.
- Foundation – set a stone or gravel pad to prevent rot and improve drainage.
- Ventilation – cut low‑level slits near the roof ridge and install a tiny window for airflow.
- Finishing touches – apply a light, non‑toxic stain to protect wood while preserving the natural grain.
Waterproof Tarp‑Cover Chicken Coop
Usually you’ll start by stretching a heavy‑duty, UV‑resistant tarp over a simple wooden frame, securing it with rust‑proof grommets and tension straps so the coop stays dry even during the heaviest rain. Choose a tarp with a reinforced grommet line along each edge; this lets you tighten the canvas without tearing.
Cut the tarp a few inches larger than the frame, then fold the excess under the lip of the roof to create a neat overhang that directs water away from the entrance. Use adjustable ratchet straps to fine‑tune tension, checking for sag after each rainstorm.
Add a drip edge along the bottom to prevent pooling, and seal any gaps with silicone‑based caulk. The result is a lightweight, weather‑proof shelter that protects your flock while staying easy to remove for cleaning.
Solar‑Powered Light & Ventilation Kit
Brighten and refresh your coop with a solar‑powered light and ventilation kit that runs entirely off the sun. You’ll notice healthier birds, steadier egg production, and lower energy bills. The kit’s solar panel mounts discreetly on the roof, charging a compact battery that powers a low‑watt LED and a quiet exhaust fan.
You install the components without wiring to the house, and the automatic sensor adjusts light and airflow based on temperature and daylight.
- Solar panel – weather‑resistant, 10 W, angled for optimal sun exposure.
- Battery pack – sealed lithium, 12 V, 5 Ah, hidden inside the coop wall.
- LED light – 3000 K, dimmable, timer‑controlled for dawn‑dusk cycles.
- Ventilation fan – 30 CFM, brushless motor, thermostat‑triggered for humidity control.
Compact Rooftop Coop‑Nest Stack
A compact rooftop coop‑nest stack maximizes limited space while keeping your flock comfortable and secure.
You’ll frame a sturdy base with reclaimed lumber, then attach a shallow nesting box directly under a sloped roof panel.
The roof’s overhang shields birds from rain and sun, while the nesting box offers privacy and easy egg access.
Use lightweight metal brackets to secure the roof, and add a small vent at the peak for airflow.
Install a perch just below the roof so chickens can hop up and settle.
Finish with weather‑proof paint and a removable tray for cleaning.
The stack’s vertical design fits tight yards, yet provides a cozy, protected home for your chickens.
Multi‑Level Coop With Egg‑Collect Tray
Elevate your backyard setup by stacking functional tiers that separate living space, nesting, and egg collection. A multi‑level coop lets you maximize footprint while keeping hens comfortable and eggs pristine.
Build a sturdy base frame, add a raised perch level, then install a dedicated nesting tier with a sliding egg‑collect tray that slides out for easy harvest. Use weather‑resistant plywood and secure all joints with galvanized brackets to ensure durability.
Keep each tier well‑ventilated, and position the tray just beneath the nesting box so eggs drop straight onto a clean surface. This design reduces mess, speeds up collection, and gives you a tidy, organized coop that looks as good as it works.
- Frame construction with reinforced corners
- Perch level positioned 12‑18 in. above ground
- Nesting boxes fitted with a 2‑inch clearance for tray
- Sliding tray mechanism using low‑friction rollers
Budget Coop Insulated With Recycled Bottles
After setting up the multi‑level layout, you can keep your coop warm without breaking the bank by filling the wall cavities with clean, crushed soda bottles.
First, rinse and dry the bottles, then smash them into uniform fragments using a hammer or a heavy-duty shredder. Pack the pieces tightly into each cavity, leaving a thin barrier of breathable fabric to keep dust out while allowing airflow.
Seal the interior with a layer of plywood or reclaimed pallet wood, then cover the exterior with weather‑proof siding. The bottles create air pockets that trap heat, reducing the need for supplemental heating.
This low‑cost insulation method also diverts waste from landfills, giving your chickens a cozy, eco‑friendly home.
Conclusion
Now’ve got a coop for every budget, space, and style—whether you’re stacking pallets, framing with PVC, or repurposing bottles for insulation. Each design offers easy cleaning, predator‑proofing, and good airflow, plus thoughtful touches like sliding nests, solar vents, and portable wheels. Pick the one that fits your yard, build it with confidence, and watch your chickens thrive in a comfy, low‑maintenance home.
The Only Tools You Need for a Thriving Garden 🌱
Whether you're a weekend gardener or growing daily — these hand-picked tools make every session faster, easier, and more satisfying.