You can transform spare wood, pallets, or even old drawers into functional garden boxes without breaking the bank, and each option offers a distinct look that fits any backyard style. By mixing lightweight soil blends, adding simple drainage layers, and sealing the surfaces, you’ll get durable, low‑maintenance planters that hold herbs, flowers, or veggies. The next step shows how to build and finish each design, so you can start turning those ideas into real‑world garden features.
Key Takeaways
- Choose reclaimed wood, pallets, or old drawers, sand, drill ¼‑inch drainage holes, line with landscape fabric, and fill with potting soil‑compost mix.
- Use cinder or concrete blocks, stack with ½‑inch gaps, drill drainage holes, add gravel, line with fabric, and top with lightweight soil for herbs or succulents.
- Repurpose plastic bottles or tires: cut, sand edges, add drainage holes, insert a liner, and fill with a well‑draining mix for small-space or hanging gardens.
- Create fabric grow bags or macramé pocket planters using breathable canvas, a waterproof liner, and a lightweight soil blend for portable, root‑rot‑resistant planting.
- Finish all wooden planters with weather‑proof sealant or paint, and protect hard‑surface planters with clear sealant to enhance durability and longevity.
DIY Reclaimed Wooden Crate Planter – Rustic Budget Charm
Grab a weathered crate, sand it down, and turn it into a rustic, budget‑friendly planter that adds charm to any patio or balcony.
First, clean the crate, then sand rough spots to prevent splinters. Drill drainage holes in the bottom; a ¼‑inch drill bit works well.
Line the interior with landscape fabric to keep soil from escaping.
Fill with a mix of potting soil and compost, then plant herbs, succulents, or annual flowers.
Arrange crates at varying heights for visual interest, securing them with brackets if needed.
Paint or stain the exterior for extra weather protection, but keep the finish light to preserve the reclaimed look.
This simple project recycles wood, saves money, and instantly upgrades outdoor space.
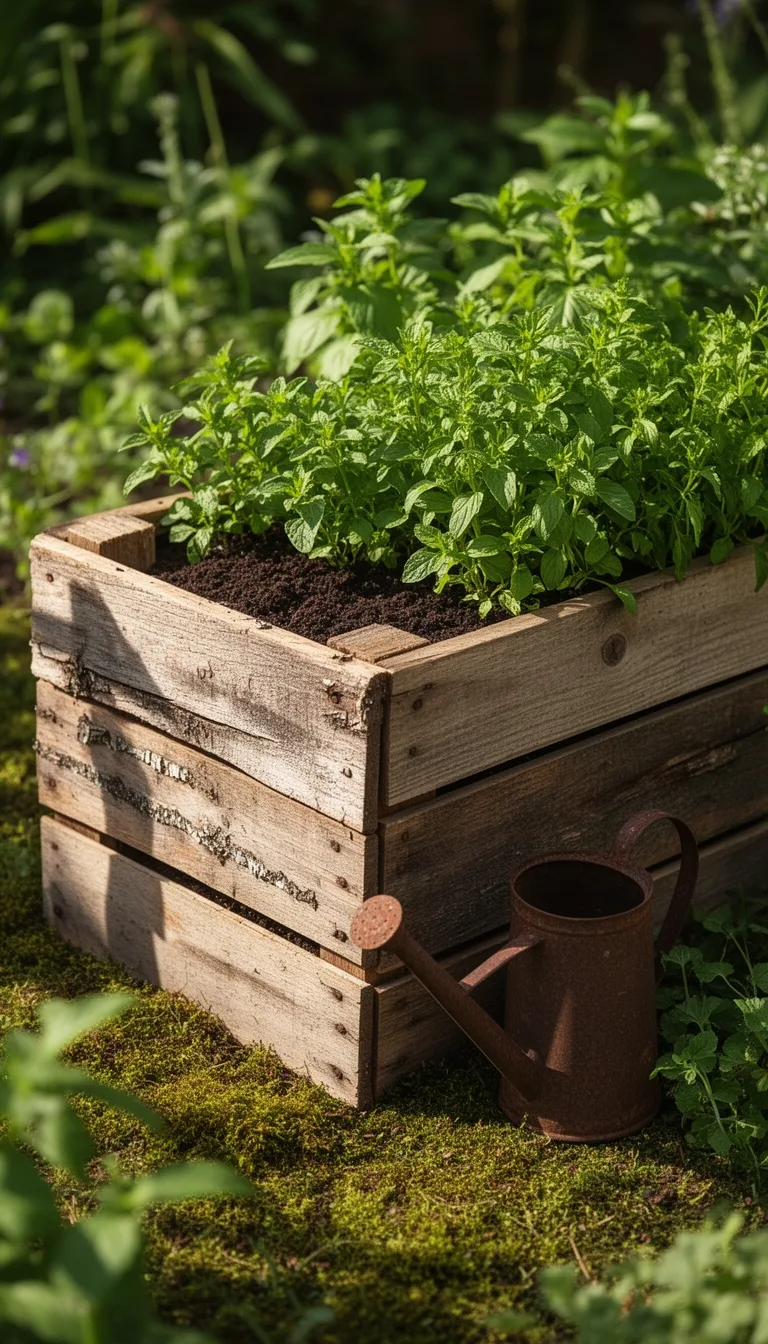
DIY Pallet Wood Box – Easy Upcycled Garden Box

Turn an old pallet into a sturdy garden box in just a few steps, and you’ll have a budget‑friendly, upcycled planter ready for herbs, veggies, or flowers. First, dismantle the pallet, remove any nails, and cut the boards to your desired length. Assemble the sides with a drill and wood screws, then add a bottom panel for drainage. Line the interior with landscape fabric, fill with soil, and plant. This project takes under an hour and costs pennies.
| Step | Tools | Materials |
|---|---|---|
| 1 | Saw, hammer | Pallet boards |
| 2 | Drill, screws | Wood screws |
| 3 | Sandpaper | Sanding block |
| 4 | Landscape fabric | Fabric roll |
| 5 | Soil, plants | Compost mix |
DIY Old Drawer Planter – Turn Vintage Storage Into Blooms
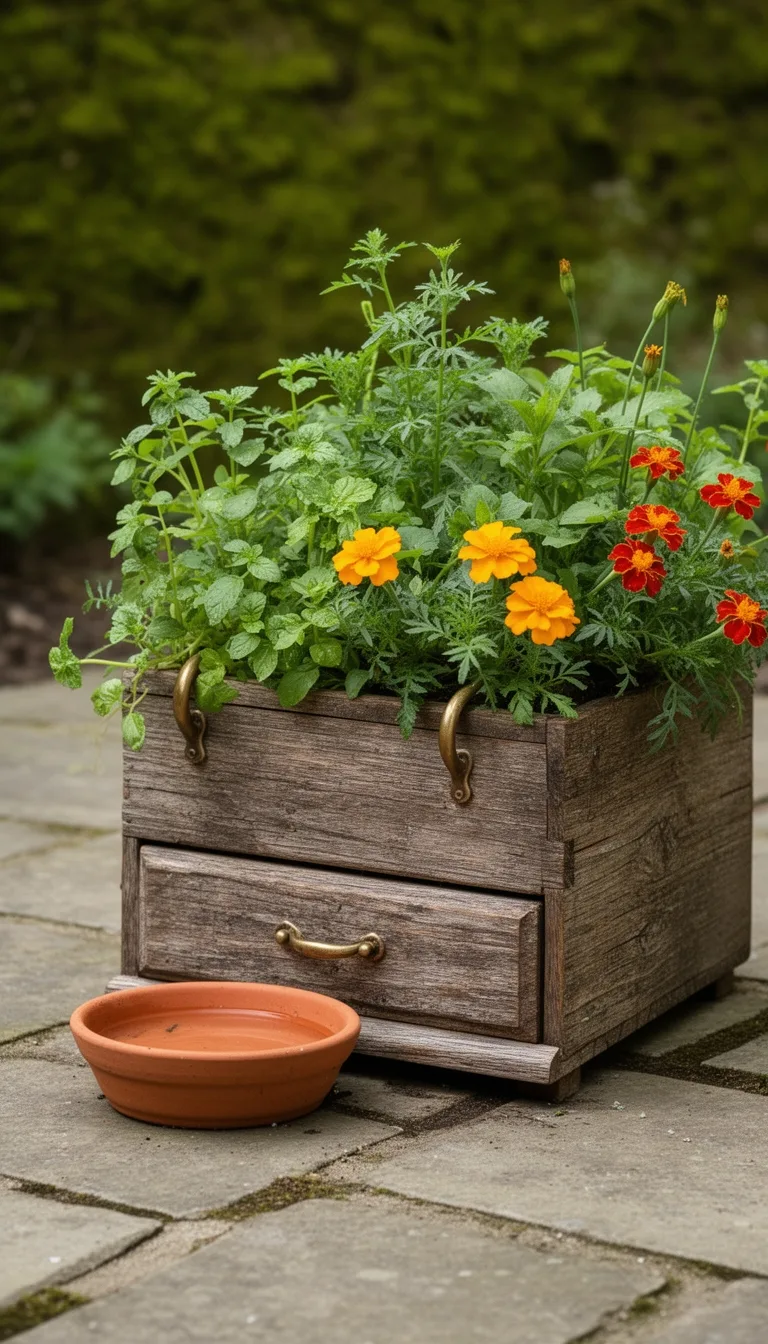
Give an old drawer a new life by converting it into a charming planter that fits perfectly on a balcony or windowsill. First, clean the drawer thoroughly and sand any rough edges. Drill a few drainage holes in the bottom, then line it with a plastic liner or a heavy‑duty trash bag, securing the edges with staples. Fill the liner with a mix of potting soil and compost, leaving a couple of inches at the top. Choose compact herbs, succulents, or dwarf flowers that thrive in shallow containers. Water gently, allowing excess to escape through the holes. Mount the drawer on a wall hook or place it on a sturdy tray to catch runoff. Finish with a coat of outdoor‑safe paint or stain for added durability and style.
DIY Concrete Block Module – Modern Minimalist Planter

After repurposing an old drawer, you can achieve an even sleeker look with a concrete‑block planter. Choose standard 8‑inch concrete blocks, stack three for height, and leave a ½‑inch gap between each for drainage.
Drill a ¼‑inch hole at the bottom of the lowest block, then insert a small piece of landscape fabric to keep soil from escaping. Fill the interior with a lightweight potting mix, then plant shallow‑rooted herbs or succulents for a clean, modern silhouette.
Paint the block faces with spray paint or a matte sealant if you want color coordination. Secure the stack with a few zip ties or a thin metal brace to prevent wobble.
This minimalist module costs under $15 and fits any patio or garden corner.
DIY Cinder Block Garden Box – Industrial Edge With Drainage

If you want an industrial‑look planter that’s sturdy and cheap, start with a standard 8‑inch cinder block and a few basic tools.
First, drill two ½‑inch holes at the bottom of each block for drainage, then sand the edges to prevent rust.
Fill the interior with a layer of gravel, add a fabric liner, and top with quality potting mix.
Plant your herbs or succulents, and you’ve got a rugged, low‑maintenance garden box that fits any modern patio.
- Materials: cinder blocks, drill, sandpaper, gravel, landscape fabric, potting soil.
- Steps: drill drainage, sand edges, add gravel, line with fabric.
- Tips: use a masonry bit, seal the block exterior with clear sealant for durability.
- Budget: all items are under $30 total, making this project wallet‑friendly.
DIY Recycled Plastic Bottle Planter – Eco‑Friendly Pop‑Up Greenery
Switching from heavy cinder blocks to something lighter, you can turn empty plastic bottles into instant pop‑up planters that look cute and keep waste out of landfills.
First, wash and dry a 2‑liter bottle, then cut the top off about 3‑4 inches from the rim.
Poke three to four drainage holes in the bottom with a heated nail.
Fill the base with a layer of small stones, then add a light, well‑draining potting mix.
Plant herbs, succulents, or seedlings, and water sparingly—plastic retains moisture, so over‑watering can cause rot.
To stabilize, insert a wooden stake or a bamboo skewer through the bottle’s neck.
Hang the planters on a fence, string them together, or place them on a windowsill for a budget‑friendly, eco‑friendly garden boost.
DIY Tire Garden Box – Bold Colorful Revival of Old Wheels
Turn an old tire into a vibrant garden box by cutting it open, painting it, and filling it with soil—this quick makeover gives you a sturdy, eye‑catching planter while keeping waste out of landfills.
First, clean the tire and make a clean cut along the side, then sand the edges to avoid sharp bits.
Choose a weather‑proof paint, apply two coats, and let it dry completely.
Fill the tire with a mix of compost, peat, and perlite, then add your favorite herbs or flowers.
Finish with a drip‑irrigation line for low‑maintenance watering.
- Use a utility knife for a smooth cut
- Seal the interior with a non‑toxic liner to prevent rot
- Paint in bright, contrasting colors for visual impact
- Add a wooden base for stability and easier moving
DIY PVC Pipe Stack – Waterproof, Modular Planter System
The PVC pipe stack offers a waterproof, modular planter that you can assemble in minutes with just a few inexpensive fittings. Cut 3‑inch PVC pipe to your desired height, sand the edges, then drill a small drainage hole near the bottom of each section.
Slip a PVC end‑cap on the top piece, then stack the sections, securing them with PVC cement or zip‑ties. Insert a simple liner—landscape fabric or a plastic bag—to keep soil from leaking out.
Fill each chamber with a lightweight potting mix and plant herbs, succulents, or seedlings. Because the system is vertical, you maximize space on balconies or narrow beds.
When a plant outgrows its slot, just unstack and reallocate without digging up the whole garden.
DIY Wooden Log Slice Planter – Natural Form, Functional Design
Carve a sturdy log into a shallow, round slice, sand the edges smooth, and drill a few drainage holes at the bottom; then line the hollow with landscape fabric, fill it with lightweight soil, and plant herbs or small perennials for a rustic, low‑cost planter that brings natural texture straight to your patio or garden.
Choose a log with a natural bark pattern for visual interest and avoid chemicals that could leach into the soil.
Keep the planter on a saucer or tray to catch excess water, and rotate it seasonally for even sunlight exposure.
This DIY piece fits tight spaces, reduces waste, and adds a tactile, organic element to any outdoor design.
- Select a log 8‑12 inches thick for stability.
- Use a hand drill with a ½‑inch bit for drainage holes.
- Line with breathable landscape fabric to prevent soil loss.
- Fill with a mix of peat moss, perlite, and compost for lightness.
DIY Fabric Grow Bag – Flexible, Portable, Breathable Planter
Sewing a sturdy, breathable fabric and a simple lining gives you a lightweight, portable grow bag that fits balconies, patios, or tiny urban gardens. Grab a canvas or burlap piece, cut it to your desired size, then fold the edges over and stitch with a heavy‑duty thread. Slip a waterproof liner inside, secure it with a few interior stitches, and attach a sturdy rope or webbing for hanging.
Fill the bag with a well‑draining soil mix, plant herbs, lettuce, or compact tomatoes, and water gently. The fabric’s breathability prevents root rot, while the flexible shape lets you move the bag to follow sun or shade. Clean the liner annually, and you’ll have a reusable, budget‑friendly planter that adapts to any space.
DIY Brick Wall Pocket Planters – Sturdy Built‑In Garden Boxes
Create sturdy, built‑in garden boxes right into your brick wall by carving shallow pockets and inserting simple wooden frames.
First, mark 12‑inch‑wide sections, then chisel to a depth of 6‑8 inches, keeping edges smooth to prevent brick damage.
Cut 1‑inch‑thick pine strips to frame each pocket, securing with stainless‑steel screws and waterproof wood glue.
Fill the frame with a lightweight soil mix, add a drip‑irrigation line, and plant herbs or small flowers.
This method reuses existing masonry, costs under $30 per pocket, and eliminates the need for freestanding containers.
- Use a rotary hammer with a masonry bit for clean cuts.
- Apply a breathable sealant to the wood to deter rot.
- Install a simple rain‑catcher hose for automatic watering.
- Add a layer of landscape fabric to keep soil from escaping.
DIY Metal Sheet Box – Sleek, Weather‑Resistant Planter
After carving pockets into brick, you can switch to a metal‑sheet planter that offers a sleek, weather‑resistant alternative without the hassle of masonry work.
Cut a sheet of galvanized steel to your desired length, width, and depth—usually 12 × 12 × 8 in. works well for herbs.
Fold the edges up, securing them with a silicone‑welded seam or rivets for strength.
Drill drainage holes ½ in. apart across the bottom, then attach a simple wooden or plastic tray to catch excess water.
Line the interior with a heavy‑duty landscape fabric to protect the metal from rust.
Fill with a light, well‑draining potting mix and plant your greens.
This DIY box costs under $30, resists rain, and adds a modern edge to any garden nook.
DIY Upcycled Window Frame Planter – Framed Flowers Makeover
Turn an old window frame into a charming planter by stripping away the glass, reinforcing the sash, and adding a waterproof liner—then you’ve got a ready‑made “picture frame” for flowers that’s both stylish and budget‑friendly.
First, sand the wood and apply a weather‑proof sealant.
Next, cut a piece of heavy‑duty plastic or pond liner to fit the interior, securing it with a staple gun.
Fill the frame with a mix of potting soil and compost, then plant your favorite annuals or herbs.
Finish by attaching simple brackets or a hanging rope for display.
- Use reclaimed wood for the frame to cut costs.
- Seal edges with silicone to prevent leaks.
- Add a drip tray underneath for excess water.
- Rotate the planter monthly for even growth.
DIY Hanging Macramé Pocket Planters – Boho Box‑Style Hanging Solutions
You’ll start by gathering a sturdy piece of natural‑fiber rope, a small wooden or metal frame, and a few cheap fabric or canvas pockets; then, using a simple macramé knot sequence, you’ll weave the rope around the frame to form a hanging “box” that securely holds the pockets for herbs, succulents, or tiny décor items. Cut the rope into equal lengths, tie a square knot at each corner, then create alternating half‑hitches to build the sides. Slip the pockets into the woven gaps, adjust tension, and hang the box from a hook or branch. The result is a boho‑chic, budget‑friendly planter that adds vertical interest without heavy hardware.
| Material | Approx. Cost | Quantity |
|---|---|---|
| Natural‑fiber rope | $3 per 10 ft | 1 roll |
| Wooden/metal frame | $5 each | 1 |
| Fabric/canvas pockets | $1 each | 3 |
| Hook or branch | Free | 1 |
| Scissors | $2 | 1 |
DIY Upcycled Bottle Garden Box – Quick, Low‑Cost Greenery
Gather a few empty plastic bottles, cut off the tops, and flatten them into shallow trays—then fill each with a bit of soil and your favorite low‑maintenance plants for an instant, budget‑friendly garden box that recycles waste into greenery. Trim the bottle edges for a clean look, poke drainage holes, and arrange the trays on a sunny windowsill or patio. You’ll watch seedlings sprout while keeping costs low and reducing plastic waste.
This quick project needs only a few tools, a bit of creativity, and a couple of minutes each week for watering and pruning.
- Choose sturdy, wide‑mouth bottles for stability.
- Use a sharp utility knife for clean cuts.
- Add a layer of gravel before soil to improve drainage.
- Label each tray for plant type and care schedule.
Conclusion
Pick the idea that fits your space, budget, and style, then roll up your sleeves and get building. Use reclaimed wood, pallets, or even old drawers for rustic charm, and turn concrete blocks or metal sheets into sleek, modern pieces. Add drainage layers, mix lightweight soil, and seal or paint for durability. Hang bottles, use fabric grow bags, or stack cinder blocks to maximize every inch. With a little creativity and hands‑on effort, your garden will transform into a thriving, personalized oasis.
The Only Tools You Need for a Thriving Garden 🌱
Whether you're a weekend gardener or growing daily — these hand-picked tools make every session faster, easier, and more satisfying.