You’ve decided to build your first raised garden bed. This project simplifies so much, from controlling your soil to reducing weeds. You just need the right location, durable materials, and a good soil mix to start. But the real secret for success isn’t just in the building—it’s in what you do next to ensure your plants thrive from day one.
Key Takeaways
- Choose a sunny, level garden location with a convenient water source and good access.
- Use naturally rot-resistant wood or composite materials and galvanized or stainless-steel fasteners.
- Build a sturdy frame by pre-drilling wood and ensuring corners are square before joining.
- Fill beds with a balanced soil mix of compost, topsoil, and sand for drainage and nutrients.
- Start with easy vegetables like leafy greens and use trellises for climbers to maximize yield.
Why a Raised Bed Is the Perfect Beginner Garden Solution
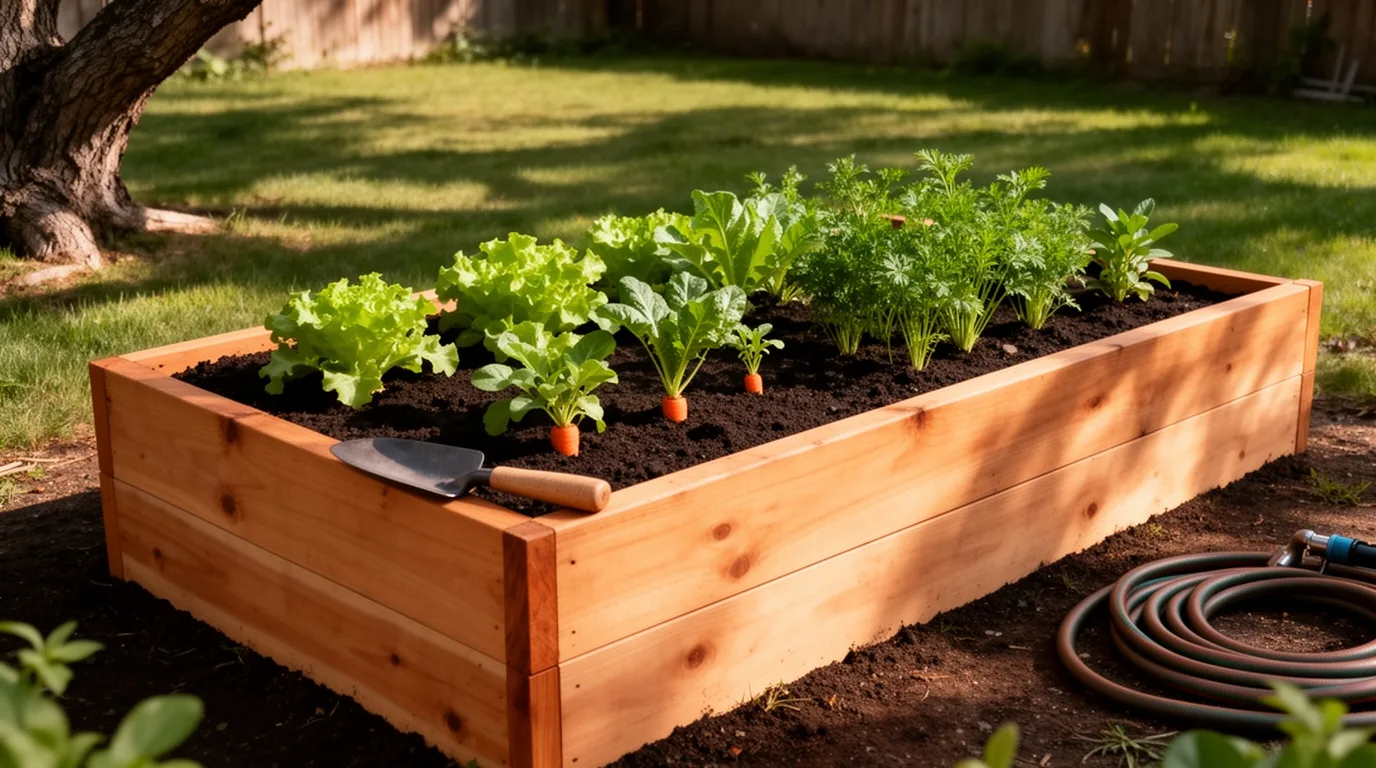
Because gardening in traditional soil can be tricky with poor drainage or compacted earth, a raised bed solves these problems by giving you control from the start. You’ll fill it with a perfect, fluffy soil mix you create, which means roots get the air, nutrients, and water they need without fighting through tough ground.
This superior soil leads to stronger plants and bigger harvests with less effort. You also gain a major advantage with weeds and pests; there are far fewer, and the raised height makes managing them much easier on your back.
It’s a defined, organized space that simplifies everything from planting to watering, turning a potentially overwhelming project into a manageable and rewarding one.
How to Choose the Best Location for Your Raised Bed

Once you’ve decided to build a raised bed, picking the right spot is the most critical step for your garden’s success.
First, analyze your yard’s sun exposure. Most vegetables need at least six to eight hours of direct sunlight daily, so watch how shadows move across your space.
Choose a level area to prevent water runoff and ensure structural stability.
You’ll also want convenient access to a water source to simplify irrigation.
Position the bed where you can easily reach the center from all sides; this makes planting and weeding a breeze.
Avoid low spots where cold air or water pools.
A sunny, flat, and accessible location sets you up for a thriving garden with less effort.
How to Choose the Right Wood and Materials

After finding the perfect sunny, level spot, selecting suitable materials for your raised bed’s frame will ensure it’s durable and safe for your plants.
Your primary choice is wood. Avoid treated lumber, as chemicals can leach into your soil. Instead, opt for naturally rot-resistant woods like cedar, redwood, or black locust; they’re more expensive but last for years. For a budget-friendly option, choose untreated, kiln-dried pine or fir, knowing you’ll likely need to replace it sooner.
You can also use composite lumber, stone, or concrete blocks. Whichever material you pick, ensure any fasteners, like screws, are galvanized or stainless steel to resist rust. Your smart choices now build a strong foundation.
Step-by-Step: Building Your Raised Bed Frame
Gather your materials and tools on a flat work surface to assemble the sturdy frame for your garden bed.
You’ll start by cutting your boards to your desired length. Lay out two long and two short boards to form a rectangle.
Pre-drill holes to prevent the wood from splitting, then join the corners using your corner brackets or galvanized screws.
Use a carpenter’s square to ensure each corner is a perfect 90-degree angle.
Attach the second layer of boards directly on top of the first, staggering the corner seams for added strength.
Once the frame is square and secure, you’ve built a solid foundation ready for its final garden location.
The Right Way to Fill Your Raised Bed for Healthy Plants
Your raised bed frame is built, so now you can focus on creating the ideal growing environment inside it. You’ll need a blend of materials for drainage, fertility, and structure. Start by covering the bottom with a thin layer of sticks or leaves to suppress weeds and improve airflow. The core of your bed is crucial. Don’t just use bagged topsoil. Instead, follow the popular “lasagna” layering method or create a simple 1:1:1 mix for fantastic results.
| Layer | Purpose | Your Plant’s Feeling |
|---|---|---|
| Compost | Nutrient Powerhouse | “I’m so well-fed!” |
| Topsoil | Structure & Stability | “My roots are secure.” |
| Coarse Sand | Perfect Drainage | “No soggy feet for me!” |
Fill the bed completely, as soil will settle. Water it thoroughly before planting to activate the ecosystem.
What Should You Plant in Your New Raised Bed?
Now you’re ready to dive into the exciting world of selecting what to grow. Your raised bed’s excellent drainage and loose soil open up many possibilities. For your first season, focus on easy, high-yield crops that thrive in contained spaces.
- Quick-Growing Leafy Greens: Plant lettuce, spinach, or kale; you can harvest young leaves in just weeks.
- Compact Root Vegetables: Choose shorter carrot varieties or radishes, which develop beautifully in the loose soil.
- Vertical Climbers: Grow cucumbers or pole beans on a trellis to save valuable ground space.
- Flavorful Herbs: Basil, cilantro, and thyme are perfect for edging your bed and providing constant fresh cuttings.
Consider each plant’s sun needs and mature size when planning your layout to prevent overcrowding.
Simple Tips for Maintaining Your Raised Bed Garden
While you’ve carefully chosen your plants and placed them for growth, regular care will keep your new garden productive and healthy throughout the season.
First, establish a watering schedule. Raised beds drain well, so check soil moisture daily; water deeply when the top inch feels dry.
Regularly remove weeds to prevent competition for nutrients.
You’ll also need to add nutrients. Feed your plants with a balanced organic fertilizer every few weeks or apply compost as a top dressing mid-season.
Inspect leaves often for pests; handpick insects or use gentle sprays like soapy water.
Finally, prune or harvest ripe produce promptly to encourage further growth. This consistent, simple attention makes all the difference.
Frequently Asked Questions
Can Raised Beds Be Built Over Concrete?
Yes, you can build a raised bed over concrete. Just ensure it’s at least 12-18 inches deep. You’ll need a solid base layer for drainage, like gravel, before adding your soil to create a healthy root zone.
How Do I Stop My Wooden Bed From Rotting?
You can use a liner to separate the soil from the wood. Choose rot-resistant wood like cedar and apply a water-based sealant to the outside boards. Ensure drainage holes exist so moisture doesn’t accumulate.
Can I Move a Raised Bed After It’s Built?
Yes, you can, but you’ll empty it first to make it light enough. Then, brace the corners to prevent it from collapsing while you carefully lift and relocate the entire structure.
Do I Need a Liner for My Raised Bed?
You don’t always need one, but a liner helps. It prevents weeds and stops soil from washing out. Use landscape fabric, not plastic, so water can still drain and your plant roots can breathe.
How Deep Should a Bed Be for Vegetables?
For most vegetables, aim for at least 12 inches deep. You’ll want 18 to 24 inches for root crops like carrots. This depth gives roots plenty of room to spread out and access nutrients.
Conclusion
With your bed built and filled, you’ll start planting soon. Keep the soil consistently moist, pull weeds early, and add compost each season. You’ll be amazed at what you can grow in this little space. Your journey into gardening has begun, and this raised bed is your perfect, manageable start. Now, get your seeds, get your hands dirty, and enjoy the harvest you’ll grow yourself.
The Only Tools You Need for a Thriving Garden 🌱
Whether you're a weekend gardener or growing daily — these hand-picked tools make every session faster, easier, and more satisfying.