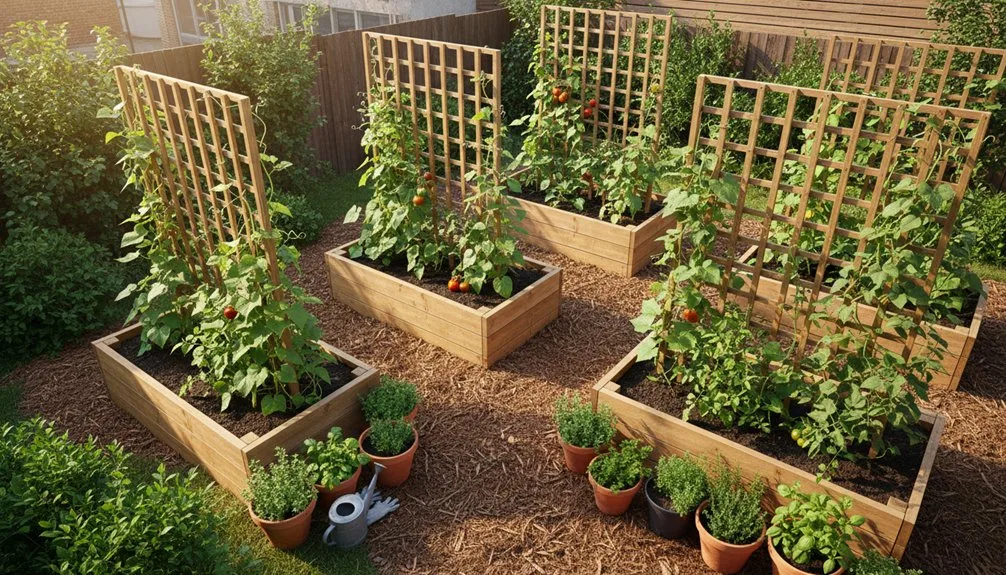
You can start your garden long before you buy plants. It’s about controlling your timing and using the right method for your space. But where you begin matters most, and a poor choice here can waste your effort. Let’s look at how to select what you’ll grow first, so your initial success sets the tone for the whole season.
Key Takeaways
- Find your average last frost date to determine when to start seeds indoors.
- Use sterile seed-starting mix and clean containers with drainage for healthy seedlings.
- Provide 14–16 hours of bright light daily after germination to prevent leggy growth.
- Harden off seedlings by gradually exposing them to outdoor conditions before transplanting.
- Keep soil moist but not soggy and start fertilizing after the first true leaves appear.
Determine What You Want to Grow
Before you dig into seed catalogs or browse garden centers, decide what you actually want to harvest. Are you craving fresh salads, hoping to can tomatoes, or wanting to cut flowers? Your goal dictates your choices.
Consider your space and climate; don’t waste effort on melons if you have a tiny, shady balcony. Look up your growing zone to see what thrives.
Be realistic about how much time you have—some plants need more care than others. Focus on vegetables or herbs you love to eat; there’s no point growing zucchini if no one likes it.
Start with a short list of 3-5 proven, rewarding varieties to build confidence and ensure your first season is a success.
Find the Best Time to Start Your Seeds
Once you’ve chosen your seeds, you’ll need to pinpoint the ideal sowing date, which hinges on two key factors: your local frost dates and the specific needs of each plant.
First, find your area’s average last spring frost date. This is your gardening anchor. Next, check your seed packets. You’ll see instructions like “start indoors 6-8 weeks before the last frost.” Count backward from your frost date to determine your perfect sowing week.
Some plants, like tomatoes, need a long indoor head start. Others, like beans, prefer direct sowing after the frost danger passes.
Getting this timing right gives your seedlings their best shot, ensuring they’re robust and ready for transplanting when the weather cooperates.
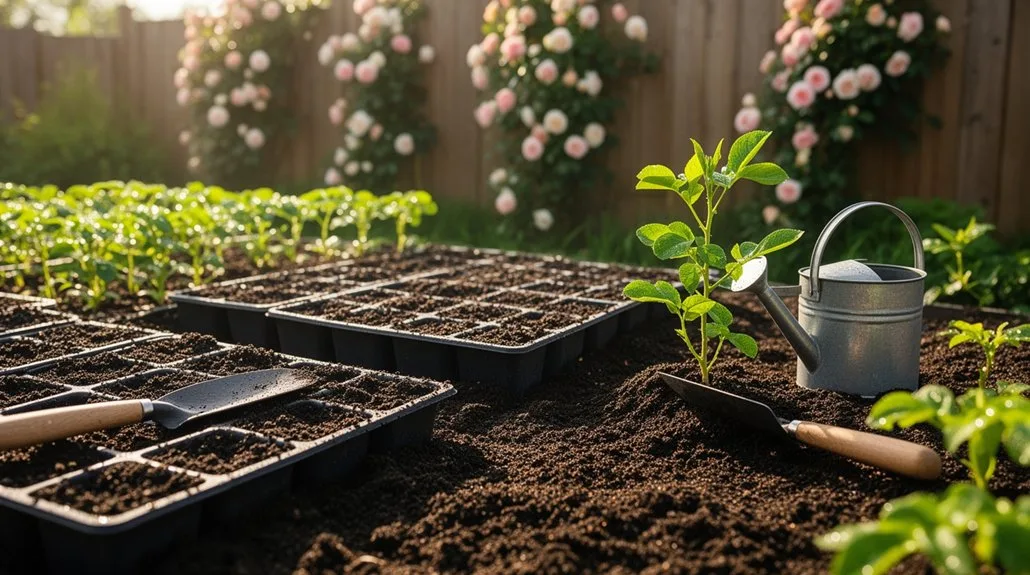
Gather Your Seed Starting Supplies

To kick things off, let’s round up the essential gear you’ll need for indoor seed starting. You’ll require a high-quality seed starting mix, which is lighter and finer than regular potting soil to help delicate roots establish. Get your chosen seeds, ensuring they’re fresh for the best germination rates. A heat mat is a valuable tool, as it warms the soil to encourage quicker sprouting. You’ll also need a source of light, like a simple shop light with adjustable height, once your seedlings emerge. Have labels and a marker ready to identify your plants. Finally, gather a spray bottle for gentle watering and a small fan to promote strong stem growth by simulating a breeze.
Choose the Right Container for Your Seeds
Your seeds’ first home, the container, makes a big difference in their early growth. You can use almost anything, from recycled yogurt cups to new plastic cell packs. Ensure your container has drainage holes to prevent soggy soil.
Small, separate cells are great for individual seeds, while shallow trays work for sowing many together. Depth matters; choose a container about twice as deep as your seed’s planting depth.
Clean all reused pots with soapy water to avoid disease. Remember, your container just needs to hold moisture and give roots space. You don’t need fancy equipment.
Many beginners successfully start seeds in simple egg cartons or takeout containers with holes punched in the bottom.
Pick the Perfect Seed Starting Soil
The container you’ve selected needs a suitable growing medium, because regular garden soil won’t work well for seedlings.
It’s often too dense, can harbor diseases, and may not drain properly, which can harm delicate young roots. Instead, look for a sterile, soilless seed-starting mix. You’ll find bags labeled specifically for this purpose.
A good mix is light and fluffy to allow for excellent aeration and moisture retention without becoming waterlogged. Its fine texture makes it easier for tiny roots to grow and for seeds to push through the surface.
You can buy a commercial mix or make your own from ingredients like peat moss, vermiculite, and perlite. Fill your containers and lightly moisten the mix before sowing.
Learn How to Read a Seed Packet
Understanding how to read a seed packet correctly can unlock all the information you need for a successful start. Don’t overlook this vital guide. First, note the variety name and description to ensure it’s suitable for your climate. Pay close attention to the “days to maturity,” which is how long from planting outdoors until harvest. Next, the “planting depth” and “spacing” instructions are crucial; planting too deep can prevent germination. Always check the “when to plant” advice, which may suggest starting indoors before your last frost date. These details are your roadmap, so you can plant with confidence.
| Packet Section | What It Tells You | Why It Matters |
|---|---|---|
| Days to Maturity | Time from transplant to harvest. | Helps you plan your growing season. |
| Planting Depth | How deep to sow the seeds. | Ensures proper germination. |
| Spacing | Distance between plants. | Prevents overcrowding for healthy growth. |
| When to Plant | Ideal sowing times indoors/outdoors. | Aligns planting with your local climate. |
Get Your Seeds Ready to Plant
Now you’ll need to gather your supplies and organize your workspace to prep your seeds for planting.
First, collect your seed packets, clean containers, seed-starting mix, labels, and a waterproof tray. Check each packet for any special pre-planting instructions, like soaking or chilling requirements. Some seeds germinate faster after soaking in warm water for several hours.
Next, fill your containers with a moistened, sterile seed-starting mix; don’t use garden soil. Gently firm the surface.
Now, sort your seeds by size. You’ll handle tiny seeds differently than large ones later. Have your plant labels and a pen ready to mark each container immediately.
This preparation makes the actual sowing process smooth and organized.
Sow Your Seeds With Confidence
Once your seeds are organized and your containers are prepped, it’s time to put them in the soil. Check the seed packet for the correct planting depth; tiny seeds often need just a light covering while larger ones go deeper. Place each seed gently into its own pre-moistened hole. Press the soil back over it, but don’t compact it tightly.
Sow your seeds with a hopeful heart, knowing each one holds a world of potential.
- Embrace the quiet ritual of placing each tiny promise into the earth.
- Trust that the simple act of sowing is the first step toward abundance.
- Imagine the vibrant green life that will soon push through the soil.
- Celebrate your role as the creator of this new beginning.
Provide the Right Amount of Water for Seedlings
Watering seedlings correctly, often a delicate balance, is crucial for their survival and growth. You’ll keep your tiny plants healthy by aiming for consistent moisture, not constant saturation. Use a gentle spray, like from a misting bottle, to avoid disturbing the delicate roots. Check the soil daily; if the surface looks dry or the container feels light, it’s time for a drink. Overwatering is a common pitfall, leading to rot and disease. Let the top layer of soil dry slightly between watering sessions to encourage strong root development.
| Your Careful Action | The Happy Result |
|---|---|
| Gentle, consistent misting | Sturdy stems & peaceful growth |
| Allowing soil to dry slightly | Roots that eagerly explore |
| Avoiding waterlogged soil | Vigorous, disease-free seedlings |
Give Your Seeds the Warmth They Need
Just as consistent moisture is vital, maintaining the right temperature is essential for coaxing your seeds out of dormancy and encouraging strong germination. Most common vegetable and flower seeds germinate best in a cozy range of 65-75°F (18-24°C).
You can’t just rely on your home’s ambient air. A simple seed-starting heat mat placed under your trays provides gentle, consistent bottom warmth that makes a tremendous difference. This steady heat accelerates germination, giving your seeds a confident and vigorous start. Think of it as creating a snug spring day for them, no matter the weather outside.
- Feel the Thrill of seeing green shoots days earlier than expected.
- Experience the Joy of near-perfect germination rates.
- Build Confidence knowing you’ve given your seeds their ideal launch.
- Savor the Reward of stronger, more uniform seedlings ready to grow.
Why Your Seedlings Need Plenty of Light
After warmth coaxes your seeds to life, light takes over as their fuel for growth. Without enough of it, seedlings become weak and stretch desperately toward any light source, a condition called “legging.” Strong light ensures they develop sturdy stems and lush, green leaves. It’s their energy source for photosynthesis. You’ll need to provide 14-16 hours of bright light daily. A sunny south-facing window might work, but most beginners find better results with simple LED or fluorescent grow lights placed just a few inches above the plants.
| Light Source | Pro | Con |
|---|---|---|
| South Window | Free natural light | Often insufficient in winter |
| Fluorescent Shop Light | Affordable, effective | Can be bulky |
| LED Grow Light | Energy-efficient, low heat | Higher upfront cost |
Rotate Seedlings for Even Growth
Light sources aren’t perfectly uniform, so you should rotate your seedling trays every day or two. This simple habit prevents your plants from straining toward the light and becoming leggy or lopsided. Just give the tray a quarter-turn each time you check on them.
Consistent rotation builds strong, upright stems, which is crucial for supporting future growth. It’s a small task with a big payoff for your garden’s success.
- Feel the satisfaction of fostering straight, sturdy stems from the very start.
- Enjoy watching every seedling get its fair share of light and attention.
- Prevent the heartache of weak, flopping plants that struggle to thrive.
- Build your confidence with this easy, proactive step toward a lush garden.
Recognize When to Thin Your Seedlings
You’ll often need to thin your seedlings to give the strongest ones the space and resources they need.
Watch for the first set of true leaves—those that appear after the initial seed leaves. That’s your signal to start thinning. If seedlings are crowded, competing for light, or look stunted, they’re ready.
You must remove excess plants so the remaining ones have room to develop robust roots and stems. Choose the healthiest, most vigorous seedlings to keep.
Use scissors to snip off unwanted ones at soil level; pulling them can disturb the roots of your chosen plants.
Don’t delay this task, as timely thinning prevents weak, tangled growth and ensures your best seedlings thrive.
When and How to Fertilize Seedlings
Although your seedlings are growing, they’ll soon need a nutritional boost from fertilizer to support their development. Start fertilizing once they’ve developed their first set of true leaves—those that look like the plant’s mature foliage. Use a diluted, balanced liquid fertilizer, as full strength can harm delicate roots. Apply it every other week when you water.
- Witness the first true leaves—it’s your signal to nurture their next big leap.
- Choose a gentle, balanced feed to build strong foundations without overwhelming them.
- Dilute it carefully, protecting those tiny roots while giving them exactly what they need.
- Watch them perk up after feeding, a satisfying reward for your attentive care.
Consistency is key, so you’ll soon see robust, happy plants ready for transplanting.
Diagnose and Fix Slow Growth and Mold
If your seedlings seem stuck or you spot fuzzy mold on the soil surface, these common setbacks can often be resolved quickly by adjusting their growing conditions.
Slow growth usually signals inadequate light or cool temperatures. Move seedlings to a brighter spot or provide a supplemental grow light for 14-16 hours daily. Ensure room temperatures stay above 65°F.
For surface mold, caused by excessive moisture and poor air circulation, first scrape off the visible fuzz. Then, reduce watering immediately—let the soil surface dry slightly between waterings. Improve airflow by gently running a fan nearby.
These simple tweaks create a healthier environment, helping your seedlings recover their vigor and grow strong.
Prevent and Treat Seedling Diseases
Beyond tackling mold and slow growth, keeping seedlings healthy involves guarding against other diseases. You can prevent most issues with good practices, but act fast if you spot trouble. Watch for damping-off, where stems collapse, or discolored, wilting leaves. Your best defense is a clean, well-managed environment.
- Sterilize everything before you start; dirty tools and pots spread pathogens.
- Water wisely at the soil line, not the leaves, to keep foliage dry.
- Ensure strong airflow with a fan to stop fungal spores from settling.
- Remove sick seedlings immediately to protect their healthy neighbors.
If disease strikes, isolate affected plants. You might apply an organic fungicide, like a copper spray, following label instructions precisely. Don’t lose heart—every gardener faces this.
Label Your Seedlings and Keep Records
You’ll often see experienced gardeners carefully labeling their seedlings, and they do this for a very practical reason: you can’t rely on memory to identify every plant later. Use waterproof labels and an indelible pen. Record the seed variety and sowing date right when you plant. This helps you track growth rates and know when to transplant. Keep a simple garden journal or digital note. Log successes and failures to learn for next season. Consistent records turn guesswork into a reliable system. For example, tracking this basic data is incredibly useful:
| Plant Variety | Date Sown | Germination Date |
|---|---|---|
| Tomato ‘Sun Gold’ | Mar 10 | Mar 18 |
| Basil ‘Genovese’ | Mar 12 | Mar 20 |
| Zinnia ‘Benary’s Giant’ | Mar 5 | Mar 14 |
Transplant Seedlings Into Larger Pots
Watch your seedlings for a clear sign they need more room: when the first true leaves appear after the seed leaves.
Transplant them into individual pots filled with fresh potting mix. Gently loosen the soil and lift each seedling by its leaves, not its fragile stem, to avoid damage. Settle it into a new hole and firm the soil around it. This process, called “potting up,” gives roots space to grow and prevents competition.
Keep these emotional rewards in mind:
- The pride of nurturing a life from its earliest stages.
- The satisfaction of giving your plants their first real home.
- The excitement of seeing rapid growth after the transplant.
- The deepened connection you feel as their caretaker.
Hardening Off: Prepare Seedlings for the Outdoors
Now that your seedlings are settled in their individual pots, they’re almost ready for the garden.
First, you must harden them off. This process gradually acclimates tender plants to outdoor sun, wind, and temperature fluctuations, preventing shock.
Start about seven to ten days before your planting date. On the first day, place seedlings in a sheltered, shady spot for just one to two hours. Bring them back inside.
Each subsequent day, increase their time outside by an hour or two and gradually introduce them to morning sun. Always protect them from strong afternoon rays and harsh winds.
Watch for wilting or sunscald. If frost threatens, bring pots indoors immediately.
This careful transition builds strong, resilient plants.
Move Your Seedlings Into the Garden
With the hardening-off process complete, your seedlings are ready for their permanent home. Choose a calm, overcast day or a mild evening to transplant, minimizing shock. Dig a hole slightly larger than each root ball, gently loosen any circling roots, and set the plant at the same depth it grew in its container. Firm the soil around the stem and water thoroughly to settle the roots.
This moment is your reward for weeks of care.
- Feel the quiet thrill of nestling each plant into its own piece of earth.
- Savor the gentle promise as you pat soil around the stem.
- Imagine the silent conversation starting between roots and soil.
- Picture the lush growth you’ve set in motion with this simple, final act.
How to Keep Your Transplanted Plants Healthy
Your newly settled plants will need consistent attention as they establish themselves, so plan to check on them daily for the first week or two. Water deeply right after transplanting to settle the soil. Continue watering at the base of the plants whenever the top inch of soil feels dry. Shield them from harsh midday sun or strong winds for a few days if they seem stressed.
Focus on these three keys to ensure they thrive:
| Monitor For | Quick Action | Why It Helps |
|---|---|---|
| Wilting Leaves | Provide shade/water | Prevents transplant shock |
| Dry Soil | Water thoroughly | Encourages deep root growth |
| Pests | Remove by hand | Protects vulnerable new growth |
A light layer of mulch helps conserve moisture. With this care, your plants will grow strong.
Save Seeds for Next Season’s Garden
After nurturing your transplants to a strong, healthy state, you can look ahead to future gardens by saving seeds from your best-performing plants. You’ll preserve unique varieties you love and create a self-sustaining cycle.
Focus on open-pollinated plants, like tomatoes or beans, as hybrids don’t reliably reproduce. Let fruits or pods fully mature on the plant before harvesting. Clean and thoroughly dry the seeds, then store them in labeled envelopes in a cool, dark place.
This simple practice connects you to the cycle of growth and deepens your gardening journey.
- Witness your garden’s legacy encapsulated in a tiny, dormant seed.
- Feel the satisfaction of creating a free, personalized seed library.
- Experience the anticipation of replanting a story you cultivated yourself.
- Build a deeper connection to your land and its seasonal rhythms.
Frequently Asked Questions
Why Are My Seedlings Falling Over and Dying?
Your seedlings are likely weak from inadequate light. Move them closer to a bright window or use a grow light. You’ll strengthen their stems and prevent this “damping off,” a common fungal disease in soggy soil.
Can I Reuse Soil From Last Year’s Seedlings?
You can reuse it, but you’ll need to refresh it. You should sterilize old soil by baking it or mixing it with fresh compost to prevent disease and give new seedlings proper nutrients.
What Is Damping-Off and How Do I Prevent It?
Damping-off is a fungal disease that kills seedlings. You prevent it by using sterile soil and clean pots, providing good air circulation, and avoiding overwatering. Don’t let the soil stay soggy.
How Deep Should I Sow Different Types of Seeds?
Plant tiny seeds just under the surface. Sow larger seeds like beans at a depth twice their width. You’ll find specific planting depth on your seed packet, so check there first.
Should I Cover My Seed Trays With Plastic?
Yes, you should cover trays with plastic to hold in humidity while seeds germinate. Check daily and remove the cover once sprouts appear to prevent mold and encourage strong growth.
Conclusion
You’ve given your seeds their best start. Now watch them thrive. Remember, every gardener begins with a single seed. Your care and attention will transform these small beginnings into a flourishing garden. Keep learning from each season and enjoy the journey. Soon, you’ll be gathering your own bounty and saving seeds for next year’s adventure. Happy growing
The Only Tools You Need for a Thriving Garden 🌱
Whether you're a weekend gardener or growing daily — these hand-picked tools make every session faster, easier, and more satisfying.